How To Install phpMyAdmin on Ubuntu 24.04 LTS

In this tutorial, we will show you how to install phpMyAdmin on Ubuntu 24.04 LTS. phpMyAdmin is a powerful, web-based interface for managing MySQL and MariaDB databases. It’s widely used by web developers and system administrators for its ease of use and comprehensive feature set. Whether you’re managing a single database or multiple databases, phpMyAdmin simplifies tasks such as creating, modifying, and deleting databases, tables, fields, and rows, executing SQL statements, and managing users and permissions.
This article assumes you have at least basic knowledge of Linux, know how to use the shell, and most importantly, you host your site on your own VPS. The installation is quite simple and assumes you are running in the root account, if not you may need to add ‘sudo‘ to the commands to get root privileges. I will show you the step-by-step installation of the phpMyAdmin on Ubuntu 24.04 (Noble Numbat). You can follow the same instructions for Ubuntu 22.04 and any other Debian-based distribution like Linux Mint, Elementary OS, Pop!_OS, and more as well.
Prerequisites
- A server running one of the following operating systems: Ubuntu and any other Debian-based distribution like Linux Mint.
- It’s recommended that you use a fresh OS install to prevent any potential issues.
- Basic familiarity with the terminal and command-line interface.
- SSH access to the server (or just open Terminal if you’re on a desktop)
- A LAMP stack (Linux, Apache, MySQL/MariaDB, PHP) was installed and configured.
- Basic familiarity with terminal commands.
- An active internet connection. You’ll need an internet connection to download the necessary packages and dependencies.
- An Ubuntu 24.04 system with root access or a user with sudo privileges.
Install phpMyAdmin on Ubuntu 24.04
Step 1. Update System Packages.
Keeping your system packages up-to-date is crucial for security and performance. Open your terminal and execute the following commands to update your package list and upgrade your installed packages:
sudo apt update
sudo apt upgrade
This command will fetch the latest package information and upgrade all installed packages to their latest versions.
Step 2. Installing phpMyAdmin.
phpMyAdmin is available in the default Ubuntu repositories, making the installation process straightforward. To install phpMyAdmin along with the necessary PHP extensions, run:
sudo apt install phpmyadmin php-mbstring php-zip php-gd php-json php-curl
During the installation, you’ll be prompted to select the web server that should be automatically configured to run phpMyAdmin. Choose Apache2 by pressing the spacebar to select it, then press Enter.
Next, you’ll be asked whether to configure the database for phpMyAdmin with dbconfig-common. Select “Yes” and provide your MySQL root password when prompted. This step will automatically set up the necessary database and user for phpMyAdmin.
Step 3. Configure Apache for phpMyAdmin.
After installation, you need to enable the phpMyAdmin configuration in Apache. This can be done by running:
sudo a2enconf phpmyadmin
sudo systemctl restart apache2
These commands enable the phpMyAdmin configuration and restart Apache to apply the changes. To verify that Apache is configured correctly, you can check the status of the Apache service:
sudo systemctl status apache2
Step 4. Secure phpMyAdmin.
Securing phpMyAdmin is essential to protect your database from unauthorized access. One effective method is to enable Apache’s basic authentication.
First, create a .htpasswd file to store your authentication credentials:
sudo htpasswd -c /etc/phpmyadmin/.htpasswd user
Replace user with your desired username. You’ll be prompted to enter and confirm a password.
Next, configure Apache to use this .htpasswd file. Open the phpMyAdmin configuration file in a text editor:
sudo nano /etc/apache2/conf-available/phpmyadmin.conf
Add the following lines within the <Directory /usr/share/phpmyadmin> section:
<Directory /usr/share/phpmyadmin>
AuthType Basic
AuthName "Restricted Access"
AuthUserFile /etc/phpmyadmin/.htpasswd
Require valid-user
</Directory>
Save the file and exit the text editor. Then, restart Apache to apply the changes:
sudo systemctl restart apache2
Step 5. Access phpMyAdmin.
You can now access phpMyAdmin via your web browser. Navigate to:
http://your_server_ip/phpmyadmin
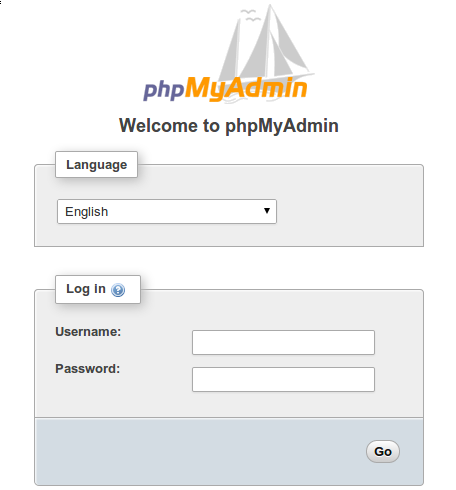
Replace your_server_ip with the IP address of your server. You’ll be prompted to enter the username and password you created in the .htpasswd file. After logging in, use your MySQL credentials to access the phpMyAdmin interface.

Step 6. Additional Security Measures.
For enhanced security, consider changing the default phpMyAdmin URL and enabling HTTPS.
- Changing the Default URL
To change the default phpMyAdmin URL, open the Apache configuration file:
sudo nano /etc/apache2/conf-available/phpmyadmin.conf
Find the line that reads:
Alias /phpmyadmin /usr/share/phpmyadmin
Change /phpmyadmin to your desired URL, for example:
Alias /new_phpmyadmin_url /usr/share/phpmyadmin
Save the file and restart Apache:
sudo systemctl restart apache2
- Enabling HTTPS with SSL Certificates
To secure your phpMyAdmin interface with HTTPS, you can use Let’s Encrypt to obtain a free SSL certificate. First, install Certbot:
sudo apt install certbot python3-certbot-apache
Then, run Certbot to obtain and install the SSL certificate:
sudo certbot --apache
Follow the prompts to configure HTTPS for your domain. Certbot will automatically obtain and install the SSL certificate, and configure Apache to use it.
Congratulations! You have successfully installed phpMyAdmin. Thanks for using this tutorial for installing phpMyAdmin on the Ubuntu 24.04 LTS system. For additional help or useful information, we recommend you check the official phpMyAdmin website.