How To Install phpPgAdmin on Debian 12

In this tutorial, we will show you how to install phpPgAdmin on Debian 12. In the world of relational databases, PostgreSQL stands tall as a powerful and open-source option. It’s versatile, robust, and widely used for various applications. To effectively manage your PostgreSQL databases, you need a reliable and user-friendly tool. This is where phpPgAdmin comes into play. It’s a web-based administration tool that simplifies the task of handling PostgreSQL databases.
This article assumes you have at least basic knowledge of Linux, know how to use the shell, and most importantly, you host your site on your own VPS. The installation is quite simple and assumes you are running in the root account, if not you may need to add ‘sudo‘ to the commands to get root privileges. I will show you the step-by-step installation of the phpPgAdmin on a Debian 12 (Bookworm).
Prerequisites
- A server running one of the following operating systems: Debian 12 (Bookworm).
- It’s recommended that you use a fresh OS install to prevent any potential issues.
- SSH access to the server (or just open Terminal if you’re on a desktop).
- An active internet connection. You’ll need an internet connection to download the necessary packages and dependencies for phpPgAdmin.
- A
non-root sudo useror access to theroot user. We recommend acting as anon-root sudo user, however, as you can harm your system if you’re not careful when acting as the root.
Install phpPgAdmin on Debian 12
Step 1. Before we install any software, it’s important to make sure your system is up to date by running the following apt commands in the terminal:
sudo apt update
sudo apt upgrade
This command will refresh the repository, allowing you to install the latest versions of software packages.
Step 2. Installing Required Dependencies.
phpPgAdmin relies on several dependencies to function properly. We need to install these dependencies, including the Apache web server, PHP, and the PostgreSQL PHP extension. Run the following command:
sudo apt install apache2 php postgresql php-pgsql
Step 3. Installing phpPgAdmin on Debian 12.
Now that we have our dependencies installed, it’s time to get phpPgAdmin. We will download the latest version from the official website and extract it. Execute these commands:
wget https://github.com/phppgadmin/phppgadmin/releases/download/REL_7-13-0/phpPgAdmin-7.13.0.tar.gz
tar xvf phpPgAdmin-7.13.0.tar.gz
With phpPgAdmin downloaded, we’ll navigate to the phpPgAdmin directory and create a configuration file. Execute these commands:
sudo cp -r phpPgAdmin-7.13.0 /var/www/html/phppgadmin
sudo mv /var/www/html/phppgadmin/conf/config.inc.php-dist /var/www/html/phppgadmin/conf/config.inc.php
Step 4. Configure Apache Web Server.
Now, we need to configure Apache to serve phpPgAdmin. Create a virtual host configuration file for phpPgAdmin using your favorite text editor (we’ll use Nano):
sudo nano /etc/apache2/sites-available/phppgadmin.conf
And add the following configuration:
<VirtualHost *:80>
ServerAdmin webmaster@localhost
DocumentRoot /var/www/html/phppgadmin

<Directory /var/www/html/phppgadmin>
Options FollowSymLinks
AllowOverride None
Require all granted
</Directory>

ErrorLog ${APACHE_LOG_DIR}/error.log
CustomLog ${APACHE_LOG_DIR}/access.log combined
</VirtualHost>
Save the file and exit the text editor. To enable the new virtual host, run:
sudo a2ensite phppgadmin.conf
To make phpPgAdmin accessible via the web, we need to enable the necessary Apache modules and restart the web server. Execute the following commands:
sudo a2enmod rewrite
sudo systemctl restart apache2
Security is paramount when dealing with database management tools like phpPgAdmin. We recommend setting up authentication and access control:
sudo htpasswd -c /etc/apache2/.htpasswd your_username
Next, edit the phpPgAdmin configuration file:
sudo nano /var/www/html/phppgadmin/conf/config.inc.php
Find the following line:
$conf['extra_login_security'] = false;
And change it to:
$conf['extra_login_security'] = true;
Save the file and exit the text editor. Restart Apache to apply the changes:
sudo systemctl restart apache2
Step 5. Accessing phpPgAdmin Web UI.
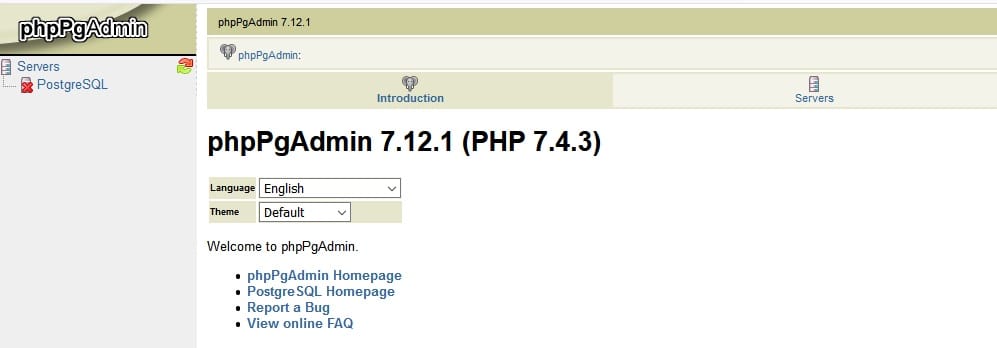
With everything set up, you can now access phpPgAdmin via your web browser. Open your browser and enter the following URL:
http://your_server_ip/phppgadmin
You will be prompted to enter the username and password you set up earlier. Once logged in, you’ll have full access to your PostgreSQL databases through the user-friendly interface of phpPgAdmin.

Congratulations! You have successfully installed phpPgAdmin. Thanks for using this tutorial for installing the latest version of phpPgAdmin on Debian 12 Bookworm. For additional help or useful information, we recommend you check the official phpPgAdmin website.