How To Install Portainer on AlmaLinux 9

Portainer is a powerful and user-friendly Docker management tool that simplifies the process of deploying, managing, and monitoring Docker containers. It provides an intuitive web-based interface for managing Docker environments, making it an essential tool for both beginners and experienced users. AlmaLinux 9, a stable and reliable Linux distribution, serves as an excellent platform for hosting Docker and Portainer. In this article, we will guide you through the step-by-step process of installing Portainer on AlmaLinux 9, enabling you to efficiently manage your Docker containers using a graphical user interface.
Prerequisites
Before proceeding with the installation of Portainer on AlmaLinux 9, ensure that your system meets the following requirements:
- AlmaLinux 9 installed on your system
- Root access or a non-root user with sudo privileges
- Internet connection to download necessary packages
It’s also recommended to update your system to the latest packages using the following command:
sudo yum updateStep 1: Install Docker on AlmaLinux 9
To install Portainer, you first need to have Docker installed on your AlmaLinux 9 system. Follow these steps to install Docker:
Add Docker Repository
Enable the Docker CE repository on AlmaLinux 9 by running the following command:
sudo dnf config-manager --add-repo=https://download.docker.com/linux/centos/docker-ce.repoInstall Docker
Install Docker CE using the dnf package manager:
sudo dnf install docker-ce docker-ce-cli containerd.ioConfirm the installation by typing “y” when prompted.
Enable and Start Docker Service
Enable Docker to start automatically on system boot and start the Docker service:
sudo systemctl enable docker
sudo systemctl start docker
Verify the status of the Docker service:
sudo systemctl status dockerVerify Docker Installation
Confirm that Docker is installed correctly by checking its version:
docker --versionStep 2: Install Docker Compose
Docker Compose is a tool for defining and running multi-container Docker applications. Although not strictly required for running Portainer, it’s a useful tool to have. Install Docker Compose using the following command:
sudo dnf install docker-composeAlternatively, you can download the Docker Compose binary directly from the official GitHub repository:
sudo curl -L "https://github.com/docker/compose/releases/download/1.29.2/docker-compose-$(uname -s)-$(uname -m)" -o /usr/local/bin/docker-compose
sudo chmod +x /usr/local/bin/docker-compose
Step 3: Create Docker Volume for Portainer
To ensure persistent storage for Portainer, create a dedicated Docker volume using the following command:
docker volume create portainer_dataThis volume will store Portainer’s data, allowing it to persist across container restarts or system reboots.
Step 4: Install Portainer on AlmaLinux 9
Download and Run Portainer Docker Image
Pull the latest Portainer Docker image and run it as a container using the following command:
docker run -d -p 8000:8000 -p 9443:9443 --name portainer --restart=always -v /var/run/docker.sock:/var/run/docker.sock -v portainer_data:/data portainer/portainer-ce:latestLet’s break down the command options:
-d: Runs the container in detached mode.-p 8000:8000 -p 9443:9443: Maps the container’s ports to the host’s ports.--name portainer: Assigns a name to the container.--restart=always: Automatically restarts the container if it stops.-v /var/run/docker.sock:/var/run/docker.sock: Mounts the Docker socket, allowing Portainer to communicate with the Docker daemon.-v portainer_data:/data: Mounts the previously created Docker volume to store Portainer’s data.portainer/portainer-ce:latest: Specifies the Portainer Docker image to use.
Access Portainer Dashboard
Once the Portainer container is running, access the Portainer web interface by opening a web browser and navigating to:
https://your_server_ip:9443
Replace your_server_ip with the IP address or hostname of your AlmaLinux 9 server.

Initial Setup
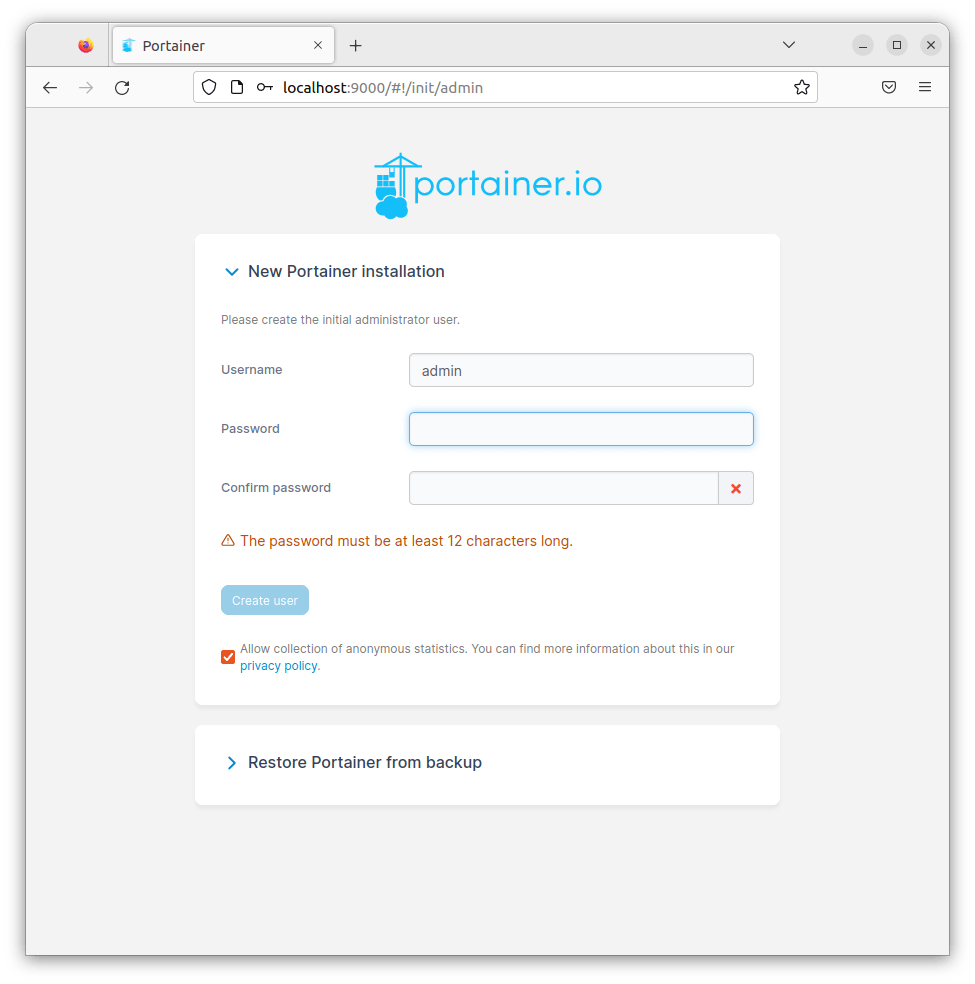
On your first access to the Portainer dashboard, you will be prompted to create an admin user. Provide a username and a strong password, then click “Create User” to proceed.
Step 5: Verify Portainer Installation
To verify that Portainer is running correctly, use the following command to list the running Docker containers:
docker psYou should see the Portainer container listed in the output, indicating that it is running and accessible.
Step 6: Basic Usage of Portainer
Portainer provides an intuitive and user-friendly interface for managing your Docker containers, images, networks, and volumes. Here’s a quick overview of how to deploy a simple container using Portainer:
- Log in to the Portainer dashboard using the admin credentials you created during the initial setup.
- Navigate to the “Containers” section in the left sidebar.
- Click on the “Add container” button.
- Provide a name for your container and specify the Docker image you want to use.
- Configure the container settings, such as port mappings, volumes, and environment variables, as needed.
- Click “Deploy the container” to create and start the container.
Portainer offers a wide range of features and options for managing your Docker environment. Explore the different sections of the Portainer interface to discover more advanced functionalities.
Troubleshooting Common Issues
If you encounter any issues during the installation or usage of Portainer, here are a few troubleshooting tips:
- Docker Installation Issues: Ensure that you have followed the Docker installation steps correctly and that your system meets the prerequisites. Double-check the repository configuration and package names.
- Portainer Container Not Starting: Verify that the Docker socket is properly mounted and that the container has the necessary permissions to access it. Check the Docker logs for any error messages.
- Portainer Web Interface Not Accessible: Ensure that the specified ports (8000 and 9443) are open and accessible. Check your firewall settings and ensure that the Portainer container is running.
Congratulations! You have successfully installed Portainer. Thanks for using this tutorial for installing the Portainer on your AlmaLinux 9 system. For additional help or useful information, we recommend you check the official Portainer website.