How To Install Portainer on Linux Mint 22

In this tutorial, we will show you how to install Portainer on Linux Mint 22. Portainer is a powerful open-source container management tool that provides a user-friendly interface for managing Docker containers, images, networks, and volumes. For users of Linux Mint 22, installing Portainer can significantly simplify the management of Docker environments. This guide will walk you through the step-by-step process of installing Portainer on Linux Mint 22, ensuring that you have everything you need to get started with container management.
Prerequisites
Before diving into the installation process, ensure you meet the following prerequisites:
- Administrative Privileges: You must have sudo access on your Linux Mint machine.
- Docker Installation: Portainer requires Docker to be installed. If Docker is not already installed, follow the instructions in this guide to install it first.
- System Requirements: Ensure your system meets the basic requirements for running Docker and Portainer.
Step 1: Install Docker
The first step in installing Portainer is to ensure that Docker is installed on your system. Follow these commands in the terminal:
sudo apt update
sudo apt install docker.io
This command updates your package lists and installs Docker. After installation, verify that Docker is installed correctly by checking its version:
docker --versionYou should see output indicating the version of Docker installed. If you encounter any issues during installation, ensure that your package manager is functioning correctly and that you have an active internet connection.
Step 2: Start Docker Service
Once Docker is installed, you need to start the Docker service. Use the following commands:
sudo systemctl start docker
sudo systemctl enable docker
The first command starts the Docker service, while the second command ensures that Docker starts automatically at boot time. To check if Docker is running properly, execute:
sudo systemctl status dockerIf everything is set up correctly, you should see an “active (running)” status.
Step 3: Install Portainer
Now that Docker is up and running, it’s time to install Portainer. First, create a volume for Portainer data to ensure persistent storage:
sudo docker volume create portainer_dataThis command creates a named volume called portainer_data. Next, run the following command to deploy the Portainer container:
sudo docker run -d -p 9000:9000 --name portainer --restart always -v /var/run/docker.sock:/var/run/docker.sock -v portainer_data:/data portainer/portainer-ceThis command does several things:
-d: Runs the container in detached mode.-p 9000:9000: Maps port 9000 on your host to port 9000 on the container.--name portainer: Names the container “portainer”.--restart always: Ensures that the container restarts automatically if it stops.-v /var/run/docker.sock:/var/run/docker.sock: Allows Portainer to communicate with the Docker daemon.-v portainer_data:/data: Uses the created volume for persistent data storage.
Step 4: Access Portainer Web Interface
After successfully installing Portainer, you can access its web interface through your browser. Open a web browser and navigate to:
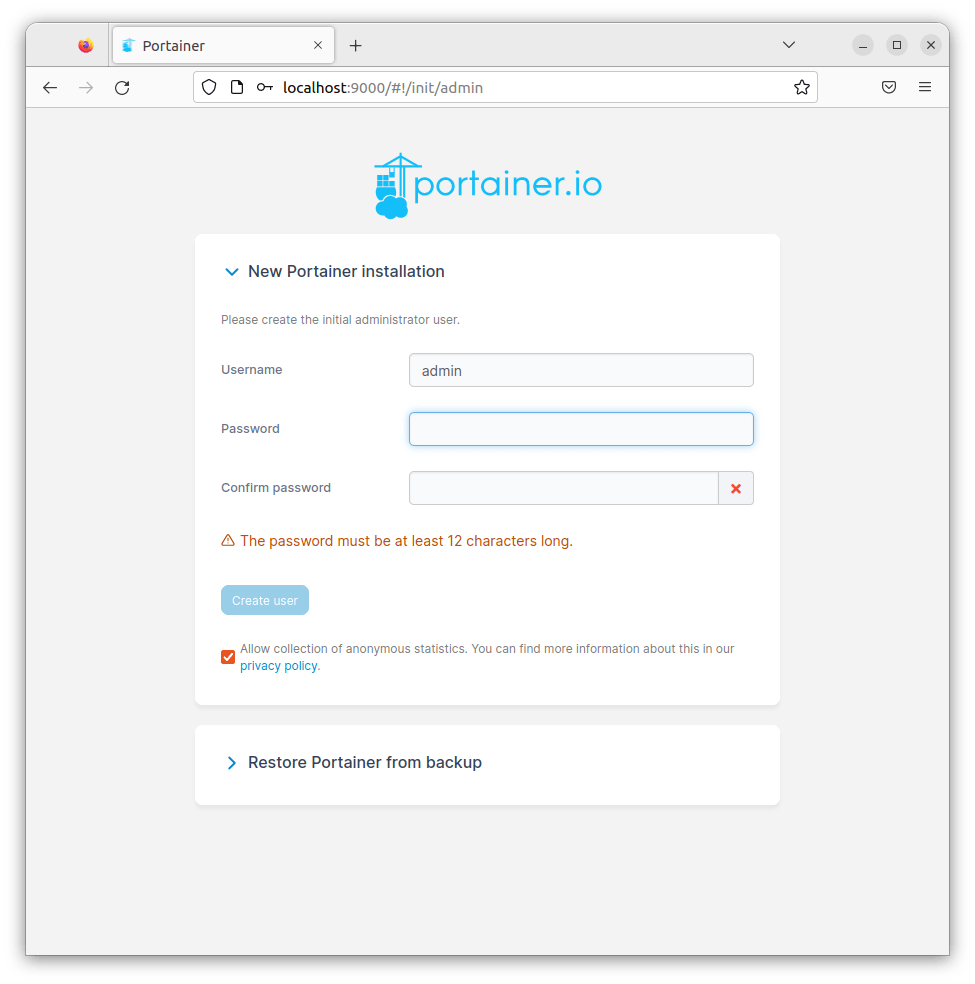
http://localhost:9000You will be greeted with a login page where you can set up an admin account. Create a strong password for security purposes and click on “Create user.” After logging in, you will be prompted to select your environment; choose “Proceed using the local environment which Portainer is running in.”

Step 5: Create a Container Using Portainer
With Portainer up and running, you can now manage your containers easily. To create a new container:
- Select “Containers” from the left menu.
- Click on “Add container.”
- Name your container and specify the image (e.g., nginx).
- Select any additional settings such as ports and volumes as needed.
- Click on “Deploy the container” to create it.
This straightforward process allows users to deploy and manage containers without needing extensive command-line knowledge.
Step 6: Managing Containers with Portainer
Portainer provides various features for managing your containers effectively. You can:
- Add or remove containers: Easily create or delete containers from the dashboard.
- Edit container settings: Modify resource limits, environment variables, and network settings as needed.
- View logs: Access logs for each container directly from the interface to troubleshoot issues quickly.
- Create stacks: Deploy multi-container applications using stacks defined in Compose files.
Troubleshooting Common Issues
If you encounter issues during installation or while using Portainer, consider these troubleshooting tips:
- Docker not starting: Ensure that your system meets all requirements and check logs using `
journalctl -u docker.service` for errors. - Cannot access Portainer UI: Verify that no firewall rules are blocking port 9000 and check if the container is running using `
docker ps`. - Error while creating containers: Check if there are sufficient resources available (CPU/memory) on your machine.
Congratulations! You have successfully installed Portainer. Thanks for using this tutorial to install the latest version of the Portainer on Linux Mint 22. For additional help or useful information, we recommend you check the official Portainer website.