How To Install PrestaShop on Debian 12

In this tutorial, we will show you how to install PrestaShop on Debian 12. PrestaShop is a powerful, open-source e-commerce platform that enables you to create and manage your online store with ease. If you’re a Debian 12 user and want to set up PrestaShop using the Command Line Interface (CLI), you’re in the right place.
This article assumes you have at least basic knowledge of Linux, know how to use the shell, and most importantly, you host your site on your own VPS. The installation is quite simple and assumes you are running in the root account, if not you may need to add ‘sudo‘ to the commands to get root privileges. I will show you the step-by-step installation of the PrestaShop e-commerce platform on a Debian 12 (Bookworm).
Prerequisites
- A server running one of the following operating systems: Debian 12 (Bookworm).
- It’s recommended that you use a fresh OS install to prevent any potential issues.
- SSH access to the server (or just open Terminal if you’re on a desktop).
- Make sure your Debian 12 system is connected to the internet. An active connection is essential for downloading the required packages and updates during the installation.
- A
non-root sudo useror access to theroot user. We recommend acting as anon-root sudo user, however, as you can harm your system if you’re not careful when acting as the root.
Install PrestaShop on Debian 12 Bookworm
Step 1. To guarantee a smooth installation, it’s crucial to update and upgrade your Debian system. Use the following commands to bring your system up to date:
sudo apt update
sudo apt upgrade
This command updates the package list and upgrades the installed packages to their latest versions.
Step 2. Installing LEMP Stack.
Before you install PrestaShop, you need to set up a LAMP (Linux, Nginx, MariaDB, PHP) stack on your Debian server.
Step 3. Configuring PHP.
Edit the PHP configuration file to optimize it for PrestaShop. Open the PHP-FPM configuration file:
sudo nano /etc/php/7.x/fpm/php.ini
Find and modify the following lines:
memory_limit = 256M
max_execution_time = 300
upload_max_filesize = 16M
post_max_size = 16M
Save and exit the editor, then restart PHP-FPM for the changes to take effect:
sudo systemctl restart php7.x-fpm
Step 4. Configuring MariaDB.
Create a database and a user for PrestaShop:
sudo mysql -u root -p
Inside the MariaDB shell, run the following commands, replacing yourdb, youruser, and your_strong_password with your preferred database name, user, and password:
CREATE DATABASE yourdb;
CREATE USER 'youruser'@'localhost' IDENTIFIED BY 'your_strong_password';
GRANT ALL PRIVILEGES ON yourdb.* TO 'youruser'@'localhost';
FLUSH PRIVILEGES;
EXIT;
Step 5. Installing PrestaShop on Debian 12.
First, create a directory for PrestaShop within your web root directory. We’ll use /var/www/html:
sudo mkdir /var/www/html/prestashop
Clone the PrestaShop repository from GitHub to your designated directory:
sudo git clone https://github.com/PrestaShop/PrestaShop.git .
To ensure you’re using the latest stable release, update the repository:
sudo git checkout develop
sudo git pull
Step 6. Configuring Nginx.
Create a new Nginx server block configuration file:
sudo nano /etc/nginx/sites-available/prestashop
Paste the following configuration:
server {
    listen 80;
    server_name your_domain.com;
    root /var/www/html/prestashop;
    index index.php;

    location / {
        try_files $uri $uri/ /index.php$is_args$args;
    }

    location ~ \.php$ {
        include snippets/fastcgi-php.conf;
        fastcgi_pass unix:/run/php/php7.x-fpm.sock;
    }

    location ~ /\.ht {
        deny all;
    }
}
Save and exit the file, then enable the configuration and restart Nginx:
sudo ln -s /etc/nginx/sites-available/prestashop /etc/nginx/sites-enabled/
sudo nginx -t
sudo systemctl restart nginx
Ensure that the web server user (www-data) has appropriate permissions:
sudo chown -R www-data:www-data /var/www/html/prestashop
sudo chmod -R 755 /var/www/html/prestashop
Step 7. Configure SSL.
To configure SSL for secure connections in PrestaShop on Debian 12 using Certbot and Nginx, follow these steps:
sudo apt update
sudo apt install certbot python3-certbot-nginx
Now, use Certbot to obtain and install an SSL certificate for your PrestaShop store:
sudo certbot --nginx
Certbot will prompt you to select the domain for which you want to obtain a certificate. Choose your PrestaShop domain and follow the prompts to complete the certificate installation.
Certbot provides automatic renewal of SSL certificates, ensuring that your PrestaShop store remains secure. The renewal process is typically handled by a systemd timer, which runs twice a day. You can manually test the certificate renewal process by running:
sudo certbot renew --dry-run
Step 8. Configure Firewall.
Configure a firewall to protect your PrestaShop server. UFW (Uncomplicated Firewall) is a user-friendly tool for this purpose:
sudo apt install ufw
sudo ufw allow OpenSSH
sudo ufw allow 'Nginx Full'
sudo ufw enable
Step 9. Accessing PrestaShop Web UI.
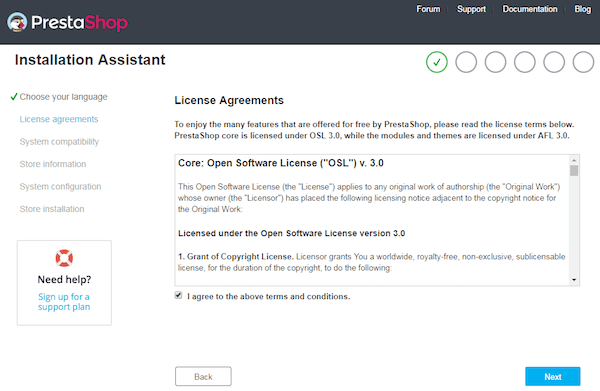
To access the PrestaShop admin panel, go to your back office URL (e.g., https://your-domain_or_your-IP-address). Log in using the admin credentials you created during the installation:

Congratulations! You have successfully installed PrestaShop. Thanks for using this tutorial to install the latest version of the PrestaShop e-commerce platform on Debian 12 Bookworm. For additional help or useful information, we recommend you check the official PrestaShop website.