How To Install Proton Mail on Ubuntu 24.04 LTS

In an era where digital privacy is increasingly under threat, secure email solutions have become essential for both personal and professional communication. Proton Mail stands out as a leader in encrypted email services, offering end-to-end encryption and a commitment to user privacy. For Ubuntu users, integrating Proton Mail into their daily workflow can significantly enhance their email security. This guide will walk you through the process of installing and configuring Proton Mail on Ubuntu 24.04 LTS, ensuring that your communications remain private and secure.
What is Proton Mail?
Proton Mail is a secure email service founded in 2013 by scientists who met at CERN. It offers end-to-end encryption, meaning that emails are encrypted on the sender’s device and can only be decrypted by the intended recipient. This level of security ensures that not even Proton Mail can access the contents of your messages.
Key features of Proton Mail include:
- End-to-end encryption
- Zero-access encryption for stored emails
- Open-source cryptography
- Anonymous email options
- Self-destructing messages
Compared to traditional email services like Gmail or Outlook, Proton Mail offers superior privacy protections. While these mainstream services may scan email contents for advertising purposes or comply with government data requests, Proton Mail’s encryption ensures that your data remains truly private.
Prerequisites
Before we begin the installation process, ensure that you have:
- Ubuntu 24.04 LTS installed and up to date
- A Proton Mail account (free or paid)
- Sudo privileges on your Ubuntu system
- At least 1GB of free disk space
- A stable internet connection
It’s also recommended to have a backup of your important data before proceeding with any new software installation.
Installing Proton Mail Bridge
Proton Mail Bridge is an application that runs in the background, enabling you to access your encrypted emails using your favorite email client. Here’s how to install it on Ubuntu 24.04 LTS:
1. Download Proton Mail Bridge
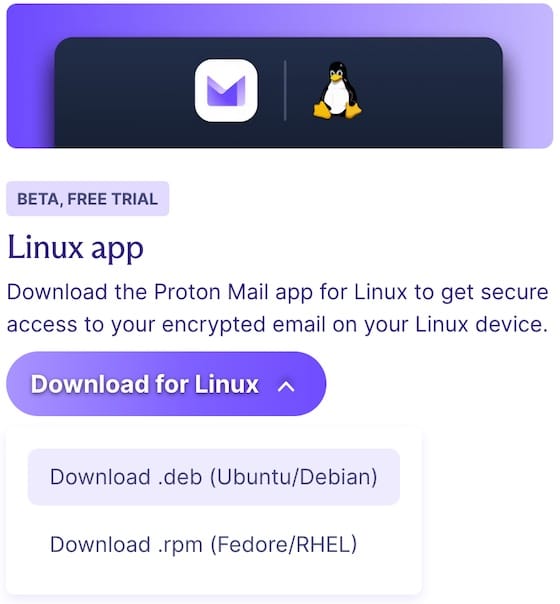
Open your web browser and navigate to the official Proton Mail Bridge download page. Select the .deb package for Ubuntu.

2. Verify the Package
After downloading, it’s crucial to verify the integrity of the package. Open a terminal and run:
sha256sum /path/to/protonmail-bridge.debCompare the output with the SHA256 checksum provided on the download page to ensure they match.
3. Installation Process
To install the package, use the following command in the terminal:
sudo dpkg -i /path/to/protonmail-bridge.debIf you encounter any dependency issues, run:
sudo apt-get install -fTroubleshooting Common Installation Issues
If you face any issues during installation, try these steps:
- Ensure your system is up to date:
sudo apt update && sudo apt upgrade - Check for conflicting packages:
sudo apt-get check - Clear the APT cache:
sudo apt-get clean
Configuring Proton Mail Bridge
Once installed, you need to configure Proton Mail Bridge:
1. Initial Setup
Launch Proton Mail Bridge from your applications menu or by running protonmail-bridge in the terminal.
2. Logging in to Your Proton Mail Account
When prompted, enter your Proton Mail credentials. If you have two-factor authentication enabled, you’ll need to provide the additional verification code.
3. Generating App-Specific Password
For added security, Proton Mail Bridge uses app-specific passwords. Generate one by following the prompts in the Bridge application.
4. Bridge Settings and Options
Explore the settings menu to customize Bridge according to your preferences. You can set it to start automatically with your system, choose the ports it uses, and more.

Setting up Proton Mail with Thunderbird
Thunderbird is a popular email client that works well with Proton Mail Bridge. Here’s how to set it up:
1. Installing Thunderbird
If you don’t have Thunderbird installed, you can install it using:
sudo apt install thunderbird2. Adding a New Email Account in Thunderbird
Open Thunderbird and click on “Add a new email account”. Enter your name, Proton Mail address, and the app-specific password generated by Bridge.
3. Configuring IMAP and SMTP Settings
Use the following settings:
- IMAP server: 127.0.0.1
- IMAP port: 1143
- SMTP server: 127.0.0.1
- SMTP port: 1025
- Connection security: STARTTLS
- Authentication method: Normal password
4. Verifying the Connection
Click “Done” and Thunderbird will test the connection. If successful, you’ll see your Proton Mail inbox populate with emails.
Using Proton Mail with GNOME Evolution
GNOME Evolution is another email client that integrates well with Ubuntu’s desktop environment:
1. Installing GNOME Evolution
Install Evolution using:
sudo apt install evolution2. Adding Proton Mail Account to Evolution
Open Evolution and go to File > New > Mail Account. Enter your Proton Mail address and app-specific password.
3. Configuring Account Settings
Use the same IMAP and SMTP settings as mentioned for Thunderbird. Ensure you select “No encryption” for the connection security, as Bridge handles the encryption.
4. Syncing Emails and Folders
Once configured, Evolution will start syncing your emails and folders. This may take some time depending on the size of your mailbox.
Command-line Usage with Mutt
For users who prefer command-line interfaces, Mutt is an excellent choice:
1. Installing Mutt
Install Mutt using:
sudo apt install mutt2. Configuring Mutt for Proton Mail
Create a .muttrc file in your home directory with the following content:
set imap_user = "your-protonmail-address@protonmail.com"
set imap_pass = "your-app-specific-password"
set smtp_url = "smtp://127.0.0.1:1025"
set smtp_pass = "your-app-specific-password"
set from = "your-protonmail-address@protonmail.com"
set realname = "Your Name"
set folder = "imap://127.0.0.1:1143"
set spoolfile = "+INBOX"
set postponed = "+Drafts"
set record = "+Sent"
set trash = "+Trash"
3. Basic Usage and Commands
Launch Mutt by typing mutt in the terminal. Use arrow keys to navigate, ‘r’ to reply, ‘m’ to compose a new message, and ‘q’ to quit.
Troubleshooting and FAQs
Common Issues and Solutions
- Bridge not connecting: Ensure the Proton Mail servers are not blocked by your firewall.
- Emails not syncing: Check if Bridge is running and properly authenticated.
- Slow performance: Consider increasing the cache size in Bridge settings.
Performance Optimization Tips
- Limit the number of emails downloaded for offline use
- Use filters to organize incoming mail
- Regularly clear your email client’s cache
Updating Proton Mail Bridge
To update Proton Mail Bridge, download the latest .deb package from the official website and install it using the same method as the initial installation. The new version will automatically replace the old one.
Congratulations! You have successfully installed Proton Mail. Thanks for using this tutorial for installing Proton Mail Desktop on the Ubuntu 24.04 LTS system. For additional help or useful information, we recommend you check the official Proton Mail website.