How To Install PuTTY on Rocky Linux 9

In this tutorial, we will show you how to install PuTTY on Rocky Linux 9. Are you a system administrator, network engineer, or software developer in search of a reliable and versatile tool for connecting to remote systems and managing them securely? Look no further than PuTTY! This popular open-source terminal emulator can be used to connect to remote computers using various protocols, including SSH, Telnet, and more.
This article assumes you have at least basic knowledge of Linux, know how to use the shell, and most importantly, you host your site on your own VPS. The installation is quite simple and assumes you are running in the root account, if not you may need to add ‘sudo‘ to the commands to get root privileges. I will show you the step-by-step installation of the PuTTY SSH and telnet client on Rocky Linux. 9.
Features of PuTTY
- Multiple session management: PuTTY allows you to manage multiple sessions at once, with each session running in a separate window or tab.
- Secure connections: PuTTY uses various encryption algorithms to secure your connections, including AES, 3DES, Blowfish, and more. It also supports SSH key authentication, which is more secure than password authentication.
- X11 forwarding: PuTTY allows you to forward X11 connections over SSH, which allows you to run graphical applications on a remote server and display them on your local machine.
- Serial console support: PuTTY can be used to connect to serial consoles, which are commonly used for managing networking equipment such as routers, switches, and firewalls.
- Portable: PuTTY does not require installation and can be run directly from a USB drive or other portable storage devices.
Prerequisites
- A server running one of the following operating systems: Rocky Linux 9.
- It’s recommended that you use a fresh OS install to prevent any potential issues.
- SSH access to the server (or just open Terminal if you’re on a desktop).
- An active internet connection. You’ll need an internet connection to download the necessary packages and dependencies for PuTTY.
- A
non-root sudo useror access to theroot user. We recommend acting as anon-root sudo user, however, as you can harm your system if you’re not careful when acting as the root.
Install PuTTY on Rocky Linux 9
Step 1. The first step is to update your system to the latest version of the package list. To do so, run the following commands:
sudo dnf install epel-release
sudo dnf update
Step 2. Installing PuTTY on Rocky Linux 9.
By default, PuTTY is available on the Rocky Linux 9 base repository. Now install PuTTY on Rocky Linux 9 using the below command:
sudo dnf install putty
The installation process will start, and you will be prompted to confirm the installation by typing ‘Y‘ and pressing Enter.
Step 3. Accessing PuTTY on Rocky Linux.
Once the installation is complete, you can launch PuTTY by running the following command:
putty
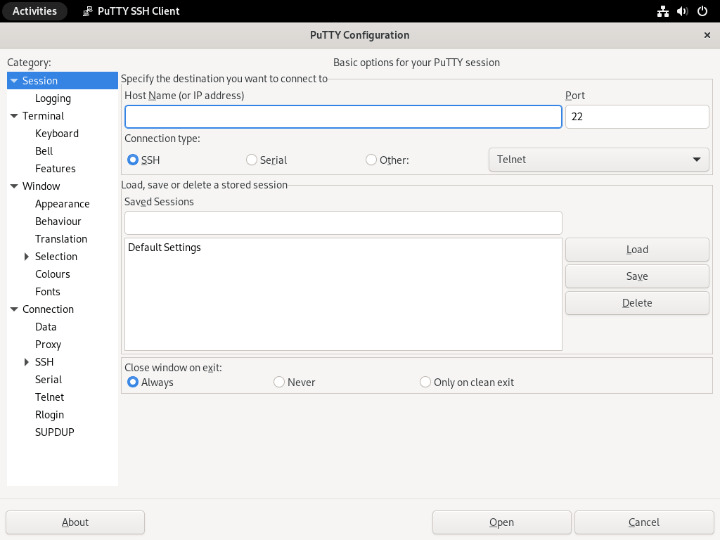
This will open the PuTTY graphical user interface, where you can enter the hostname or IP address of the remote computer you want to connect to and choose the protocol you want to use, such as SSH or Telnet.

Congratulations! You have successfully installed PuTTY. Thanks for using this tutorial for installing the PuTTY SSH client on your Rocky Linux 9 system. For additional help or useful information, we recommend you check the official PuTTY website.