In this tutorial, we will show you how to install Putty on Ubuntu 20.04 LTS. For those of you who didn’t know, PuTTY is a powerful and feature-rich terminal emulator and network file transfer application. Developed by Simon Tatham, it supports various network protocols, including SSH, Telnet, rlogin, and raw socket connections. PuTTY’s primary function is to establish secure remote sessions, allowing users to control and manage remote systems from their local machines.
One of the key advantages of PuTTY is its cross-platform compatibility, making it available for Windows, Linux, and Unix-like operating systems. It provides a user-friendly graphical interface, as well as command-line options, catering to both novice and advanced users.
In addition to its terminal emulation capabilities, PuTTY offers a range of features that enhance its functionality and usability. These include support for secure file transfers using protocols like SCP and SFTP, serial console connections, and the ability to save and load session configurations for quick access.
This article assumes you have at least basic knowledge of Linux, know how to use the shell, and most importantly, you host your site on your own VPS. The installation is quite simple and assumes you are running in the root account, if not you may need to add ‘sudo‘ to the commands to get root privileges. I will show you the step-by-step installation of the Putty SSH Client on Ubuntu 20.04 (Focal Fossa). You can follow the same instructions for Ubuntu 18.04, 16.04, and any other Debian-based distribution like Linux Mint.
Prerequisites
- A server running one of the following operating systems: Ubuntu 20.04, 18.04, and any other Debian-based distribution like Linux Mint.
- It’s recommended that you use a fresh OS install to prevent any potential issues.
- An active internet connection. You’ll need an internet connection to download the necessary packages and dependencies for Putty.
- A
non-root sudo useror access to theroot user. We recommend acting as anon-root sudo user, however, you can harm your system if you’re not careful when acting as the root.
Install Putty on Ubuntu 20.04 LTS Focal Fossa
Step 1. First, make sure that all your system packages are up-to-date by running the following apt commands in the terminal.
sudo apt update
sudo apt upgrade
Step 2. Installing Putty on Ubuntu 20.04.
PuTTY is available in the Universe repository, which is not enabled by default in Ubuntu 20.04 LTS. To install PuTTY, we need to enable this repository first. Follow these steps:
sudo add-apt-repository universe
Once you have the universe repository enabled, you should update Ubuntu and install it with this command:
sudo apt update
sudo apt install putty
This command will download and install the latest version of PuTTY from the official Ubuntu repositories. The installation process may take a few moments, depending on your internet connection speed.
Once the installation is complete, you can verify the successful installation by running the following command:
putty --version
Step 3. Accessing Putty on Ubuntu Linux.
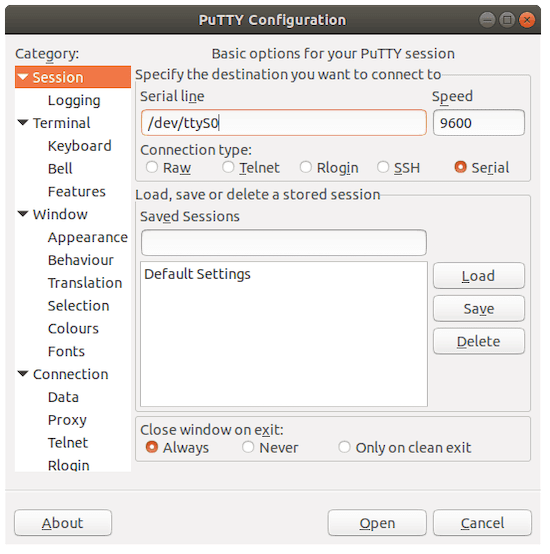
Once successfully installed, run it from the terminal using “putty” as a command, or from the Dash:
putty

To connect to a remote server using PuTTY, follow these steps:
-
- Launch PuTTY by following the instructions in the previous section.
- In the PuTTY configuration window, enter the hostname or IP address of the remote server you want to connect to in the “Host Name (or IP address)” field.
- Ensure that the “SSH” radio button is selected under the “Connection type” section.
- Click on the “Open” button to initiate the connection.
- If this is the first time you are connecting to the remote server, you may see a PuTTY Security Alert dialog box. This is normal and indicates that PuTTY is verifying the server’s host key. Click “Yes” to continue.
- Enter your username for the remote server when prompted.
- Enter your password for the remote server. Note that the password will not be visible as you type it for security reasons.
- Once you have entered the correct username and password, you will be logged in to the remote server, and you can start executing commands or performing tasks as needed.
Congratulations! You have successfully installed Putty. Thanks for using this tutorial for installing the Putty SSH Client on Ubuntu 20.04 LTS Focal Fossa system. For additional help or useful information, we recommend you check the official Putty website.