How To Install Putty on Ubuntu 22.04 LTS

In this tutorial, we will show you how to install Putty on Ubuntu 22.04 LTS. PuTTY is a widely used, lightweight, and highly configurable terminal emulator. It’s known for its ability to create secure SSH connections, making it a popular choice for remote administration and troubleshooting. PuTTY also supports other protocols like Telnet and SCP.
This article assumes you have at least basic knowledge of Linux, know how to use the shell, and most importantly, you host your site on your own VPS. The installation is quite simple and assumes you are running in the root account, if not you may need to add ‘sudo‘ to the commands to get root privileges. I will show you the step-by-step installation of the Putty on Ubuntu 22.04. You can follow the same instructions for Ubuntu 22.04 and any other Debian-based distribution like Linux Mint, Elementary OS, Pop!_OS, and more as well.
Prerequisites
- A server running one of the following operating systems: Ubuntu 22.04, 20.04, and any other Debian-based distribution like Linux Mint.
- It’s recommended that you use a fresh OS install to prevent any potential issues.
- SSH access to the server (or just open Terminal if you’re on a desktop).
- An active internet connection. You’ll need an internet connection to download the necessary packages and dependencies for Putty.
- You’ll need to have administrative privileges (sudo access) on your Ubuntu system to install software packages and make system-wide changes.
Install Putty on Ubuntu 22.04 LTS Jammy Jellyfish
Step 1. Before we dive into the installation process, it’s crucial to ensure that your system is up to date. Open the Terminal by using the shortcut Ctrl + Alt + T, and execute the following commands:
sudo apt update
sudo apt upgrade
This will update the package lists and upgrade the installed packages to their latest versions, ensuring a smooth installation process.
Step 2. Installing Putty on Ubuntu 22.04.
Installing Putty on Ubuntu 22.04 LTS is a straightforward process that can be accomplished through the command line. Use the apt package manager to install PuTTY:
sudo apt install putty
Executing this command will prompt you to confirm the installation by typing ‘Y‘ and pressing ‘Enter.’ The system will then download and install the Putty SSH Client along with its necessary dependencies.
Once the installation is complete, it’s essential to verify whether the Putty SSH Client was installed successfully. To check the version of Putty installed, use the command:
putty --version
This command will display the version information, confirming the successful installation. Additionally, launch Putty via the Terminal to ensure it opens without any errors.
Step 3. Start PuTTY from the Terminal.
With Putty installed, you can launch the application in two ways: through the command line or the graphical user interface (GUI).
putty

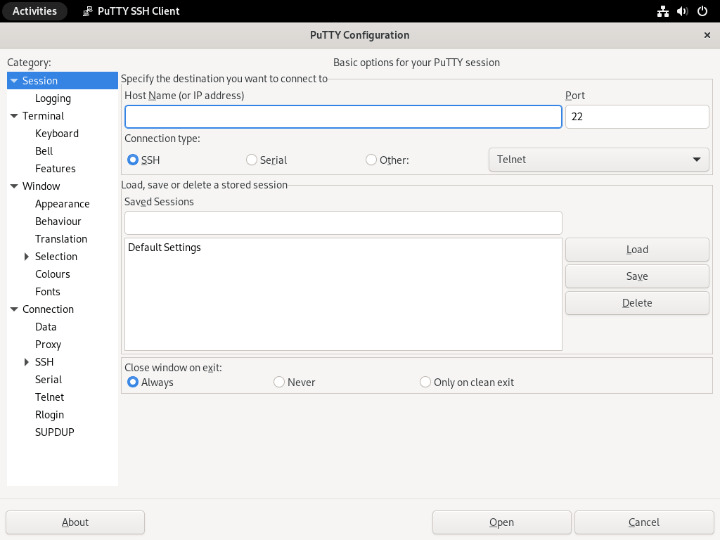
This will open the PuTTY configuration window, allowing you to select your saved session or enter your connection details.
Step 4. Troubleshooting Common Issues.
If you encounter issues while using PuTTY, consider the following:
- Connection Errors: Check your internet connection and verify the server details you’ve entered.
- Authentication Failures: Ensure your credentials are accurate and up to date.
- Firewall Issues: Sometimes, firewalls can block connections. Check firewall settings if you face issues.
Congratulations! You have successfully installed Putty. Thanks for using this tutorial for installing the Putty SSH and telnet client on Ubuntu system. For additional help or useful information, we recommend you check the official Putty website.