How To Install PyCharm on Fedora 42

PyCharm stands as one of the most powerful and feature-rich Integrated Development Environments (IDEs) for Python programming, offering developers an intelligent code editor, debugging tools, and numerous productivity features. Fedora 42, the latest release of this cutting-edge Linux distribution, provides an excellent platform for Python development. Whether you’re a beginner or an experienced developer, having a proper IDE like PyCharm can significantly enhance your coding experience and productivity. This comprehensive guide walks you through various methods to install PyCharm on Fedora 42, helping you choose the approach that best suits your needs.
Understanding PyCharm Editions
Before diving into installation methods, it’s important to understand the different PyCharm editions available and their distinct features.
Community Edition vs Professional Edition
PyCharm comes in two primary editions:
- PyCharm Community Edition: This is a free and open-source version released under the Apache 2 license. It includes essential features like an intelligent code editor, debugger, code refactoring tools, version control integration, and basic project navigation capabilities. It’s an excellent choice for beginners and developers working on smaller Python projects.
- PyCharm Professional Edition: This paid version offers everything in the Community Edition plus advanced features like web development support (HTML, CSS, JavaScript), database tools, remote development capabilities, and support for additional frameworks and technologies. Professional developers and those working on complex projects may find these additional features worth the investment.
The choice between these editions depends on your specific needs, project complexity, and budget. If you’re new to Python or working on personal projects, the Community Edition provides ample functionality. For professional work or more complex projects, the Professional Edition offers valuable additional tools that can boost productivity.
System Requirements for PyCharm on Fedora 42
Before installing PyCharm, ensure your system meets the minimum requirements for smooth operation:
Hardware Requirements:
- RAM: Minimum 4GB (8GB or more recommended for larger projects)
- Disk Space: At least 2.5GB plus additional space for projects
- Processor: Any modern multi-core CPU
Software Requirements:
- Fedora 42 64-bit desktop installation
- Python 3.x installed (Fedora 42 comes with Python pre-installed)
- Internet connection for installation and updates
Verify your Python installation by opening a terminal and typing:
python3 --versionThis command will display the currently installed Python version on your system.
Installation Method 1: Using Flatpak
Flatpak provides an easy and sandboxed way to install applications on Fedora. This method is recommended for most users as it simplifies application management and updates.
Step 1: Ensure Flatpak is Installed
Fedora 42 comes with Flatpak pre-installed, but you can verify this by running:
which flatpakIf it’s not installed, you can add it with:
sudo dnf install flatpakStep 2: Add the Flathub Repository
If you haven’t already added the Flathub repository, do so with:
flatpak remote-add --if-not-exists flathub https://flathub.org/repo/flathub.flatpakrepoStep 3: Install PyCharm
For the Community Edition:
flatpak install flathub com.jetbrains.PyCharm-CommunityFor the Professional Edition:
flatpak install flathub com.jetbrains.PyCharm-ProfessionalStep 4: Launch PyCharm
After installation, you can launch PyCharm from your application menu or by running:
flatpak run com.jetbrains.PyCharm-Communityor
flatpak run com.jetbrains.PyCharm-ProfessionalThe Flatpak installation method is particularly recommended for beginners and casual users due to its simplicity and straightforward management. Updates are handled automatically through the Flatpak system, ensuring you always have the latest version.
Installation Method 2: Using Snap
While Snap isn’t pre-installed on Fedora, it provides another convenient way to install and manage PyCharm.
Step 1: Install Snap on Fedora 42
First, install the snapd package:
sudo dnf install snapdEnable the snap socket:
sudo systemctl enable --now snapd.socketCreate a symbolic link:
sudo ln -s /var/lib/snapd/snap /snapStep 2: Install PyCharm via Snap
For the Community Edition:
sudo snap install pycharm-community --classicFor the Professional Edition:
sudo snap install pycharm-professional --classicThe --classic flag is necessary as PyCharm requires additional permissions beyond the standard snap confinement.
Step 3: Launch PyCharm
After installation, you can start PyCharm from your application menu or by typing pycharm-community or pycharm-professional in the terminal.
Updating PyCharm via Snap
Snap packages update automatically, but you can manually check for updates with:
sudo snap refresh pycharm-communityor
sudo snap refresh pycharm-professionalInstallation Method 3: Using Tar Archive (Portable Installation)
For users who prefer a more traditional approach or need a portable installation, the tar archive method provides complete control over the installation location.
Step 1: Download the PyCharm Tar Archive
Visit the official JetBrains website and download the appropriate PyCharm edition for Linux (.tar.gz file).
Step 2: Verify the Download
It’s good practice to verify the integrity of the downloaded file using the SHA checksum provided on the download page:
sha256sum pycharm-community-2025.*.tar.gzCompare the output with the checksum on the download page.
Step 3: Extract the Archive
Navigate to your Downloads directory (or wherever you saved the file) and extract the archive:
cd ~/Downloads
tar -xzf pycharm-community-*.tar.gz -C ~/Programs
This extracts PyCharm to a directory called Programs in your home folder. You can choose any location you prefer.
Step 4: Run PyCharm
Navigate to the bin directory inside the extracted folder and run the PyCharm shell script:
cd ~/Programs/pycharm-community-*/bin
./pycharm.sh
Step 5: Create a Desktop Entry
For easier access, create a desktop entry by selecting “Tools” > “Create Desktop Entry” from within PyCharm. This adds PyCharm to your application menu for convenient launching.
This installation method gives you complete control over where PyCharm is installed and doesn’t depend on package managers. However, you’ll need to manually check for and install updates.
Installation Method 4: JetBrains Repository
JetBrains provides a repository for easier installation and updates of their products on Linux systems.
Step 1: Add the JetBrains Repository
Create a new repository file:
sudo tee /etc/yum.repos.d/jetbrains.repo <Step 2: Install PyCharm
Update your package lists and install PyCharm:
sudo dnf update
sudo dnf install pycharm-community
or
sudo dnf install pycharm-professionalStep 3: Launch PyCharm
After installation, PyCharm will be available in your application menu, or you can launch it from the terminal by typing pycharm-community or pycharm-professional.

The repository installation method simplifies updates, as PyCharm will be updated along with your system packages when you run sudo dnf upgrade.
Installation Method 5: JetBrains Toolbox
The JetBrains Toolbox App provides a convenient way to install and manage multiple JetBrains products, including PyCharm.
Step 1: Download JetBrains Toolbox
Visit the JetBrains Toolbox web page and download the .tar.gz file for Linux.
Step 2: Extract and Install the Toolbox App
cd ~/Downloads
tar -xzf jetbrains-toolbox-*.tar.gz
cd jetbrains-toolbox-*
./jetbrains-toolbox
Step 3: Install PyCharm through Toolbox
Once the Toolbox App is running:
- Log in with your JetBrains account (or create one)
- Find PyCharm in the available tools
- Click the “Install” button next to the edition you want
Step 4: Launch PyCharm
After installation, you can launch PyCharm directly from the Toolbox App or from your application menu.
The Toolbox App automatically handles updates for all installed JetBrains products and allows you to easily manage multiple versions. This is particularly useful if you work with different projects that might require different PyCharm versions.
Post-Installation Setup
After installing PyCharm, several initial configurations will help optimize your development environment.
Setting up Python Interpreters
- Go to “File” > “Settings” > “Project” > “Python Interpreter”
- Click the gear icon and select “Add…”
- Choose the appropriate interpreter type (System, Virtual Environment, etc.)
- Navigate to your Python executable (typically
/usr/bin/python3on Fedora) - Click “OK” to add the interpreter
Configuring Virtual Environments
Virtual environments help isolate project dependencies:
- Go to “File” > “Settings” > “Project” > “Python Interpreter”
- Click the gear icon and select “Add…”
- Choose “Virtual Environment” > “New environment”
- Specify the location and base interpreter
- Click “OK” to create and set the virtual environment
Installing Essential Plugins
Enhance PyCharm’s functionality with useful plugins:
- Go to “File” > “Settings” > “Plugins”
- Browse the marketplace for plugins like:
- Markdown support
- GitToolBox
- Python Code Quality tools
- Material Theme UI
Customizing the IDE Appearance
Personalize your PyCharm experience:
- Go to “File” > “Settings” > “Appearance & Behavior” > “Appearance”
- Select your preferred theme (e.g., Darcula, Light, High Contrast)
- Adjust font size and family under “Editor” > “Font”
- Configure color schemes under “Editor” > “Color Scheme”
First-Run Experience
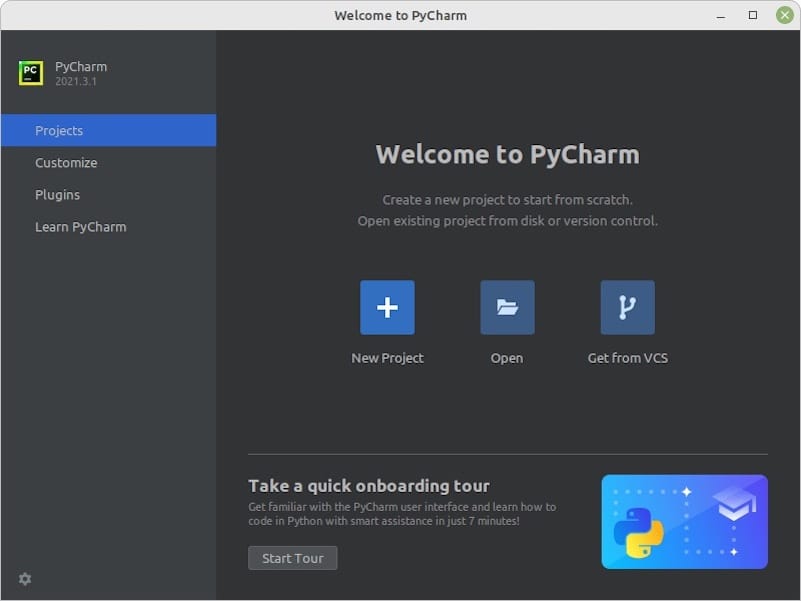
When you first launch PyCharm after installation, you’ll be greeted with the Welcome Screen, which offers several options:
- Create New Project: Start a fresh Python project
- Open: Access an existing project
- Get from VCS: Clone a project from version control
- Learn PyCharm: Access tutorials and documentation
- Plugins: Install additional plugins
- Customize: Adjust your IDE settings
Take time to explore the interface and familiarize yourself with key features. The Feature Trainer (accessible from the Welcome Screen) provides interactive tutorials to help you learn PyCharm’s capabilities.
Troubleshooting Common Installation Issues
Despite the straightforward installation process, you might encounter some issues. Here are solutions to common problems:
Permission Denied Errors
If you encounter permission errors during installation:
sudo chmod +x /path/to/installation/scriptor run the installation command with sudo privileges.
Package Dependency Issues
If installation fails due to missing dependencies:
sudo dnf install python3-develDesktop Integration Problems
If PyCharm doesn’t appear in your application menu after creating a desktop entry:
sudo update-desktop-databasePython Interpreter Not Found
If PyCharm can’t locate your Python interpreter:
- Verify Python is installed:
which python3 - Manually add the interpreter path in PyCharm settings
Graphics and Font Rendering Issues
For display problems, try starting PyCharm with alternative graphics settings:
./pycharm.sh -Dsun.java2d.xrender=falsePackage Installation Issues
If you encounter problems installing Python packages within PyCharm, try installing them directly using the terminal with your virtual environment activated:
source <venv path>/bin/activate
pip install <package name>
This helps identify whether the issue is with PyCharm or with the package itself.
Method Comparison and Recommendations
Each installation method has its strengths and limitations:
| Method | Pros | Cons | Best For |
|---|---|---|---|
| Flatpak | Easy installation, automatic updates, sandboxed | Larger disk footprint | Most users, beginners |
| Snap | Simple management, automatic updates | Not pre-installed on Fedora | Users familiar with Snap |
| Tar Archive | Complete control, works on any Linux distro | Manual updates | Advanced users, portable needs |
| JetBrains Repo | System integration, easy updates | Requires repo setup | Long-term use, system integration |
| Toolbox App | Manages multiple JetBrains products | Another app to install | Users of multiple JetBrains tools |
Recommendations:
- For beginners: Use Flatpak for its simplicity and integration with Fedora
- For professional developers: Consider the Toolbox App for managing multiple JetBrains products
- For system administrators: The Tar Archive method provides the most control over the installation
- For portable use: The Tar Archive method allows installation without system integration
Congratulations! You have successfully installed PyCharm. Thanks for using this tutorial for installing the PyCharm on your Fedora 42 Linux system. For additional Apache or useful information, we recommend you check the official JetBrains website.