How To Install RabbitMQ on Fedora 41

RabbitMQ is a powerful open-source message broker that empowers applications and services to communicate asynchronously, efficiently, and reliably. It bridges the gap between microservices, distributed systems, and real-time data processing, making it an excellent choice for modern software architectures. In Fedora 41, RabbitMQ runs smoothly on top of the Erlang runtime, allowing for robust messaging patterns and seamless horizontal scalability. This guide offers a comprehensive walkthrough on installing, configuring, and optimizing RabbitMQ so that you can confidently deploy queues, routing rules, and clusters. Whether you are a seasoned system administrator or a curious Linux enthusiast, these steps will help you set up RabbitMQ for efficient message handling, enabling you to benefit from a lean, well-structured, and stable messaging environment.
System Requirements
Before diving into the RabbitMQ installation steps, verifying that your Fedora 41 system satisfies certain requirements is crucial. Adequate planning ensures that RabbitMQ performs at its best without unexpected disruptions.
- Operating System: Fedora 41 (64-bit) with all recent updates installed.
- Hardware: A minimum of 1 GHz CPU (2 GHz or faster recommended). At least 1 GB of RAM is advisable for development purposes, and more for production-level usage.
- Disk Space: Roughly 100 MB of free storage for Erlang, RabbitMQ, and dependencies, plus additional space for message storage volumes.
- Networking: Stable network connectivity for local or remote administration, including open ports to allow AMQP connections (typically port 5672) and the management plugin console (port 15672 by default).
Ensuring these requirements are met helps minimize potential installation challenges. A properly dimensioned machine or virtual environment helps RabbitMQ comfortably handle the message load it was designed for.
Pre-Installation Steps
RabbitMQ depends on the Erlang runtime, so properly setting up the necessary repositories and packages beforehand avoids installation issues down the road. Use the steps below to prepare Fedora 41 for RabbitMQ installation.
System Updates
1. Open a terminal on your Fedora 41 system.
2. Update your local package index and upgrade existing packages:
sudo dnf update -y
sudo dnf upgrade -y
These commands fetch the latest metadata for your repositories and then upgrade outdated packages. It ensures your system libraries and dependencies are current.
Installing Dependencies
Erlang is the primary dependency for RabbitMQ. Additionally, you may need other utilities that facilitate building and debugging. Fedora 41 has official repositories for Erlang, but you can also leverage the RabbitMQ-maintained package repositories for a more recent Erlang release if desired.
sudo dnf install -y erlang
You might also consider installing Git for cloning repositories or retrieving source code:
sudo dnf install -y git
If you prefer to compile RabbitMQ from GitHub, having Git installed can be particularly useful. However, most users can rely on pre-built packages to expedite the process.
RabbitMQ Installation Process
After setting up your Fedora 41 system with the necessary prerequisites, proceed to install RabbitMQ itself. This involves adding the RabbitMQ repository, importing its GPG keys, and installing the official package.
Repository Configuration
Modern RPM-based distributions such as Fedora 41 support adding external repository definitions so you can retrieve the latest RabbitMQ release without manual downloads. To set up the repository:
sudo tee /etc/yum.repos.d/rabbitmq.repo <<EOF
[rabbitmq-server]
name=RabbitMQ RPM Repository
baseurl=https://packagecloud.io/rabbitmq/rabbitmq-server/fedora/41/\$basearch
repo_gpgcheck=1
gpgcheck=0
enabled=1
gpgkey=https://packagecloud.io/rabbitmq/rabbitmq-server/gpgkey
sslverify=1
sslcacert=/etc/pki/tls/certs/ca-bundle.crt
metadata_expire=300
EOF
This sample repository file points DNF to the official package repository tailored for RabbitMQ on Fedora 41 (or a recent Fedora version).
Importing GPG Keys
After configuring the repository, import the GPG keys to validate the packages:
sudo rpm --import https://packagecloud.io/rabbitmq/rabbitmq-server/gpgkey
These keys confirm that the packages you download originate from a trusted source. Failure to import them may cause warnings or installation failures.
Installing RabbitMQ
You can now install RabbitMQ as follows:
sudo dnf makecache
sudo dnf install -y rabbitmq-server
The first command refreshes repository metadata, after which RabbitMQ and associated dependencies will be downloaded and installed. Once completed, the files for your messaging broker will be placed in standard locations suitable for Fedora 41.
If you want to confirm the installation, query the RPM database:
rpm -qa | grep rabbitmq
You should see the version number of your newly installed rabbitmq-server package.
Post-Installation Configuration
Having finished the installation, perform some basic setup tasks to ensure RabbitMQ is running smoothly. This includes managing the RabbitMQ system service, creating administrative accounts, and setting up essential security rules.
Service Management
Systemd is commonly used on Fedora 41 to orchestrate background services. Enable RabbitMQ to start at boot:
sudo systemctl enable rabbitmq-server
Then, start the service immediately:
sudo systemctl start rabbitmq-server
Confirm its status:
sudo systemctl status rabbitmq-server
When properly configured, you should see an active (running) status message. That indicates RabbitMQ is operational and ready to process messages.
Creating an Admin User and Permissions
The default user setup is often disabled for security reasons. Create a new administrative user for comprehensive control of your message broker:
sudo rabbitmqctl add_user admin strongpassword123
sudo rabbitmqctl set_user_tags admin administrator
sudo rabbitmqctl set_permissions -p / admin ".*" ".*" ".*"
Feel free to replace admin and strongpassword123 with your chosen username and secure password.
Configuring Firewall Rules
By default, Fedora 41’s firewall could block RabbitMQ’s AMQP port 5672 or management plugin port 15672. Use firewalld commands to permit inbound traffic:
sudo firewall-cmd --add-port=5672/tcp --permanent
sudo firewall-cmd --add-port=15672/tcp --permanent
sudo firewall-cmd --reload
These steps ensure your RabbitMQ server remains reachable for remote applications and administrative tools.
Management Interface Setup
RabbitMQ’s management interface is an optional but highly recommended feature. With it, you can monitor queues, connections, channels, and more from a browser-based console. Enabling it on Fedora 41 is straightforward.
sudo rabbitmq-plugins enable rabbitmq_management
sudo systemctl restart rabbitmq-server
After restarting, the service listens on port 15672 by default. Access it using a URL such as:
http://<server-ip>:15672
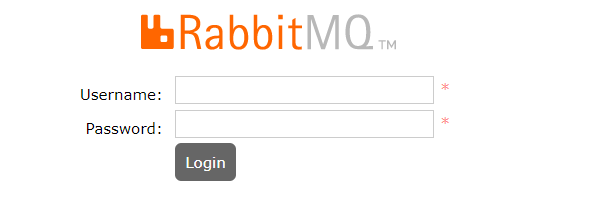
Authenticate using the administrative user you created. You will then be greeted by a web-based dashboard showing statistics for connections, queues, and exchanges. This visual interface is invaluable for diagnosing issues quickly and checking the overall health of your message broker in real time.

Testing the Installation
The most reliable way to confirm your RabbitMQ deployment is functional is to run a test using a simple send-and-receive scenario. You can do this from the command line or the management console.
Verifying Server Status
From the command line, verify the operational status of the server with:
rabbitmqctl status
You will see a JSON-like structure with information on your Erlang processes, plugins, and overall memory usage. This confirms that the broker is active.
Message Publishing Test
A simple demonstration might involve installing a client that can communicate with AMQP or using the rabbitmqadmin command-line utility. Publish a test message to an exchange, then subscribe to a queue bound to that exchange to ensure you successfully receive your message.
If the message goes through, your RabbitMQ is fully ready. If you spot any issues, revisit steps like the firewall setup, user permissions, or logs for error messages.
Performance Optimization
Although RabbitMQ performs efficiently out-of-the-box, certain optimizations fine-tune your Fedora 41 environment for higher message throughput. By adjusting resource management and network configurations, you help RabbitMQ scale effectively.
System Tuning
1. Memory Settings: Ensure you have enough swap space or system RAM to handle large numbers of connections or messages. By default, RabbitMQ will refuse connections if memory usage exceeds 40% of system RAM, but you can fine-tune this proportion using environment variables in /etc/rabbitmq/rabbitmq-env.conf.
2. File Descriptor Limits: Each connection uses file descriptors. Increase system-wide limits in /etc/security/limits.conf to ensure RabbitMQ can accept large volumes of concurrent connections.
3. Network Configuration: If your RabbitMQ instance deals with large message bursts, check your network interface throughput. Tuning kernel parameters (for instance, net.core.somaxconn) can alleviate connection backlog issues.
Monitoring Metrics
Configure monitoring tools or use the built-in management plugin stats to keep track of deliver rates, queue length, resource usage, and node health. Rapid identification of spikes or anomalies helps ward off message failures or bottlenecks.
Troubleshooting Guide
Encountering issues with RabbitMQ on Fedora 41 often revolves around inconsistent service states, network constraints, or incompatible Erlang versions. The following tips help you home in on solutions quickly.
- Logs: Check logs in
/var/log/rabbitmq/for warnings or errors relating to node configuration, memory usage, or plugins that failed to load. - Service Startup Failures: If
systemctl start rabbitmq-serverfails, runjournalctl -xeto see system-level error messages. This might highlight permission issues or port conflicts. - Connection Problems: If you cannot connect to RabbitMQ remotely, verify that firewall rules, SELinux contexts, and port configurations are correct. Also confirm that AMQP port 5672 is open and that the management port 15672 is accessible over the network.
- Erlang Compatibility: RabbitMQ requires a supported Erlang version that matches your RabbitMQ release. If you see incompatible protocol version or downgrade errors, confirm that you installed an Erlang package that is current and compatible.
- Cluster Issues: Clustering multiple Fedora 41 servers might fail if cookie files do not match or the hostnames are incorrectly set. Double-check that the
erlang.cookieis consistent across nodes, and that each node can resolve the other’s hostname.
Persistent problems often stem from minor misconfigurations in these key areas. Methodically reviewing your configuration files and logs can save immense time in isolating root causes.
Security Best Practices
While RabbitMQ is secure by default, following best practices shields your system from unauthorized access or data corruption. By employing strong authentication, encrypting data in flight, and isolating the broker from untrusted networks, you preserve message integrity.
- Use Strong Credentials: Avoid default usernames or weak passwords. Always create a unique administrator account and apply secure authentication policies.
- Least Privilege Model: Grant only necessary permissions. If a service needs read access to a queue but not write access, limit its user role accordingly.
- Enable TLS: Securing communication channels ensures that messages and authentication details remain private. Configure SSL certificates in
/etc/rabbitmq/rabbitmq.confor a dedicated config file, then enablessl_listenersfor encrypted connectivity. - Network Isolation: Where possible, run RabbitMQ on an internal network behind a VPN or firewall rules to reduce the threat surface.
Enforcing such safeguards helps maintain a robust environment that can stand up to unauthorized intrusions and data exfiltration attempts.
Maintenance and Upgrades
Regular maintenance and timely upgrades keep your RabbitMQ deployment stable. Tracking official release notes for both Erlang and RabbitMQ helps you adopt new features, performance improvements, or security patches.
- Backing Up Configurations: The core settings, including definitions of queues, bindings, and users, can be exported using
rabbitmqadminorrabbitmqctl. Keep a versioned backup of these definitions. - Applying Updates: To fetch new versions, run:
sudo dnf update -y
sudo dnf install rabbitmq-server
This checks the repository for any newer releases. Even minor updates fix potential security vulnerabilities.
- Rolling Upgrades: In a cluster, rotate updates node by node to avoid downtime. Keep at least one node up to handle connections while others are being upgraded.
- Version Management: Track the current RabbitMQ and Erlang versions in use. If you move to a major Erlang release, confirm the RabbitMQ package supports it before proceeding to avoid protocol mismatches.
These measures promote continuity of service, ensuring that your queues and exchanges remain accessible and consistent.
Congratulations! You have successfully installed RabbitMQ. Thanks for using this tutorial for installing the RabbitMQ on your Fedora 41 system. For additional help or useful information, we recommend you check the official RabbitMQ website.