How To Install RabbitMQ on Ubuntu 22.04 LTS

In this tutorial, we will show you how to install RabbitMQ on Ubuntu 22.04 LTS. For those of you who didn’t know, RabbitMQ is a popular open-source message broker that stores and passes asynchronous messages between two or more services according to pre-defined rules. It is an intermediary software that ensures your systems are more reliable, scalable, and always available. It implements the Advanced Message Queuing Protocol (AMQP), Streaming Text Oriented Messaging Protocol (STOMP), MQ Telemetry Transport (MQTT), and other protocols.
This article assumes you have at least basic knowledge of Linux, know how to use the shell, and most importantly, you host your site on your own VPS. The installation is quite simple and assumes you are running in the root account, if not you may need to add ‘sudo‘ to the commands to get root privileges. I will show you the step-by-step installation of the RabbitMQ on Ubuntu 22.04 (Jammy Jellyfish). You can follow the same instructions for Ubuntu 22.04 and any other Debian-based distribution like Linux Mint, Elementary OS, Pop!_OS, and more as well.
Prerequisites
- A server running one of the following operating systems: Ubuntu 22.04, 20.04, and any other Debian-based distribution like Linux Mint.
- It’s recommended that you use a fresh OS install to prevent any potential issues.
- SSH access to the server (or just open Terminal if you’re on a desktop).
- A
non-root sudo useror access to theroot user. We recommend acting as anon-root sudo user, however, as you can harm your system if you’re not careful when acting as the root.
Install RabbitMQ on Ubuntu 22.04 LTS Jammy Jellyfish
Step 1. First, make sure that all your system packages are up-to-date by running the following apt commands in the terminal.
sudo apt update
sudo apt upgrade
sudo apt install curl gnupg apt-transport-https
Step 2. Installing Erlang.
Now we install the required ErLang packages using the following command:
sudo apt install -y erlang-base \
    erlang-asn1 erlang-crypto erlang-eldap erlang-ftp erlang-inets \
    erlang-mnesia erlang-os-mon erlang-parsetools erlang-public-key \
    erlang-runtime-tools erlang-snmp erlang-ssl \
    erlang-syntax-tools erlang-tftp erlang-tools erlang-xmerl
For additional resources on installing Erlang, read the post below:
Step 3. Installing RabbitMQ on Ubuntu 22.04.
By default, RabbitMQ is not available on Ubuntu 22.04 base repository. Now run the following command below to add the RabbitMQ repository to your Ubuntu system:
deb [signed-by=/usr/share/keyrings/net.launchpad.ppa.rabbitmq.erlang.gpg] http://ppa.launchpad.net/rabbitmq/rabbitmq-erlang/ubuntu jammy main
deb-src [signed-by=/usr/share/keyrings/net.launchpad.ppa.rabbitmq.erlang.gpg] http://ppa.launchpad.net/rabbitmq/rabbitmq-erlang/ubuntu jammy main
deb [signed-by=/usr/share/keyrings/io.packagecloud.rabbitmq.gpg] https://packagecloud.io/rabbitmq/rabbitmq-server/ubuntu/ jammy main
deb-src [signed-by=/usr/share/keyrings/io.packagecloud.rabbitmq.gpg] https://packagecloud.io/rabbitmq/rabbitmq-server/ubuntu/ jammy main
Next, add GPG keys using the following command:
curl -1sLf "https://keys.openpgp.org/vks/v1/by-fingerprint/0A9AF2115F4687BD29803A206B73A36E6026DFCA" | sudo gpg --dearmor | sudo tee /usr/share/keyrings/com.rabbitmq.team.gpg > /dev/null
curl -1sLf "https://keyserver.ubuntu.com/pks/lookup?op=get&search=0xf77f1eda57ebb1cc" | sudo gpg --dearmor | sudo tee /usr/share/keyrings/net.launchpad.ppa.rabbitmq.erlang.gpg > /dev/null
curl -1sLf "https://packagecloud.io/rabbitmq/rabbitmq-server/gpgkey" | sudo gpg --dearmor | sudo tee /usr/share/keyrings/io.packagecloud.rabbitmq.gpg > /dev/null
After the repository was added, now install the RabbitMQ server and dependencies using the following command below:
sudo apt update
sudo apt install rabbitmq-server -y --fix-missing
Once successfully installed, RabbitMQ starts and is enabled on boot. You can check this by using:
sudo systemctl enable rabbitmq-server
sudo systemctl start rabbitmq-server
Step 4. Enable RabbitMQ Management Console.
To enable RabbitMQ management UI, first enable the management plugin:
rabbitmq-plugins enable rabbitmq_management
Step 5. Configure Firewall.
Now we set up an Uncomplicated Firewall (UFW) with Apache to allow public access on default web ports for 5672 and 15672:
sudo ufw allow OpenSSH
sudo ufw allow proto tcp from any to any port 5672,15672
sudo ufw enable
Step 6. Accessing RabbitMQ Web Interface.
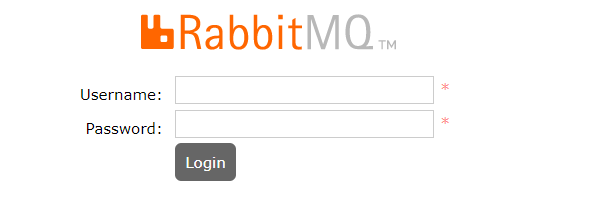
Once successfully installed, open your web browser and access the RabbitMQ installation wizard using the URL http://your-domain.com:15672 or http://server-ip-address:15672. You will be redirected to the following page:

By default, the guest user exists and can connect only from localhost. You can log in with this user locally with the password “guest”
It is recommended to create a new user and assign administrative permissions to it when setting up a RabbitMQ server. You can use the rabbitmqctl add_user command to add new users. Pick a unique username and set a secure password to continue:
rabbitmqctl add_user ngadimin y0ur-Strong-Passwd
rabbitmqctl set_user_tags ngadimin administrator
It is also advisable to delete the default user guest for security reasons:
rabbitmqctl delete_user guest
Feel free to check the list of users to make sure your configuration is correct:
rabbitmqctl list_users
Congratulations! You have successfully installed RabbitMQ. Thanks for using this tutorial for installing RabbitMQ on Ubuntu 22.04 LTS Jammy Jellyfish system. For additional help or useful information, we recommend you check the RabbitMQ website.