How To Install Rancher on AlmaLinux 9

In this tutorial, we will show you how to install Rancher on AlmaLinux 9. Rancher is a widely used open-source container management platform that makes deploying and managing Kubernetes clusters much easier. With its intuitive UI and robust feature set for everything from configuring load balancers to monitoring cluster health, Rancher has become popular in development and production environments alike.
This article assumes you have at least basic knowledge of Linux, know how to use the shell, and most importantly, you host your site on your own VPS. The installation is quite simple and assumes you are running in the root account, if not you may need to add ‘sudo‘ to the commands to get root privileges. I will show you the step-by-step installation of the Rancher on AlmaLinux 9. You can follow the same instructions for CentOS and Rocky Linux or RHEL-based.
Prerequisites
- A server running one of the following operating systems: AlmaLinux 9.
- It’s recommended that you use a fresh OS install to prevent any potential issues.
- SSH access to the server (or just open Terminal if you’re on a desktop).
- An active internet connection. You’ll need an internet connection to download the necessary packages and dependencies for Rancher.
- Rancher requires certain permissions that can only be granted to a superuser or a user with
sudoprivileges. Ensure that you have the necessary administrative access.
Install Rancher on AlmaLinux 9
Step 1. Before installing any new software, it’s good practice to update your system. Use the following command to update your AlmaLinux system:
sudo dnf clean all
sudo dnf update
Step 2. Installing Docker on AlmaLinux 9.
By default, Docker is not available on the AlmaLinux 9 base repository. Simply add the Docker CE repository to your AlmaLinux system:
sudo dnf config-manager --add-repo=https://download.docker.com/linux/centos/docker-ce.repo
After the repository is enabled, now install the latest version of Docker CE using the below command:
sudo dnf install docker-ce docker-ce-cli containerd.io
Next, start the Docker service and enable it to automatically start on boot by running the following command:
sudo systemctl enable --now docker
sudo systemctl start docker
sudo systemctl status docker
Confirm the installation and check the installed build version of Docker:
docker --version
Step 3. Installing Rancher on AlmaLinux 9.
With Docker ready, we can now grab the Rancher container image and launch it. Pull the latest Rancher image from Docker Hub:
sudo docker pull rancher/rancher
This may take a few minutes to download depending on your connection speed.
When finished, use the docker run command to start Rancher in a container. We’ll publish ports 80 and 443 while enabling persistent storage:
sudo docker run -d --restart=unless-stopped \
  -p 80:80 -p 443:443 \
  --privileged \
  rancher/rancher
Let’s break down what we’re doing here:
-d– Run the container in detached mode--restart unless-stopped– Auto restart if there is an error or reboot-p 80:80 -p 443:443– Publish ports 80 and 443 from the container to the host--privileged– Give extended privileges required for Ranchersrancher/rancher– Use the official Rancher container image
Watch the container logs to confirm Rancher is initializing properly:
docker logs -f <container_id>
Step 4. Accessing Rancher Web UI.
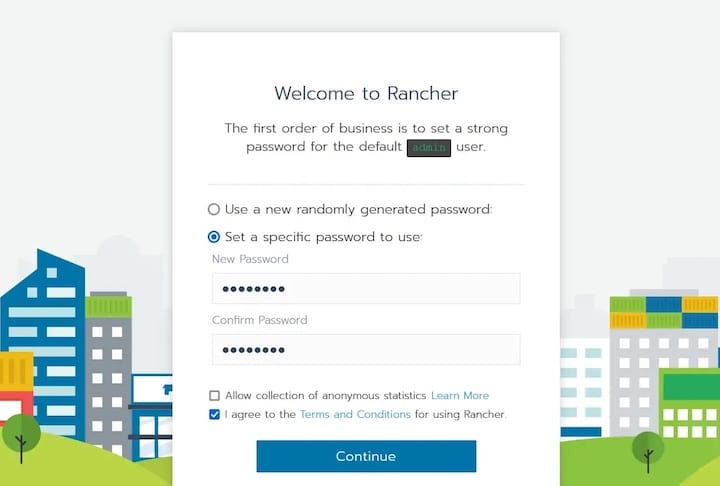
With the Rancher container running, you can now access the Rancher user interface by navigating to http://your-IP-address in your web browser. The default username and password are both admin. After logging in for the first time, you will be prompted to change the password.

Congratulations! You have successfully installed Rancher. Thanks for using this tutorial for installing Rancher on your AlmaLinux 9 system. For additional help or useful information, we recommend you check the official Rancher website.