In this tutorial, we will show you how to install RavenDB on Ubuntu 20.04 LTS. For those of you who didn’t know, RavenDB is a NoSQL database manager written in C#. With a RavenDB database, you can set up a NoSQL data architecture or add a NoSQL layer to your current relational database. RavenDB supports multiple databases, sharding, or partitioning the data across multiple servers. It has the ability to handle hundreds or thousands of databases on the same instance. RavenDB uses JSON to store documents and does not requires a schema to be declared and enables developers to work with data more naturally.
This article assumes you have at least basic knowledge of Linux, know how to use the shell, and most importantly, you host your site on your own VPS. The installation is quite simple and assumes you are running in the root account, if not you may need to add ‘sudo‘ to the commands to get root privileges. I will show you the step-by-step installation of the RavenDB on Ubuntu 20.04 (Focal Fossa). You can follow the same instructions for Ubuntu 18.04, 16.04, and any other Debian-based distribution like Linux Mint.
Prerequisites
- A server running one of the following operating systems: Ubuntu 20.04, 18.04, 16.04, and any other Debian-based distribution like Linux Mint.
- It’s recommended that you use a fresh OS install to prevent any potential issues.
- A
non-root sudo useror access to theroot user. We recommend acting as anon-root sudo user, however, as you can harm your system if you’re not careful when acting as the root.
Install RavenDB on Ubuntu 20.04 LTS Focal Fossa
Step 1. First, make sure that all your system packages are up-to-date by running the following apt commands in the terminal.
sudo apt update
sudo apt upgrade
Step 2. Installing Required Packages.
Before starting, you’ll want to install the required dependencies, including NET Core runtime:
wget https://packages.microsoft.com/config/ubuntu/20.04/packages-microsoft-prod.deb -O packages-microsoft-prod.deb
sudo dpkg -i packages-microsoft-prod.deb
Next, update and install .NET core:
sudo apt update
sudo apt install apt-transport-https
sudo apt install aspnetcore-runtime-3.1
Step 3. Installing RavenDB on Ubuntu 20.04.
Now we download the latest version of the RavenDB from the official website:
wget -O ravendb.tar.bz2 https://hibernatingrhinos.com/downloads/RavenDB%20for%20Linux%20x64/latest
tar xvjf ravendb.tar.bz2
Then, make the file executable and install it:
sudo chmod -R 755 RavenDB
cd ~/RavenDB
./run.sh
Step 4. Create a Systemd Service File for RavenDB.
Now we create a systemd service file to manage the RavenDB. You can create it with the following command:
sudo nano /etc/systemd/system/ravendb.service
Add the following lines:
[Unit]
Description=RavenDB v4.0
After=network.target

[Service]
LimitCORE=infinity
LimitNOFILE=65536
LimitRSS=infinity
LimitAS=infinity
User=godet
Restart=on-failure
Type=simple
ExecStart=/home/godet/RavenDB/run.sh

[Install]
WantedBy=multi-user.target
Save and close the file. Then, reload the systemd daemon with the following command:
sudo systemctl daemon-reload
sudo systemctl start ravendb
sudo systemctl enable ravendb
Step 5. Accessing RavenDB on Ubuntu.
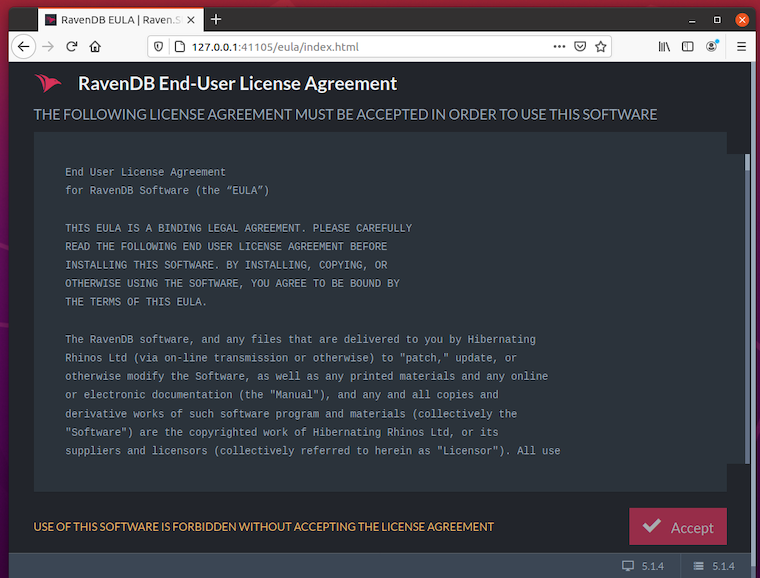
Once successfully installed RavenDB, you can now access its web interface. Open a browser and point it to http://127.0.0.1:41105, You should see the following screen:

By default, the RavenDB is accessible only from the local host. If you need to configure the server’s public IP address, open its config file and add the IP address:
sudo nano ~/RavenDB/Server/settings.json
Add replace the host or IP with the public one:
{
  "DataDir": "RavenData",
  "License.Eula.Accepted": true,
  "Setup.Mode": "Unsecured",
  "Security.UnsecuredAccessAllowed": "PublicNetwork",
  "ServerUrl": "http://127.0.0.1:8080",
  "ServerUrl.Tcp": "tcp://127.0.0.1:38888"
}
Congratulations! You have successfully installed RavenDB. Thanks for using this tutorial for installing the RavenDB on your Ubuntu 20.04 LTS Focal Fossa system. For additional help or useful information, we recommend you check the official RavenDB website.