How To Install Redmine on Debian 12

In this tutorial, we will show you how to install Redmine on Debian 12. Redmine, a powerful open-source project management tool, offers a comprehensive solution for tracking tasks, managing resources, and collaborating with team members. With its user-friendly interface and extensive features, Redmine has become a popular choice among businesses of all sizes.
This article assumes you have at least basic knowledge of Linux, know how to use the shell, and most importantly, you host your site on your own VPS. The installation is quite simple and assumes you are running in the root account, if not you may need to add ‘sudo‘ to the commands to get root privileges. I will show you the step-by-step installation of the Redmine on a Debian 12 (Bookworm).
Prerequisites
- A server running one of the following operating systems: Debian 12 (Bookworm).
- It’s recommended that you use a fresh OS install to prevent any potential issues.
- SSH access to the server (or just open Terminal if you’re on a desktop).
- Make sure your Debian 12 system is connected to the internet. An active connection is essential for downloading the required packages and updates during the installation.
- A
non-root sudo useror access to theroot user. We recommend acting as anon-root sudo user, however, as you can harm your system if you’re not careful when acting as the root.
Install Redmine on Debian 12 Bookworm
Step 1. Open your terminal and log in to your server using SSH. Update the package list and upgrade your system with the following commands:
sudo apt update
sudo apt upgrade
This command updates the package list and upgrades the installed packages to their latest versions.
Step 2. Installing Required Dependencies.
Redmine relies on several dependencies to function properly. To install these dependencies, run the following command:
sudo apt install ruby-full build-essential zlib1g-dev libxml2-dev libmysqlclient-dev libpq-dev libmagickwand-dev
Step 3. Configuring the Hostname and DNS Settings.
Set the hostname of your server and update the /etc/hosts file. Replace ‘yourhostname‘ with your chosen hostname:
echo "yourhostname" | sudo tee /etc/hostname
echo "127.0.0.1 yourhostname" | sudo tee -a /etc/hosts
sudo hostname yourhostname
Step 4. Installing and Configuring the Database.
For Redmine, it’s recommended to use PostgreSQL. Install it with:
sudo apt install postgresql
Now, let’s configure PostgreSQL and create a user for Redmine. Log in to the PostgreSQL shell:
sudo -u postgres psql
Create a database and user for Redmine:
CREATE DATABASE redmine;
CREATE USER redmine WITH PASSWORD 'your_stong_password';
ALTER ROLE redmine SET client_encoding TO 'utf8';
ALTER ROLE redmine SET default_transaction_isolation TO 'read committed';
ALTER ROLE redmine SET timezone TO 'UTC';
GRANT ALL PRIVILEGES ON DATABASE redmine TO redmine;
\q
Next, edit the PostgreSQL configuration to allow Redmine access. Open the configuration file:
sudo nano /etc/postgresql/13/main/pg_hba.conf
Add the following line at the end of the file:
host redmine redmine 127.0.0.1/32 md5
Save the file and restart PostgreSQL:
sudo systemctl restart postgresql
Step 5. Installing Redmine on Debian 12.
Now download the latest stable Redmine release:
cd /opt
wget https://www.redmine.org/releases/redmine-5.1.0.tar.gz
sudo tar -xvf redmine-5.1.0.tar.gz
Next, create a database configuration file:
cd /opt/redmine-5.1.0/config
sudo cp database.yml.example database.yml
Edit database.yml and configure the database connection:
production:
adapter: postgresql
database: redmine
host: localhost
username: redmine
password: "your_strong_password"
encoding: utf8
Navigate to your Redmine directory and install the required gems:
cd /opt/redmine-5.1.0
sudo gem install bundler
sudo bundle install --without development test
Migrate the database schema and load default data:
sudo bundle exec rake db:migrate RAILS_ENV=production
sudo bundle exec rake redmine:load_default_data RAILS_ENV=production
Generate a secret key for Redmine:
sudo bundle exec rake generate_secret_token
Step 6. Configuring Apache Web Server.
Install Apache and enable it:
sudo apt install apache2
sudo systemctl enable apache2
Once Apache is installed, start it and enable it to start on boot:
sudo systemctl start apache2
sudo systemctl enable apache2
Next, create a new Apache virtual host configuration file:
sudo nano /etc/apache2/sites-available/redmine.conf
Add the following configuration, replacing ‘yourdomain‘ with your actual domain:
<VirtualHost *:80>
ServerName yourdomain
ServerAlias www.yourdomain
DocumentRoot /opt/redmine-5.1.0/public
ErrorLog ${APACHE_LOG_DIR}/error.log
CustomLog ${APACHE_LOG_DIR}/access.log combined
</VirtualHost>
Enable the required Apache modules and configure the proxy settings:
sudo a2enmod proxy
sudo a2enmod proxy_http
Edit your virtual host file to add proxy settings:
sudo nano /etc/apache2/sites-available/redmine.conf
Add these lines inside the <VirtualHost> block:
 ProxyPass / http://127.0.0.1:3000/
ProxyPassReverse / http://127.0.0.1:3000/
After that, improve security by disabling directory listing and setting up a .htaccess file:
sudo a2disconf serve-cgi-bin
sudo a2enmod rewrite
sudo nano /opt/redmine-5.1.0/public/.htaccess
Add the following:
Options -Indexes
Step 7. Installing Let’s Encrypt SSL Certificate.
Now install Certbot to obtain an SSL certificate from Let’s Encrypt:
sudo apt install certbot python3-certbot-apache
Next, use Certbot to obtain and install an SSL certificate for your Redmine:
sudo certbot --apache
Certbot will prompt you to select the domain for which you want to obtain a certificate. Choose your Redmine domain and follow the prompts to complete the certificate installation.
Certbot provides automatic renewal of SSL certificates, ensuring that your PrestaShop store remains secure. The renewal process is typically handled by a systemd timer, which runs twice a day. You can manually test the certificate renewal process by running:
sudo certbot renew --dry-run
Step 8. Configure Firewall.
Configure a firewall to protect your Redmine server. UFW (Uncomplicated Firewall) is a user-friendly tool for this purpose:
sudo apt install ufw
sudo ufw allow OpenSSH
sudo ufw allow 'Apache Full'
sudo ufw enable
To check the status of UFW with the newly added rules, use:
sudo ufw status
Step 9. Accessing Redmine Web UI.
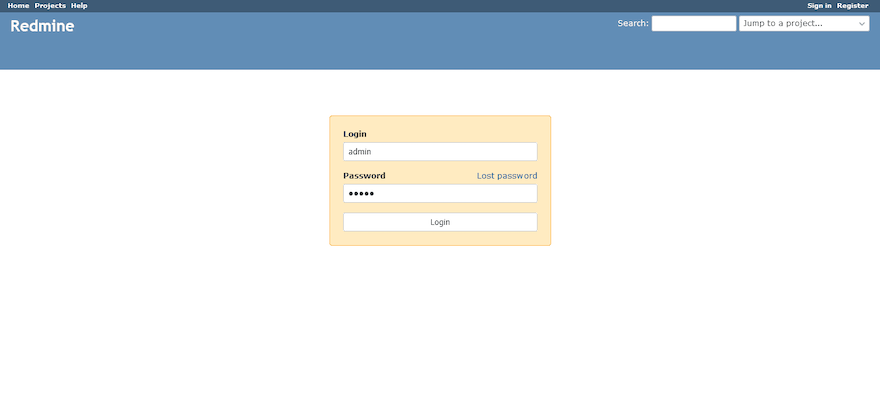
Access your Redmine instance by navigating to https://yourdomain. You should be able to log in and start using Redmine securely.

Congratulations! You have successfully installed Redmine. Thanks for using this tutorial to install the latest version of the Redmine on Debian 12 Bookworm. For additional help or useful information, we recommend you check the official Redmine website.