In this tutorial, we will show you how to install Rocket.Chat on CentOS 8. For those of you who didn’t know, Rocket.Chat is one of the most popular open-source chat software. A fantastic alternate to both Slack and compensated live chat software. It’s free, what is unlimited and it’s a bunch of cool features like Video chat, Screen sharing, Mobile apps, and more.
This article assumes you have at least basic knowledge of Linux, know how to use the shell, and most importantly, you host your site on your own VPS. The installation is quite simple and assumes you are running in the root account, if not you may need to add ‘sudo‘ to the commands to get root privileges. I will show you through the step by step installation of the Rocket.Chat open-source chat software on CentOS 8.
Prerequisites
- A server running one of the following operating systems: CentOS 8.
- It’s recommended that you use a fresh OS install to prevent any potential issues.
- A
non-root sudo useror access to theroot user. We recommend acting as anon-root sudo user, however, as you can harm your system if you’re not careful when acting as the root.
Install Rocket.Chat on CentOS 8
Step 1. First, let’s start by ensuring your system is up-to-date and install all required dependency.
sudo dnf install epel-release
sudo dnf update
sudo dnf groupinstall 'Development Tools'
sudo dnf install curl GraphicsMagick gcc-c++
Step 2. Installing Node.js.
Rocket.Chat Nodejs to be installed on your system. Run the following command to install Node.js:
curl -sL https://rpm.nodesource.com/setup_8.x | sudo -E bash -
sudo dnf install nodejs
Step 3. Installing the Nginx Web server on CentOS 8.
Nginx is a high-performance web server and very popular these days, The first step is to install Nginx. So open a terminal session or connect to your server using SSH:
sudo dnf install nginx
Once the installation is successful, start and enable Nginx to run on system boot:
systemctl enable --now nginx
The next step is to open the ports in the Firewall so that we can use Nginx:
sudo firewall-cmd --permanent --zone=public --add-service=http
sudo firewall-cmd --permanent --zone=public --add-service=https
sudo firewall-cmd --reload
Step 4. Installing MongoDB on CentOS 8.
Open a terminal session and we have to configure the MongoDB repository. To do this, open a new file:
nano /etc/yum.repos.d/mongodb-org-4.2.repo
Add the following:
[mongodb-org-4.2]
name=MongoDB Repository
baseurl=https://repo.mongodb.org/yum/redhat/$releasever/mongodb-org/development/x86_64/
gpgcheck=1
enabled=1
gpgkey=https://www.mongodb.org/static/pgp/server-4.2.asc
Now installing MongoDB is as simple as running just one command:
dnf install mongodb-org
MongoDB daemon should be enabled to start on boot:
sudo systemctl enable mongodb
sudo systemctl start mongodb
Next, you will need to define a replica set in MongoDB. You can define it with the following command:
nano /etc/mongod.conf
Add the following lines:
replication:
replSetName: "myreplica01"
Save and close the file then restart the MongoDB service:
sudo systemctl restart mongod
Then, log in to the MongoDB shell and initiate the replica set with the following command:
mongo

> rs.initiate()
You should get the following results:
{
    "info2" : "no configuration specified. Using a default configuration for the set",
    "me" : "127.0.0.1:27017",
    "ok" : 1,
    "operationTime" : Timestamp(160666164, 1),
    "$clusterTime" : {
        "clusterTime" : Timestamp(160666164, 1),
        "signature" : {
            "hash" : BinData(0,"AAAAAAAAAAAAAAAAAAAAAAAAAAA="),
            "keyId" : NumberLong(0)
        }
    }
}
Step 5. Installing Rocket.Chat on CentOS 8.
First, you will need to create a separate user to run Rocket.Chat:
useradd -m -U -r -d /opt/rocket rocket
usermod -a -G rocket nginx
chmod 750 /opt/rocket
Now we download the latest version of Rocket Chat by using the following command:
su - rocket
curl -L https://releases.rocket.chat/latest/download -o rocket.chat.tgz
Next, extract the downloaded file:
tar zxf rocket.chat.tgz
mv bundle Rocket.Chat
Then, change the directory to Rocket.Chat server and install required modules with the following command:
cd Rocket.Chat/programs/server
npm install
Step 6. Create a Systemd Service for Rocket.Chat.
Now we create a systemd service file to manage the Rocket.Chat service:
nano /etc/systemd/system/rocketchat.service
Add the following lines:
[Unit]
Description=Rocket.Chat server
After=network.target nss-lookup.target mongod.target

[Service]
StandardOutput=syslog
StandardError=syslog
SyslogIdentifier=rocketchat
User=rocket
Environment=MONGO_URL=mongodb://localhost:27017/rocketchat ROOT_URL=http://chat.example.com:3000/ PORT=3000
ExecStart=/usr/local/bin/node /opt/rocket/Rocket.Chat/main.js

[Install]
WantedBy=multi-user.target
Save and close the file then start the Rocket.Chat service also enables it to start at system reboot with the following command:
sudo systemctl daemon-reload
sudo systemctl start rocketchat
sudo systemctl enable rocketchat
Step 7. Configure Nginx as a Reverse Proxy.
Now we create an Nginx virtual host configuration file with the following command:
nano /etc/nginx/conf.d/rocket.conf
Add the following lines:
upstream rocketchat_backend {
  server 127.0.0.1:3000;
}

server {
    listen 80;
    server_name chat.mydomain.com;

    location / {
        proxy_pass http://rocketchat_backend/;
        proxy_http_version 1.1;
        proxy_set_header Upgrade $http_upgrade;
        proxy_set_header Connection "upgrade";
        proxy_set_header Host $http_host;

        proxy_set_header X-Real-IP $remote_addr;
        proxy_set_header X-Forward-For $proxy_add_x_forwarded_for;
        proxy_set_header X-Forward-Proto http;
        proxy_set_header X-Nginx-Proxy true;

        proxy_redirect off;
    }
}
Save and close the file then restart the Nginx service to apply the changes:
sudo systemctl restart nginx
Step 8. Accessing Rocket.Chat Web Interface.
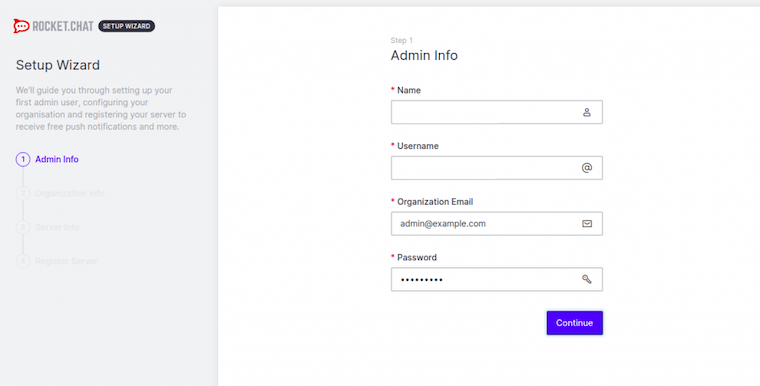
Rocket.Chat will be available on HTTP port 80 by default. Open your favorite browser and navigate to http://chat.mydomain.com and complete the required steps to finish the installation.

Congratulations! You have successfully installed the Rocket.Chat. Thanks for using this tutorial for installing Rocket.Chat open-source chat software on your CentOS 8 system. For additional help or useful information, we recommend you to check the official Rocket.Chat website.