How To Install Rust Programming Language on Linux Mint 20

In this tutorial, we will show you how to install Rust Programming Language on Linux Mint 20. For those of you who didn’t know, Rust is an open-source systems programming language that focuses on speed, memory safety, and parallelism. It provides numerous features such as move semantics, zero-cost abstractions, pattern matching, minimal runtime, type inference, threads without data traces, efficient C bindings, and so on. It is employed in data centers by companies like Dropbox, Postmates, and many more.
This article assumes you have at least basic knowledge of Linux, know how to use the shell, and most importantly, you host your site on your own VPS. The installation is quite simple and assumes you are running in the root account, if not you may need to add ‘sudo‘ to the commands to get root privileges. I will show you the step-by-step installation of a Rust Programming Language on a Linux Mint 20 (Ulyana).
Prerequisites
- A server running one of the following operating systems: Linux Mint 20 (Ulyana).
- It’s recommended that you use a fresh OS install to prevent any potential issues.
- A
non-root sudo useror access to theroot user. We recommend acting as anon-root sudo user, however, as you can harm your system if you’re not careful when acting as the root.
Install Rust Programming Language on Linux Mint 20 Ulyana
Step 1. Before running the tutorial below, it’s important to make sure your system is up to date by running the following apt commands in the terminal:
sudo apt update
sudo apt install curl build-essential gcc make
Step 2. Installing Rust Programming Language on Linux Mint 20.
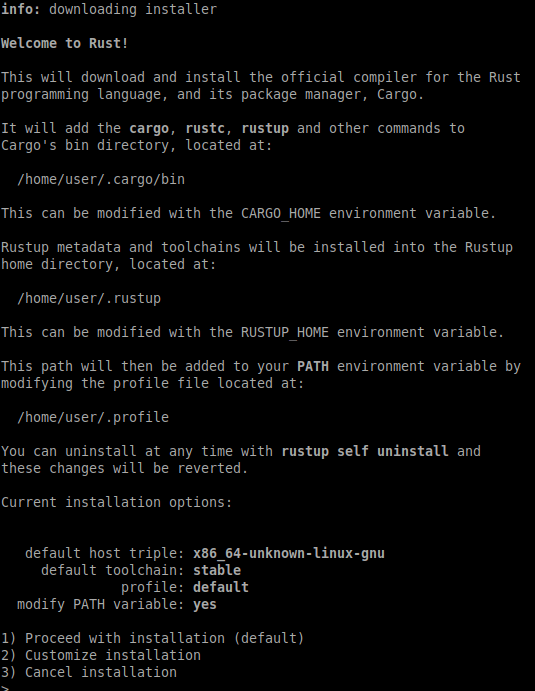
Now we download the Rust installation script from the official site using the following curl command:
curl --proto '=https' --tlsv1.2 -sSf https://sh.rustup.rs | sh

Once installation is complete, keep in mind that you will need to activate the Rust environment for your current shell. To enable the rust environment, run:
source ~/.profile
source ~/.cargo/env
Verify the version build of Rust installed:
rustc -V
Step 3. Create Rust Sample Project.
Now we create a hello world script to make sure rust is properly installed and configured on our machine:
mkdir ~/projects
cd projects
After that, create a new rust file with the command below:
sudo nano hello.rs
Add the following lines:
fn main() {
 println!("Hello, World!");
}
Save the file. then, compile the rust file with the command:
rustc hello.rs
To run the application you created using Rust, run the program with the execute the command below:
./hello
Congratulations! You have successfully installed Rust. Thanks for using this tutorial for installing the latest version of Rust Programming Language on the Linux Mint system. For additional help or useful information, we recommend you check the official Rust website.