How To Install Seafile on Debian 12

In this tutorial, we will show you how to install Seafile on Debian 12. Seafile is a versatile, self-hosted file synchronization and sharing solution that empowers individuals and organizations to manage their files and data efficiently. It stands out for its privacy and security features, making it a popular choice for businesses and individuals who value data protection.
This article assumes you have at least basic knowledge of Linux, know how to use the shell, and most importantly, you host your site on your own VPS. The installation is quite simple and assumes you are running in the root account, if not you may need to add ‘sudo‘ to the commands to get root privileges. I will show you the step-by-step installation of the Seafile on a Debian 12 (Bookworm).
Prerequisites
- A server running one of the following operating systems: Debian 12 (Bookworm).
- It’s recommended that you use a fresh OS install to prevent any potential issues.
- SSH access to the server (or just open Terminal if you’re on a desktop).
- An active internet connection. You’ll need an internet connection to download the necessary packages and dependencies for Seafile.
- A
non-root sudo useror access to theroot user. We recommend acting as anon-root sudo user, however, as you can harm your system if you’re not careful when acting as the root.
Install Seafile on Debian 12 Bookworm
Step 1. Before we install any software, it’s important to make sure your system is up to date by running the following apt commands in the terminal:
sudo apt update
sudo apt upgrade
This command will refresh the repository, allowing you to install the latest versions of software packages.
Step 2. Installing Necessary Dependencies.
Next, let’s install the dependencies required for Seafile:
sudo apt install python3 python3-setuptools python3-pip python3-mysqldb python3-ldap python3-urllib3 python3-requests python3-pil python3-pip python3-setuptools
Step 3. Create a Non-Root User.
It’s a good practice to create a dedicated user to run Seafile, rather than using the root account. Replace ‘seafile‘ with your preferred username:
sudo adduser seafile
Step 4. Installing MariaDB.
Now install MariaDB with the following command below:
sudo apt install mariadb-server mariadb-client
After installation, secure MariaDB by running the built-in script:
sudo mysql_secure_installation
Follow the prompts to set a root password and answer the security questions accordingly.
Step 5. Create a Seafile Database and User.
Log in to the MariaDB server as the root user:
sudo mysql -u root -p
Enter the root password you set during the secure installation. Now, create a new database and user for Seafile:
CREATE DATABASE seafiledb CHARACTER SET = 'utf8mb4';
CREATE USER 'seafile'@'localhost' IDENTIFIED BY 'your_strong_password';
GRANT ALL PRIVILEGES ON seafiledb.* TO 'seafile'@'localhost';
FLUSH PRIVILEGES;
EXIT;
Step 6. Setting Up the Web Server (Nginx).
Nginx is a high-performance web server that we’ll use to serve Seafile. Install it using the following command:
sudo apt install nginx
Next, create a new Nginx configuration file for Seafile:
sudo nano /etc/nginx/sites-available/seafile
Add the following configuration:
server {
listen 80;
server_name your_domain;

location / {
proxy_pass http://127.0.0.1:8000;
proxy_set_header Host $host;
proxy_set_header X-Real-IP $remote_addr;
proxy_set_header X-Forwarded-For $proxy_add_x_forwarded_for;
proxy_set_header X-Forwarded-Host $server_name;
proxy_set_header X-Forwarded-Proto $scheme;
}

location /seafhttp {
rewrite ^/seafhttp(.*)$ $1 break;
proxy_pass http://127.0.0.1:8082;
client_max_body_size 0;
}

location /media {
root /opt/seafile/seafile-server-latest/seahub;
}
}
Save the file and create a symbolic link to enable this configuration:
sudo ln -s /etc/nginx/sites-available/seafile /etc/nginx/sites-enabled/
Now, test the Nginx configuration for errors:
sudo nginx -t
If the test passes without errors, reload Nginx to apply the changes:
sudo systemctl reload nginx
Step 7. Installing Seafile on Debian 12.
Now, let’s obtain and extract the Seafile server files:
mkdir -p ~/seafile-server && cd ~/seafile-server
wget https://download.seadrive.org/seafile-server_${VER}_x86-64.tar.gz
tar -zxvf seafile-server_8.0.2_x86-64.tar.gz
Replace the download link with the latest version available on the Seafile download page.
Step 8. Configure Seafile.
First, create a new configuration file for Seafile:
cp ~/seafile-server/seafile-server-latest/seafile.conf ~/seafile-server/seafile-data
nano ~/seafile-server/seafile-data/seafile.conf
Add the following configuration:
[database]
type = mysql
host = 127.0.0.1
port = 3306
user = seafile
password = your_strong_password
db_name = seafiledb
connection_charset = utf8

[seafile]
server-name = your_server_name
Next, edit the database configuration file:
nano ~/seafile-server/seafile-data/seahub_settings.py
Modify the database settings to match your setup:
DATABASES = {
'default': {
'ENGINE': 'django.db.backends.mysql',
'NAME': 'seafiledb',
'USER': 'seafile',
'PASSWORD': 'your_strong_password',
'HOST': '127.0.0.1',
'PORT': '3306',
}
}
After that, initialize the Seafile database by running the initialization script:
cd ~/seafile-server/seafile-server-latest
./setup-seafile-mysql.sh auto
Finally, start the Seafile and Seahub services:
./seafile.sh start
./seahub.sh start
Step 9. Configuring Firewall Rules (UFW).
If you have a firewall enabled, open the required ports for Seafile to function properly:
sudo ufw allow 80,443/tcp
sudo ufw allow 8000/tcp
sudo ufw allow 8082/tcp
Enable the Uncomplicated Firewall (UFW) and check its status:
sudo ufw enable
sudo ufw status
Step 10. Accessing Seafile Web Interface.
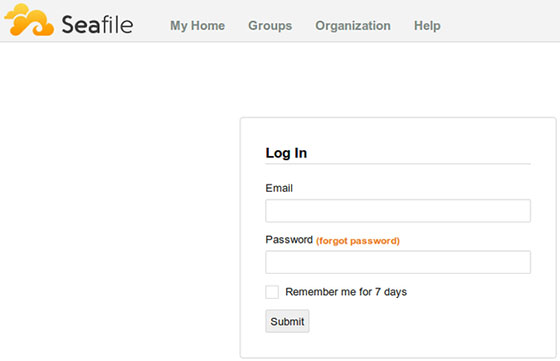
Open your web browser and navigate to http://your_domain or http://your_server_ip (replace with your server’s domain or IP address). You should see the Seafile login page.

Congratulations! You have successfully installed Seafile. Thanks for using this tutorial to install the latest version of Seafile on Debian 12 Bookworm. For additional help or useful information, we recommend you check the official Seafile website.