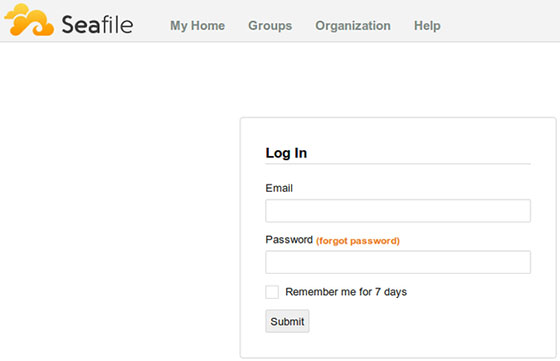
How To Install Seafile on Ubuntu 24.04 LTS

Seafile is a powerful, open-source cloud storage platform that offers file synchronization, sharing, and collaboration features. For organizations and individuals seeking a self-hosted alternative to commercial cloud services, Seafile on Ubuntu 24.04 LTS provides a robust and secure solution. This guide will walk you through the process of installing and configuring Seafile on the latest Ubuntu Long Term Support release, ensuring you have a fully functional private cloud storage system.
Seafile stands out as a versatile file hosting platform, combining the convenience of cloud storage with the control and privacy of self-hosting. By running Seafile on Ubuntu 24.04 LTS, users can benefit from:
- Enhanced data privacy and control
- Customizable storage limits
- Advanced file versioning and recovery
- Seamless file synchronization across devices
- Collaborative editing and sharing features
Ubuntu 24.04 LTS, known for its stability and long-term support, provides an ideal foundation for hosting Seafile. This combination ensures a reliable and secure environment for your data, backed by regular security updates and community support.
Prerequisites
Before diving into the installation process, it’s crucial to ensure your system meets the necessary requirements. This preparation will help avoid potential roadblocks and ensure a smooth setup experience.
System Requirements
To run Seafile effectively on Ubuntu 24.04 LTS, your server should meet or exceed the following specifications:
- CPU: Dual-core processor (2 GHz or higher recommended)
- RAM: Minimum 2 GB (4 GB or more recommended for better performance)
- Storage: At least 20 GB free space (SSD preferred for optimal performance)
- Network: Stable internet connection with sufficient bandwidth
Additionally, ensure you have root access or sudo privileges on your Ubuntu server to perform the installation and configuration tasks.
Network Requirements
Proper network configuration is essential for Seafile to function correctly:
- Open ports 8000 and 8082 in your firewall for Seafile’s web interface and file syncing service
- Configure a domain name pointing to your server’s IP address for easier access
- Consider setting up a reverse proxy for enhanced security and performance
System Preparation
Begin by updating your Ubuntu system to ensure you have the latest security patches and software versions:
sudo apt update
sudo apt upgrade -y
After updating, it’s wise to perform some basic security configurations:
sudo apt install ufw
sudo ufw enable
sudo ufw allow ssh
sudo ufw allow 8000
sudo ufw allow 8082
These commands install and configure the Uncomplicated Firewall (UFW), allowing SSH access and opening the necessary ports for Seafile.
Database Configuration
Seafile requires a database to store metadata. While it supports various database systems, MariaDB is recommended for its performance and compatibility.
MariaDB Setup
Install MariaDB server:
sudo apt install mariadb-server
Secure your MariaDB installation:
sudo mysql_secure_installation
Follow the prompts to set a root password and remove insecure default settings.
Create a database and user for Seafile:
sudo mysql -u root -p
CREATE DATABASE `seafile-db` CHARACTER SET utf8 COLLATE utf8_general_ci;
CREATE USER 'seafile'@'localhost' IDENTIFIED BY 'choose-a-secure-password';
GRANT ALL PRIVILEGES ON `seafile-db`.* TO 'seafile'@'localhost';
FLUSH PRIVILEGES;
EXIT;
Remember to replace ‘choose-a-secure-password’ with a strong, unique password.
Seafile Installation
With the system prepared and database configured, you’re ready to install Seafile.
Dependencies Installation
Install the required dependencies:
sudo apt install python3 python3-pip python3-setuptools python3-venv libmysqlclient-dev memcached libmemcached-dev
Server Setup
Download the latest version of Seafile server:
wget https://download.seadrive.org/seafile-server_latest_x86-64.tar.gz
tar xzvf seafile-server_latest_x86-64.tar.gz
mkdir /opt/seafile
mv seafile-server-* /opt/seafile/
cd /opt/seafile/seafile-server-*
Run the setup script:
./setup-seafile-mysql.sh
Follow the prompts, providing the necessary information such as server name, domain, and database details.
Configuration
After installation, fine-tune Seafile’s configuration for optimal performance and security.
Core Settings
Edit the configuration file:
nano /opt/seafile/conf/ccnet.conf
Ensure the following settings are correctly configured:
SERVICE_URL = http://your-domain-or-ip:8000
Adjust the file storage path if needed in /opt/seafile/conf/seafile.conf:
[fileserver]
port = 8082
Service Configuration
Create a systemd service file for Seafile:
sudo nano /etc/systemd/system/seafile.service
Add the following content:
[Unit]
Description=Seafile
After=network.target mysql.service

[Service]
Type=forking
ExecStart=/opt/seafile/seafile-server-latest/seafile.sh start
ExecStop=/opt/seafile/seafile-server-latest/seafile.sh stop
User=seafile
Group=seafile

[Install]
WantedBy=multi-user.target
Enable and start the Seafile service:
sudo systemctl enable seafile
sudo systemctl start seafile
Web Server Setup
While Seafile can run on its built-in server, using Nginx as a reverse proxy enhances security and performance.
Nginx Configuration
Install Nginx:
sudo apt install nginx
Create a Nginx configuration file for Seafile:
sudo nano /etc/nginx/sites-available/seafile
Add the following configuration, adjusting the server_name to match your domain:
server {
    listen 80;
    server_name your-domain.com;

    location / {
        proxy_pass         http://127.0.0.1:8000;
        proxy_set_header   Host $host;
        proxy_set_header   X-Real-IP $remote_addr;
        proxy_set_header   X-Forwarded-For $proxy_add_x_forwarded_for;
        proxy_set_header   X-Forwarded-Host $server_name;
        proxy_read_timeout 1200s;

        # used for view/edit office file via Office Online Server
        client_max_body_size 0;

        access_log      /var/log/nginx/seahub.access.log;
        error_log       /var/log/nginx/seahub.error.log;
    }

    location /seafhttp {
        rewrite ^/seafhttp(.*)$ $1 break;
        proxy_pass http://127.0.0.1:8082;
        client_max_body_size 0;
        proxy_connect_timeout  36000s;
        proxy_read_timeout  36000s;
        proxy_send_timeout  36000s;
        send_timeout  36000s;
    }
}
Enable the Nginx configuration:
sudo ln -s /etc/nginx/sites-available/seafile /etc/nginx/sites-enabled/
sudo nginx -t
sudo systemctl restart nginx
Security Measures
Enhance the security of your Seafile installation with these additional steps:
- Implement SSL/TLS encryption using Let’s Encrypt for secure HTTPS connections
- Regularly update Seafile and Ubuntu to patch security vulnerabilities
- Enable two-factor authentication for Seafile user accounts
- Implement fail2ban to protect against brute-force attacks
Testing and Verification
After completing the installation and configuration, verify that Seafile is functioning correctly:
- Check the Seafile service status:
sudo systemctl status seafile - Access the Seafile web interface through your domain or IP address
- Create a test user account and upload a file to ensure storage functionality
- Test file synchronization using the Seafile desktop client

Troubleshooting Guide
If you encounter issues during or after installation, consider these troubleshooting steps:
- Check Seafile logs in
/opt/seafile/logs/for error messages - Verify database connectivity and permissions
- Ensure all required ports are open and accessible
- Review Nginx error logs at
/var/log/nginx/error.log
Congratulations! You have successfully installed Seafile. Thanks for using this tutorial for installing the Seafile on the Ubuntu 24.04 LTS system. For additional help or useful information, we recommend you check the official Seafile website.