How To Install Sensu Monitoring on Rocky Linux 9

In this tutorial, we will show you how to install Sensu Monitoring on Rocky Linux 9. For those of you who didn’t know, Sensu is an open-source infrastructure and application monitoring system designed for both container and non-container monitoring and multi-cloud infrastructure. System monitoring provides observations and reports that help manage applications and servers in an infrastructure. It involves continuous analysis of the CPU, memory, bandwidth, application performance, switches, and other network components.
This article assumes you have at least basic knowledge of Linux, know how to use the shell, and most importantly, you host your site on your own VPS. The installation is quite simple and assumes you are running in the root account, if not you may need to add ‘sudo‘ to the commands to get root privileges. I will show you the step-by-step installation of Sensu Monitoring on Rocky Linux. 9.
Prerequisites
- A server running one of the following operating systems: Rocky Linux 9.
- It’s recommended that you use a fresh OS install to prevent any potential issues.
- SSH access to the server (or just open Terminal if you’re on a desktop).
- A
non-root sudo useror access to theroot user. We recommend acting as anon-root sudo user, however, as you can harm your system if you’re not careful when acting as the root.
Install Sensu Monitoring on Rocky Linux 9
Step 1. The first step is to update your system to the latest version of the package list. To do so, run the following commands:
sudo dnf check-update
sudo dnf install dnf-utils
Step 2. Installing Sensu Backend on Rocky Linux 9.
By default, Sensu is not available on Rocky Linux 9 base repository. Now run the following command below to add the Sensu repository to your Rocky Linux system:
curl -s https://packagecloud.io/install/repositories/sensu/stable/script.rpm.sh | sudo bash
After the repository has been added, now we install the Sensu Go backend using the following command:
sudo dnf install vim sensu-go-backend
Step 3. Configure Sensu Backend.
First, we copy the configuration template to /etc/sensu/backend.yml:
sudo curl -L https://docs.sensu.io/sensu-go/latest/files/backend.yml -o /etc/sensu/backend.yml
Next, start and enable the Sensu service with the command:
sudo systemctl start sensu-backend
sudo systemctl enable sensu-backend
Then, create the admin user and password by exporting the credentials as shown below:
export SENSU_BACKEND_CLUSTER_ADMIN_USERNAME=admin
export SENSU_BACKEND_CLUSTER_ADMIN_PASSWORD=Your-Strong-Password
sensu-backend init
Step 4. Configure Firewall.
By default, Sensu listens on ports 3000 and 8080. If any firewall is installed and configured on your server, then you will need to allow both ports via firewalld. You can allow them with the following command:
sudo firewall-cmd --add-port=3000/tcp --permanent
sudo firewall-cmd --add-port=8080/tcp --permanent
sudo firewall-cmd --add-port=8081/tcp --permanent
sudo firewall-cmd --reload
Make a request to the backend to ensure it is up and running using the command:
curl http://127.0.0.1:8080/health
Step 5. Accessing the Sensu web UI.
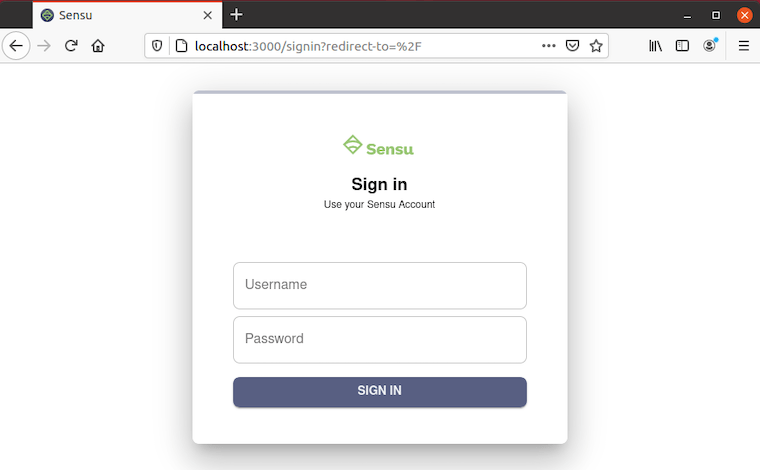
Once successfully installed, open your web browser and type the URL http://your-IP-address:3000. And you should see the Sensu login page:

Step 6. Installing Sensuctl.
The sensuctlis a command line utility that allows users to manage the Sensu resources. It calls the HTTP API when creating, reading, updating, and many more. Now run the following command to install it:
sudo dnf install sensu-go-cli
Once installed, configure the CLI by login in with your user credentials, namespace, and the backend URL as below:
sensuctl configure -n \
--username 'admin' \
--password 'Your-Strong-Password' \
--namespace default \
--url 'http://127.0.0.1:8080'
Now use the tool to perform the desired operations. For example, changing the password for the admin user, use the command:
sensuctl user change-password --interactive
Step 7. Installing Sensu Go Agents.
To monitor the host or machine using Sensu, you must install the Sensu Agent package on all of your hosts. The Sensu Agent is available for almost Linux distributions and Windows. For Debian/Ubuntu-based system, run the following apt command to install the Sensu Agent package. Now the installation will begin:
curl -s https://packagecloud.io/install/repositories/sensu/stable/script.deb.sh | sudo bash
sudo apt install sensu-go-agent
Next, run the following command to start the Sensu Agent service and enable it to run automatically at system boot:
sudo systemctl start sensu-agent
sudo systemctl enable sensu-agent
Step 8. Verify Keepalive Events.
Keepalives are heartbeat mechanisms used to ensure the agents are reaching the backend. To verify the added agents, use the Sensu CLI:
$ sensuctl entity list
              ID                Class    OS               Subscriptions                        Last Seen
────────────────────────────── ─────── ─────── ──────────────────────────────────── ─────────────────────────────────
  localhost.localdomain         agent   linux   entity:localhost.localdomain         2022-10-15 08:46:40 +0200 CEST
  node1.idroot.us               agent   linux   entity:node1.idroot.us               2022-10-15 08:46:30 +0200 CEST
Congratulations! You have successfully installed Sensu. Thanks for using this tutorial for installing Sensu Monitoring on your Rocky Linux 9 system. For additional help or useful information, we recommend you check the official Sensu website.