How To Install Sentry on Ubuntu 22.04 LTS

In this tutorial, we will show you how to install Sentry with Docker on Ubuntu 22.04 LTS. Are you a developer looking for an easy and efficient way to track and monitor errors in your software applications? Then you’re in the right place! Today, we’re going to talk about Sentry – an open-source error tracking and monitoring tool that can help you identify, diagnose, and fix errors in your software applications in real-time. If you’re using Ubuntu 22.04, you’ll be glad to know that installing Sentry is a breeze when you use Docker. Not only is it easy to install, but it’s also straightforward to configure for error tracking.
This article assumes you have at least basic knowledge of Linux, know how to use the shell, and most importantly, you host your site on your own VPS. The installation is quite simple and assumes you are running in the root account, if not you may need to add ‘sudo‘ to the commands to get root privileges. I will show you the step-by-step installation of Sentry with Docker on Ubuntu 22.04. You can follow the same instructions for Ubuntu 22.04 and any other Debian-based distribution like Linux Mint, Elementary OS, Pop!_OS, and more as well.
Prerequisites
- A server running one of the following operating systems: Ubuntu 22.04, 20.04, and any other Debian-based distribution like Linux Mint.
- It’s recommended that you use a fresh OS install to prevent any potential issues.
- SSH access to the server (or just open Terminal if you’re on a desktop).
- An active internet connection. You’ll need an internet connection to download the necessary packages and dependencies for Sentry and Docker.
- A
non-root sudo useror access to theroot user. We recommend acting as anon-root sudo user, however, as you can harm your system if you’re not careful when acting as the root.
Install Sentry with Docker on Ubuntu 22.04 LTS Jammy Jellyfish
Step 1. First, make sure that all your system packages are up-to-date by running the following apt commands in the terminal.
sudo apt update
sudo apt upgrade
Step 2. Installing Docker.
By default, Docker is not available on Ubuntu 22.04 base repository. Now run the following command below to add the Docker repository to the system:
echo "deb [arch=$(dpkg --print-architecture) signed-by=/usr/share/keyrings/docker-archive-keyring.gpg] https://download.docker.com/linux/ubuntu $(lsb_release -cs) stable" | sudo tee /etc/apt/sources.list.d/docker.list
Next, import the GPG key to your system:
curl -fsSL https://download.docker.com/linux/ubuntu/gpg | sudo gpg --dearmor -o /usr/share/keyrings/docker-archive-keyring.gpg
After the repository is enabled, now install the latest version of the Docker package using the below command:
sudo apt update
sudo apt install docker-ce docker-ce-cli containerd.io docker-compose-plugin
You can verify that Docker is installed and about the current version:
docker -v
After successfully installed, enable Docker (to start automatically upon system boot), start, and verify the status using the commands below:
sudo systemctl enable docker
sudo systemctl start docker
sudo systemctl status docker
By default, Docker requires root privileges. If you want to avoid using sudo every time you run the docker command, add your username to the docker group:
sudo usermod -aG docker $(whoami)
su - ${USER}
Confirm that your user is added to the Docker group:
groups
For additional resources on installing and managing Docker, read the post below:
Step 3. Installing Sentry on Ubuntu 22.04.
After installing Docker, we can now proceed with the installation of Sentry. Now we download the latest version of Sentry from the Git repository using the following command:
git clone https://github.com/getsentry/onpremise
Next, change the directory to the downloaded directory and run the Sentry installation script to start the installation:
cd onpremise
bash install.sh
Output:
Here's the info we may collect:

  - OS username
  - IP address
  - install log
  - runtime errors
  - performance data

Thirty (30) day retention. No marketing. Privacy policy at sentry.io/privacy.

Would you like to create a user account now? [Y/n]: y

Email: Email: admin@idroot.us
Password:
Repeat for confirmation:
Added to organization: sentry
User created: admin@idroot.us
Creating missing DSNs
Correcting Group.num_comments counter
Verify all the downloaded images using the following command:
docker images
Next, we can now start the Sentry container using the following command below:
docker-compose up -d
Finally, verify the status of all containers using the following command:
docker-compose ps
Step 4. Accessing Sentry Web Interface.
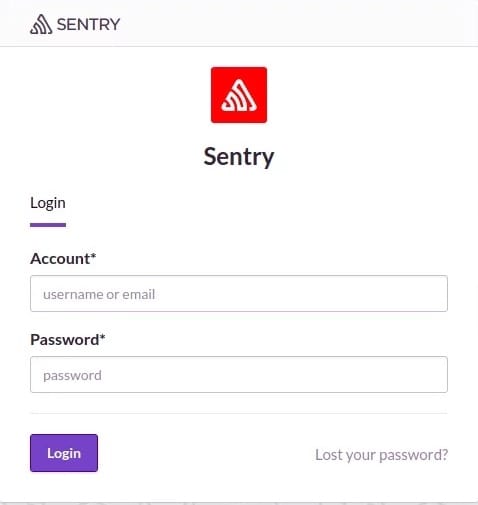
Now open your web browser and access the Sentry Web UI using the URL https://your-IP-address:9000. If everything is working correctly, you should be greeted by Sentry’s login page:

Congratulations! You have successfully installed Sentry with Docker. Thanks for using this tutorial for installing the Sentry error tracking and monitoring tool on the Ubuntu system. For additional help or useful information, we recommend you check the official Sentry website.