How To Install SFTPGo on Rocky Linux 9

In this tutorial, we will show you how to install SFTPGo on Rocky Linux 9. sFTPGo is a powerful and versatile SFTP server that provides secure file transfer capabilities for Linux systems. It offers a range of features, including virtual users, quota support, bandwidth throttling, and integration with external authentication providers. sFTPGo is lightweight, easy to set up, and highly configurable, making it an excellent choice for managing file transfers on Rocky Linux 9 servers.
This article assumes you have at least basic knowledge of Linux, know how to use the shell, and most importantly, you host your site on your own VPS. The installation is quite simple and assumes you are running in the root account, if not you may need to add ‘sudo’ to the commands to get root privileges. I will show you the step-by-step installation of the SFTPGo on Rocky Linux 9 or RHEL-based.
Prerequisites
- A server running one of the following operating systems: Rocky Linux 9.
- It’s recommended that you use a fresh OS install to prevent any potential issues.
- SSH access to the server (or just open Terminal if you’re on a desktop).
- An active internet connection. You’ll need an internet connection to download the necessary packages and dependencies for SFTPGo.
- A
non-root sudo useror access to theroot user. We recommend acting as anon-root sudo user, however, as you can harm your system if you’re not careful when acting as the root.
Install SFTPGo on Rocky Linux 9
Step 1. The first step in any software installation process on a Linux system is to update the system packages. This is a crucial step as it ensures that you have the latest security patches and software updates, providing a secure environment for your new software. To update your system packages on Rocky Linux 9, you can use the following command:
sudo dnf update
Step 2. Installing SFTPGo on Rocky Linux 9.
To begin the installation process, we first need to add the official sFTPGo repository to our Rocky Linux 9 system:
VER=$(curl -s https://api.github.com/repos/drakkan/sftpgo/releases/latest|grep tag_name | cut -d '"' -f 4 |sed 's/v//g')
wget https://github.com/drakkan/sftpgo/releases/download/v$VER/sftpgo-$VER-1.x86_64.rpm
Now that we have added the sFTPGo repository, we can proceed with installing sFTPGo using the dnf package manager:
sudo dnf install sftpgo
After installing sFTPGo, we need to start the sFTPGo service to make it operational. Additionally, we will configure sFTPGo to start automatically on system boot, ensuring that it is always available when needed. To start and enable the sFTPGo service, follow these steps:
sudo systemctl start sftpgo
To verify that the sFTPGo service has started successfully, run the following command:
sudo systemctl status sftpgo
To configure sFTPGo to start automatically on system boot, run the following command:
sudo systemctl enable sftpgo
Step 3. Configure sFTPGo.
sFTPGo provides a wide range of configuration options to customize its behavior and adapt it to your specific requirements. The main configuration file for sFTPGo is located at /etc/sftpgo/sftpgo.json. To configure sFTPGo, follow these steps:
sudo nano /etc/sftpgo/sftpgo.json
The configuration file is in JSON format and contains various settings for sFTPGo. Some key settings you may want to modify include:
- port: The port number on which sFTPGo listens for SFTP connections (default: 2022).
- bind_port: The port number on which sFTPGo listens for HTTP/HTTPS connections (default: 8080).
- data_provider: The storage backend for user data and virtual folders (default: “bolt”).
- auth_providers: The authentication providers for user authentication (default: “built-in”).
After making changes to the configuration file, restart the sFTPGo service for the changes to take effect:
sudo systemctl restart sftpgo
Step 4. Configure Firewall.
First, check that Firewalld is running:
sudo systemctl status firewalld
If it’s not active, start and enable it:
sudo systemctl start firewalld
sudo systemctl enable firewalld
Now open these ports using the firewall-cmd utility:
sudo firewall-cmd --permanent --add-port=8080/tcp
sudo firewall-cmd --permanent --add-port=2022/tcp
sudo firewall-cmd --permanent --add-port=990/tcp
sudo firewall-cmd --permanent --add-port=8090/tcp
For the changes to take effect, reload firewalld:
sudo firewall-cmd --reload
Step 5. Accessing sFTPGo Web Admin and Client UI.
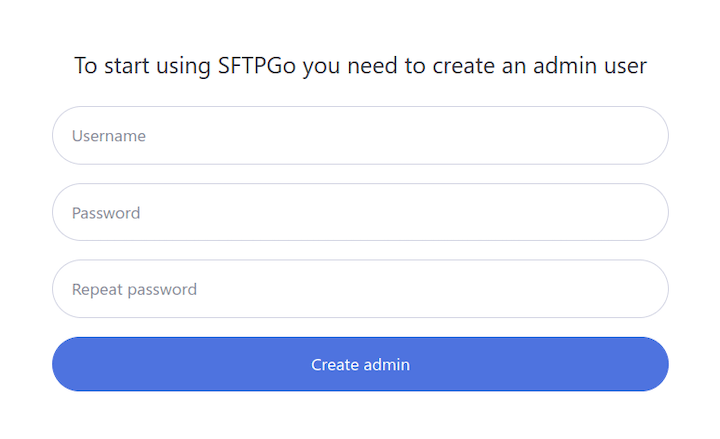
A web admin interface is a powerful tool for managing your sFTPGo server. Access it by navigating to http://your_server_ip:8080 in your web browser. The first time you access it, you’ll be prompted to create an admin account. This interface allows you to manage users, view server statistics, and configure server settings.

Congratulations! You have successfully installed SFTPGo. Thanks for using this tutorial for installing the SFTPGo on your Rocky Linux 9 system. For additional help or useful information, we recommend you check the official SFTPGo website.