How To Install SmartGit on Linux Mint 22

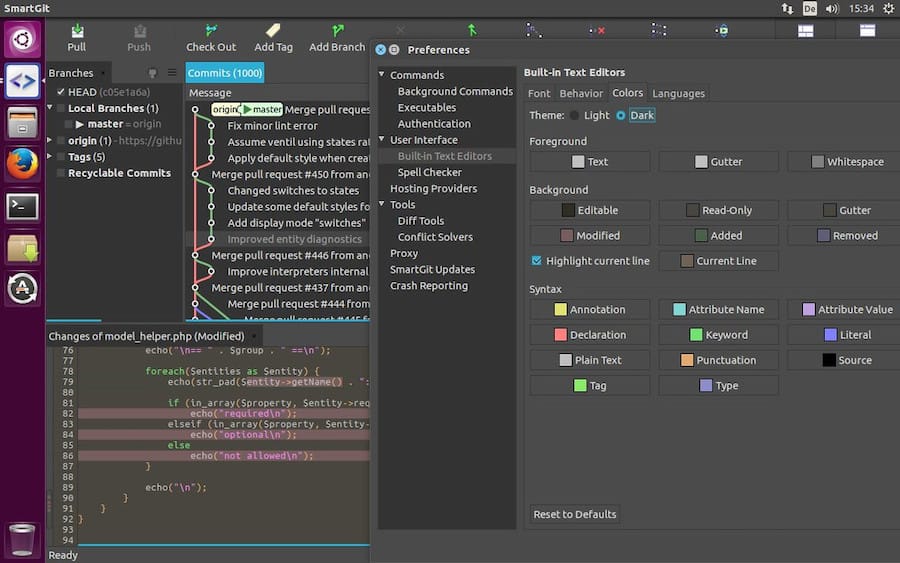
In this tutorial, we will show you how to install SmartGit on Linux Mint 22. SmartGit stands as one of the most powerful and user-friendly Git clients available for Linux systems today. This comprehensive graphical interface simplifies Git operations while maintaining the full power of command-line Git functionality. For Linux Mint 22 users seeking an efficient way to manage their Git repositories, SmartGit offers an ideal solution that bridges the gap between complex command-line operations and intuitive visual management.
Whether you’re a seasoned developer transitioning from Windows or macOS, or a Linux newcomer looking to streamline your version control workflow, this guide will walk you through every step of installing SmartGit on Linux Mint 22. We’ll cover multiple installation methods, troubleshooting common issues, and optimizing your setup for maximum productivity.
Prerequisites and System Requirements
Before diving into the SmartGit installation process, ensuring your Linux Mint 22 system meets all necessary requirements is crucial for a smooth installation experience.
System Requirements for SmartGit
Your Linux Mint 22 system should have at least 2GB of RAM, though 4GB or more is recommended for optimal performance when working with large repositories. Additionally, you’ll need approximately 200MB of free disk space for the SmartGit installation, plus additional space for your Git repositories and working directories.
Java Runtime Environment Prerequisites
SmartGit requires Java Runtime Environment (JRE) 8 or higher to function properly. Most Linux Mint 22 installations include OpenJDK by default, but you can verify your Java installation by opening a terminal and running:
java -versionIf Java isn’t installed, you can install it using:
sudo apt update
sudo apt install default-jre
System Updates and Preparation
Before proceeding with the SmartGit installation, ensure your Linux Mint 22 system is fully updated. This prevents potential compatibility issues and ensures all dependencies are current:
sudo apt update
sudo apt upgrade
Network and Permissions
An active internet connection is essential for downloading SmartGit packages and resolving dependencies. Additionally, you’ll need administrative privileges to install system packages, so ensure your user account has sudo access.
Understanding SmartGit Installation Methods
Linux Mint 22 users have several options for installing SmartGit, each with distinct advantages depending on your specific needs and system configuration.
Debian Package Installation
The most straightforward and recommended approach involves downloading and installing the official .deb package directly from Syntevo’s website. This method provides the latest stable version and ensures optimal compatibility with your system.
PPA Repository Installation
For users who prefer automatic updates and simplified package management, installing SmartGit through a Personal Package Archive (PPA) offers continuous updates through the standard apt package manager.
Manual Archive Installation
Advanced users may opt for the tar.gz archive method, which provides maximum control over the installation location and doesn’t require system-wide package installation.
Method 1: Installing SmartGit via Debian Package
This method represents the most reliable approach for installing SmartGit on Linux Mint 22, providing a clean installation with proper system integration.
Downloading the Official SmartGit Package
Navigate to the official SmartGit download page at syntevo.com and locate the Linux .deb package. Alternatively, you can download it directly using the terminal:
wget https://downloads.syntevo.com/downloads/smartgit/smartgit-24_1_3.debThe download may take several minutes depending on your internet connection speed. The package size is approximately 70MB, so ensure you have sufficient bandwidth and storage space.
Installing the .deb Package
Once the download completes, install SmartGit using the dpkg command:
sudo dpkg -i smartgit-24_1_3.debIf you encounter dependency issues during installation, resolve them using:
sudo apt-get install -fThis command automatically downloads and installs any missing dependencies required for SmartGit to function properly.
Verification and First Launch
After successful installation, verify SmartGit is properly installed by launching it from the terminal:
smartgitYou can also access SmartGit through the Linux Mint application menu under Development or by searching for “SmartGit” in the application launcher.
Method 2: Installing SmartGit via PPA Repository
The PPA installation method offers automatic updates and simplified package management for users who prefer this approach.
Adding the SmartGit PPA
Add the official SmartGit PPA to your system repositories:
sudo add-apt-repository ppa:eugenesan/ppa
sudo apt update
This process adds the repository to your system’s package sources and updates the package list to include SmartGit.
Installing SmartGit from PPA
Install SmartGit using the standard apt package manager:
sudo apt install smartgitThe PPA installation automatically handles all dependencies and integrates SmartGit with your system’s update mechanism.
PPA Installation Benefits
This method ensures you’ll receive automatic updates whenever new SmartGit versions are released through the PPA. The installation integrates seamlessly with Linux Mint’s software update system.
Method 3: Installing SmartGit via Tar.gz Archive
For users requiring maximum control over the installation process, the tar.gz archive method provides flexibility in installation location and configuration.
Downloading and Extracting the Archive
Download the SmartGit tar.gz bundle from the official website:
wget https://downloads.syntevo.com/downloads/smartgit/smartgit-linux-24_1_3.tar.gzExtract the archive to your preferred location:
tar -xzf smartgit-linux-24_1_3.tar.gzManual Installation Configuration
Navigate to the extracted directory and run the installation script:
cd smartgit/bin
./smartgit.sh
This method requires manual creation of desktop shortcuts and menu entries if desired.
Desktop Integration Setup
To integrate SmartGit with your desktop environment, run the provided script:
./add-menuitem.shThis creates appropriate menu entries and desktop shortcuts for easy access.
Installing Git (Essential Prerequisite)
SmartGit requires Git to be installed on your system as it serves as the backend for all version control operations.
Checking Existing Git Installation
Verify whether Git is already installed on your Linux Mint 22 system:
git --versionIf Git is installed, you’ll see version information. If not, proceed with the installation.
Installing Git on Linux Mint 22
Install Git using the apt package manager:
sudo apt update
sudo apt install git
This installs the latest stable version of Git available in the Linux Mint repositories.
Basic Git Configuration
Configure Git with your identity information for commit attribution:
git config --global user.name "Your Name"
git config --global user.email "your.email@example.com"
These settings ensure proper attribution when making commits through SmartGit.
Initial SmartGit Configuration
Proper initial configuration ensures SmartGit operates optimally with your workflow and preferences.
First-Time Setup Wizard
When launching SmartGit for the first time, you’ll encounter a setup wizard that guides you through essential configuration options. This wizard helps configure your user profile, license selection, and initial preferences.

License Configuration
SmartGit offers both commercial and non-commercial license options. Select the appropriate license based on your usage requirements. Non-commercial licenses are free for educational and open-source projects.
User Profile Setup
Configure your name and email address for commit attribution. These settings integrate with your Git configuration and ensure proper authorship tracking.
Repository Configuration
SmartGit excels at managing multiple repositories simultaneously. During initial setup, you can:
- Clone existing repositories from remote servers
- Open local repositories already present on your system
- Create new repositories for fresh projects
Remote Repository Integration
SmartGit supports popular hosting services including GitHub, GitLab, and Bitbucket. Configure authentication credentials during setup to enable seamless remote repository operations.
Interface Customization
Customize SmartGit’s appearance and behavior to match your preferences:
- Select from available themes and color schemes
- Configure toolbar layouts and visible panels
- Set working directory preferences
- Optimize performance settings for your hardware
Common Installation Issues and Troubleshooting
Even with careful preparation, installation issues can occasionally occur. Here are solutions for the most common problems.
Dependency Resolution Issues
Missing Java Runtime Environment
If SmartGit fails to launch due to missing Java, install the required JRE:
sudo apt install default-jre openjdk-11-jreUnmet Package Dependencies
When encountering dependency issues during .deb installation, resolve them using:
sudo apt --fix-broken installThis command automatically resolves and installs missing dependencies.
Permission and Access Problems
Installation Permission Errors
Ensure you have sudo privileges when installing system packages. If you encounter permission errors, verify your user account is in the sudo group:
groups $USERDesktop Integration Issues
If SmartGit doesn’t appear in your application menu after installation, manually refresh the desktop database:
sudo update-desktop-databaseRepository Setup and Configuration Issues
Git Not Found Errors
If SmartGit reports that Git cannot be found, verify Git installation and configure the path manually in SmartGit’s preferences under “Commands” settings.
Authentication Setup Problems
For repositories requiring authentication, configure SSH keys or credential storage within SmartGit’s preferences. This ensures secure access to remote repositories.
Post-Installation Best Practices
Optimizing your SmartGit installation enhances security, performance, and usability.
Security Configuration
SSH Key Setup
Generate SSH keys for secure repository access:
ssh-keygen -t ed25519 -C "your_email@example.com"Add the public key to your Git hosting service account for authenticated access.
Credential Management
Configure SmartGit’s credential storage with appropriate security measures. Use credential timeout settings to balance convenience with security.
Performance Optimization
Memory Allocation
For large repositories, increase SmartGit’s memory allocation in the preferences under “Low-level Properties.” This improves performance when working with extensive project histories.
File Watching Configuration
Configure file system watching preferences to optimize performance based on your repository size and system capabilities.
Backup and Migration
Settings Export
Regularly export SmartGit settings to preserve your configuration:
- Repository bookmarks
- Preference settings
- License information
- Custom configurations
This ensures easy migration to new systems or recovery from system issues.
Advanced Features and Integration
SmartGit offers numerous advanced features that enhance productivity and workflow efficiency.
IDE Integration
SmartGit integrates seamlessly with popular Integrated Development Environments (IDEs) including IntelliJ IDEA, Eclipse, and Visual Studio Code. Configure external tool integration in SmartGit’s preferences to launch your preferred editor directly from the Git client.
Diff and Merge Tool Configuration
Configure custom diff and merge tools for enhanced conflict resolution capabilities. SmartGit supports various external tools including KDiff3, Meld, and Beyond Compare.
Team Collaboration Features
Branch Management
SmartGit’s visual branch management simplifies complex Git workflows. The graphical branch view makes it easy to understand project history and merge relationships.
Pull Request Integration
For repositories hosted on GitHub, GitLab, or Bitbucket, SmartGit provides integrated pull request management, allowing you to create, review, and merge pull requests directly from the application.
Maintenance and Updates
Keeping SmartGit current ensures access to the latest features and security improvements.
Update Management
Automatic Update Checking
SmartGit includes built-in update checking that notifies you when new versions are available. Enable automatic checking in the preferences for timely notifications.
Manual Update Process
For .deb installations, download and install new versions using the same process as the initial installation. The new version will automatically replace the existing installation while preserving your settings.
Clean Uninstallation
If you need to remove SmartGit from your system, use the appropriate uninstallation method based on your installation approach:
For .deb installations:
sudo apt remove smartgitFor PPA installations, first remove the package, then optionally remove the PPA:
sudo apt remove smartgit
sudo add-apt-repository --remove ppa:eugenesan/ppa
Congratulations! You have successfully installed SmartGit. Thanks for using this tutorial for installing the SmartGit on the Linux Mint 22 system. For additional help or useful information, we recommend you check the official SmartGit website.