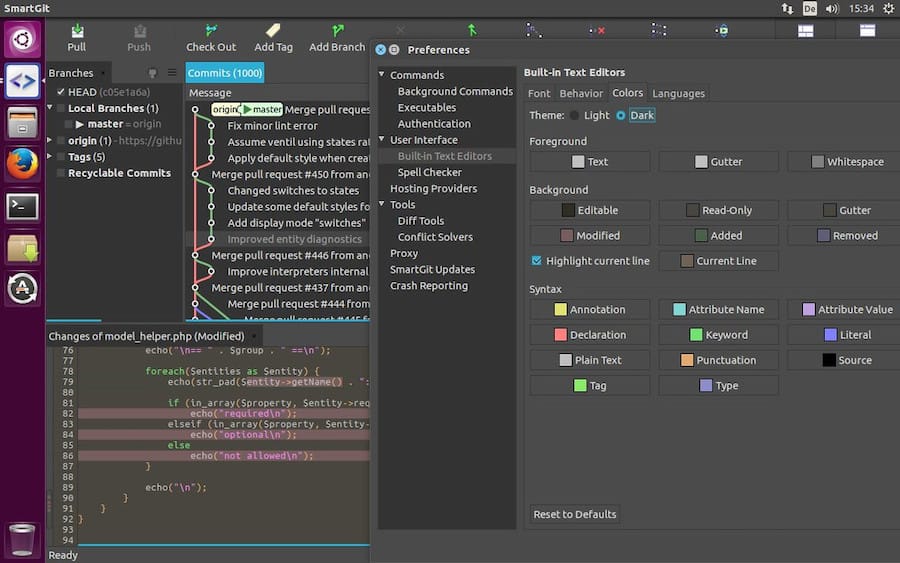
How To Install SmartGit on Ubuntu 24.04 LTS

In the ever-evolving world of software development, version control is paramount. For Ubuntu 24.04 users seeking a powerful, user-friendly Git client, SmartGit stands out as an excellent choice. This comprehensive guide will walk you through the process of installing SmartGit on Ubuntu 24.04, ensuring you have a robust tool for managing your Git repositories with ease.
What is SmartGit?
SmartGit is a versatile, cross-platform Git client that simplifies version control tasks for developers of all skill levels. It offers a graphical user interface (GUI) that makes complex Git operations more accessible, without sacrificing the power and flexibility of the command line.
Key features of SmartGit include:
- Intuitive repository management
- Visual commit history and diff views
- Integrated merge conflict resolution
- Support for GitHub, GitLab, and Bitbucket
- Built-in SSH client
SmartGit’s compatibility with Ubuntu 24.04 makes it an ideal choice for developers working in this environment. Its seamless integration with the operating system ensures a smooth workflow, allowing you to focus on your code rather than wrestling with version control complexities.
Prerequisites
Before we dive into the installation process, let’s ensure you have everything needed to successfully install and run SmartGit on Ubuntu 24.04:
- A computer running Ubuntu 24.04 LTS
- An active internet connection
- At least 250 MB of free disk space
- Java Runtime Environment (JRE) 11 or later
- Sudo privileges on your Ubuntu system
It’s always a good practice to back up your important data before installing new software. While SmartGit installation is generally safe, it’s better to be cautious, especially if you’re planning to use it with existing Git repositories.
Installation Methods
There are two primary methods to install SmartGit on Ubuntu 24.04:
- Using the official SmartGit repository
- Manual installation from a downloaded package
We’ll cover both methods in detail, allowing you to choose the one that best suits your needs and preferences.
Method 1: Installing SmartGit via Official Repository
Installing SmartGit through the official repository is the recommended method, as it simplifies the process and ensures you always have access to the latest updates.
Step 1: Add the SmartGit Repository
Open a terminal and run the following commands:
sudo add-apt-repository ppa:eugenesan/ppa
sudo apt update
Step 2: Install SmartGit
With the repository added, you can now install SmartGit using the apt package manager:
sudo apt install smartgitStep 3: Verify the Installation
Once the installation is complete, you can verify it by launching SmartGit from the application menu or by running:
smartgitIf SmartGit opens successfully, you’ve completed the installation via the official repository.
Method 2: Manual Installation
If you prefer more control over the installation process or if the repository method doesn’t work for you, you can opt for manual installation.
Step 1: Download SmartGit
Visit the official SmartGit website and download the latest .tar.gz package for Linux.
Step 2: Extract the Archive
Open a terminal, navigate to the directory containing the downloaded file, and extract it:
tar -xzf smartgit-linux-24_1_0.tar.gzReplace “24_1_0” with the version number of your downloaded package.
Step 3: Move to /opt Directory
Move the extracted folder to the /opt directory:
sudo mv smartgit /opt/Step 4: Create a Desktop Shortcut
Create a .desktop file for easy access:
echo "[Desktop Entry]
Version=1.0
Type=Application
Name=SmartGit
GenericName=Git Client
Comment=Graphical Git Client
Exec=/opt/smartgit/bin/smartgit.sh
Icon=/opt/smartgit/bin/smartgit-128.png
Terminal=false
Categories=Development;RevisionControl;
Keywords=git;svn;hg;mercurial;github;" | sudo tee /usr/share/applications/smartgit.desktop
Now, you should be able to find and launch SmartGit from your application menu.

Post-Installation Setup
After successfully installing SmartGit, it’s time to set it up for first use.
Initial Configuration
- Launch SmartGit for the first time.
- You’ll be prompted to accept the license agreement.
- Choose between a commercial or non-commercial license, depending on your usage.
- Set your name and email address for Git commits.
Connecting to Your Git Account
SmartGit supports integration with popular Git hosting services:
- Go to “Edit” > “Preferences” > “Hosting Providers”.
- Select your preferred service (e.g., GitHub, GitLab, Bitbucket).
- Follow the prompts to authenticate and connect your account.
Setting Up SSH Keys
If you use SSH for Git operations:
- Generate an SSH key pair if you haven’t already.
- In SmartGit, go to “Edit” > “Preferences” > “Authentication”.
- Add your SSH private key file.
Configuring SmartGit
Customize SmartGit to suit your workflow and preferences:
User Interface Customization
- Adjust the layout in “View” > “Layout”.
- Customize toolbars and menus in “Edit” > “Preferences” > “User Interface”.
Setting Up Preferences
Explore the “Preferences” menu to configure:
- Default repository directory
- Proxy settings (if required)
- External diff and merge tools
Configuring Git Settings
Adjust Git-specific settings:
- Go to “Edit” > “Preferences” > “Git”.
- Set up your preferred commit message template.
- Configure auto-fetch intervals.
Basic Usage of SmartGit
Now that SmartGit is installed and configured, let’s cover some basic operations:
Cloning a Repository
- Click “Repository” > “Clone”.
- Enter the repository URL.
- Choose the local directory for the clone.
- Click “Clone” to start the process.
Making Changes and Committing
- Open a repository from the “Repository” menu.
- Make changes to your files.
- Stage changes in the “Files” view.
- Enter a commit message and click “Commit”.
Pushing and Pulling Changes
- To push commits: Click “Push” in the toolbar.
- To pull changes: Click “Pull” in the toolbar.
Branching and Merging
- Create a new branch: “Branch” > “Add Branch”.
- Switch branches: Double-click on a branch in the “Branches” view.
- Merge branches: Right-click on a branch and select “Merge”.
Troubleshooting Common Issues
Even with a smooth installation, you might encounter some issues. Here are solutions to common problems:
Connection Problems
- Check your internet connection.
- Verify your SSH key or account credentials.
- Ensure your firewall isn’t blocking SmartGit.
Authentication Errors
- Re-enter your credentials in SmartGit’s settings.
- Check if your SSH key is correctly set up.
- Verify your access rights on the remote repository.
Performance Issues
- Increase SmartGit’s memory allocation in the smartgit.sh file.
- Optimize large repositories by using SmartGit’s “Optimize Repository” feature.
Updating SmartGit
Keeping SmartGit up-to-date ensures you have the latest features and security patches:
Checking for Updates
- Go to “Help” > “Check for Updates”.
- SmartGit will notify you if an update is available.
Performing the Update
- If an update is found, click “Download” to get the latest version.
- Follow the prompts to install the update.
- Restart SmartGit to apply the changes.
Uninstalling SmartGit
If you need to remove SmartGit from your Ubuntu 24.04 system:
For Repository Installation
sudo apt remove smartgit
sudo add-apt-repository --remove ppa:eugenesan/ppa
For Manual Installation
- Remove the SmartGit directory:
sudo rm -rf /opt/smartgit - Delete the desktop shortcut:
sudo rm /usr/share/applications/smartgit.desktop
Cleaning Up Residual Files
Remove configuration files in your home directory:
rm -rf ~/.config/smartgitAlternatives to SmartGit
While SmartGit is an excellent Git client, you might want to explore alternatives:
- GitKraken: A powerful, cross-platform Git client with a sleek interface.
- Sublime Merge: From the makers of Sublime Text, offering a fast and intuitive Git experience.
- GitCola: A lightweight, open-source Git client for Linux.
Each of these alternatives has its strengths, but SmartGit’s combination of features, performance, and Ubuntu compatibility makes it a top choice for many developers.
Congratulations! You have successfully installed SmartGit. Thanks for using this tutorial for installing the SmartGit on the Ubuntu 24.04 LTS system. For additional help or useful information, we recommend you check the official SmartGit website.