How To Install Snipe-IT on Ubuntu 22.04 LTS

In this tutorial, we will show you how to install Snipe-IT on Ubuntu 22.04 LTS. Snipe-IT, an open-source IT asset management tool, is a powerful solution for tracking the ownership, deployment process, and intricate details of all servers within an organization. It offers a comprehensive platform for managing hardware, software licenses, accessories, and consumables, making it an indispensable tool for IT departments.
This article assumes you have at least basic knowledge of Linux, know how to use the shell, and most importantly, you host your site on your own VPS. The installation is quite simple and assumes you are running in the root account, if not you may need to add ‘sudo‘ to the commands to get root privileges. I will show you the step-by-step installation of the Snipe-IT asset management tool on Ubuntu 22.04 (Jammy Jellyfish). You can follow the same instructions for Ubuntu 22.04 and any other Debian-based distribution like Linux Mint, Elementary OS, Pop!_OS, and more as well.
Prerequisites
- A server running one of the following operating systems: Ubuntu 22.04, 20.04, and any other Debian-based distribution like Linux Mint.
- SSH access to the server (or just open Terminal if you’re on a desktop).
- Basic knowledge of the Linux command-line interface (CLI). This guide assumes you’re comfortable with executing commands in a terminal.
- An active internet connection. You’ll need an internet connection to download the necessary packages and dependencies for Snipe-IT.
- A
non-root sudo useror access to theroot user. We recommend acting as anon-root sudo user, however, as you can harm your system if you’re not careful when acting as the root.
Install Snipe-IT on Ubuntu 22.04 LTS Jammy Jellyfish
Step 1. Before diving into the installation of Snipe-IT, it’s crucial to ensure your Ubuntu system is up-to-date. This can be achieved by running the following commands:
sudo apt update
sudo apt upgrade
Step 2. Installing Necessary Software.
Next, we need to install the Apache web server, PHP, and MySQL/MariaDB database server. These are essential components for running Snipe-IT.
To install Apache, use the following command:
sudo apt install apache2
For PHP and its necessary modules, use:
sudo apt install php libapache2-mod-php php-mbstring php-xmlrpc php-soap php-gd php-xml php-intl php-mysql php-cli php-ldap php-zip php-curl
Finally, install MySQL/MariaDB server with:
sudo apt install mysql-server
Step 3. Installing Snipe-IT on Ubuntu 22.04.
With the necessary software installed, we can now proceed to download Snipe-IT. We’ll use Git to clone the Snipe-IT repository from GitHub. If Git is not installed on your system, you can install it with:
sudo apt install git
Then, clone the Snipe-IT repository:
cd /var/www
sudo git clone https://github.com/snipe/snipe-it snipe-it
After downloading Snipe-IT, navigate to the Snipe-IT directory and copy the example environment file to create a new one:
cd /var/www/snipe-it
sudo cp .env.example .env
Step 4. Configuring Snipe-IT.
- Configuring Database Connection
Before we can run the Snipe-IT installer, we need to set up a new MySQL database and user. Access the MySQL shell with:
sudo mysql -u root -p
Then, create a new database and user:
CREATE DATABASE snipeit_data;
CREATE USER 'snipeit_user'@'localhost' IDENTIFIED BY 'your-strong-password';
GRANT ALL PRIVILEGES ON snipeit_data.* TO 'snipeit_user'@'localhost';
FLUSH PRIVILEGES;
EXIT;
Next, open the .env file and update the database details:
sudo nano .env
Find the following lines and replace them with your database details:
DB_DATABASE=snipeit_data
DB_USERNAME=snipeit_user
DB_PASSWORD=your-strong-password
- Setting Up the Application Key
To set up the application key, first install Composer, a tool for dependency management in PHP:
sudo apt install composer
Then, navigate to the Snipe-IT directory and install the dependencies:
cd /var/www/snipe-it
sudo composer install --no-dev --prefer-source
Finally, generate the application key:
sudo php artisan key:generate
- Configuring Mail Settings
Snipe-IT uses email for user invitations, notifications, and password resets. Therefore, it’s essential to configure the mail settings. Open the .env file and find the mail settings section:
sudo nano .env
Update the mail settings with your mail server details.
With Snipe-IT configured, we can now run the installer script. This script will set up the necessary tables in the database and seed them with initial data:
sudo php artisan migrate --force
To check the installation, restart the Apache server:
sudo systemctl restart apache2
Step 5. Accessing Snipe-IT Web Interface.
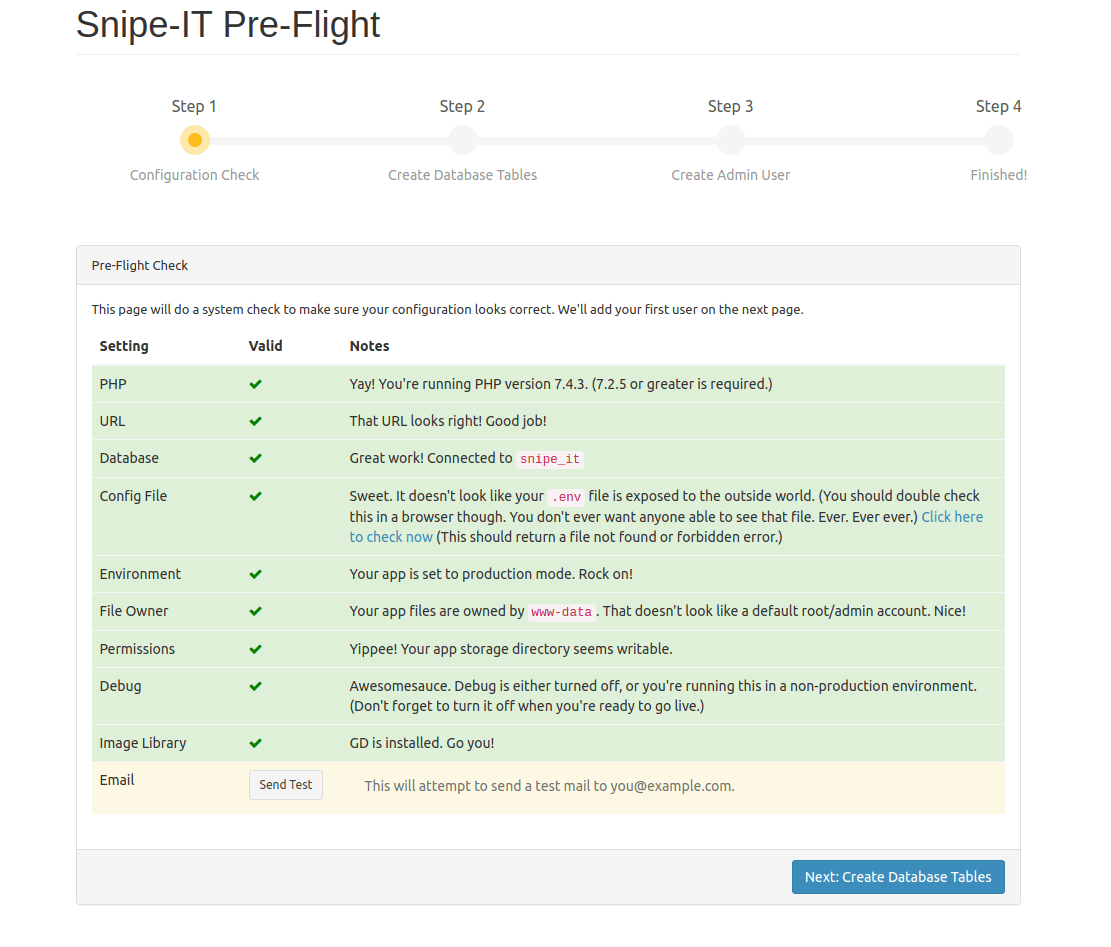
Now open a web browser and navigate to your server’s IP address or domain name. You should see the Snipe-IT setup page.

Congratulations! You have successfully installed Snipe-IT. Thanks for using this tutorial for installing the Snipe-IT on Ubuntu 22.04 LTS Jammy Jellyfish system. For additional help or useful information, we recommend you check the official Snipe-IT website.