In this tutorial, we will show you how to install Splunk on Ubuntu 20.04 LTS. For those of you who didn’t know, Splunk is the most used software technology platform for analyzing, searching, and monitoring system-generated log databases in real time. Splunk supports all major operating systems including Windows, Linux, and Mac OS. It is easily scalable, fully integrated, and supports both local and remote data sources.
This article assumes you have at least basic knowledge of Linux, know how to use the shell, and most importantly, you host your site on your own VPS. The installation is quite simple and assumes you are running in the root account, if not you may need to add ‘sudo‘ to the commands to get root privileges. I will show you the step-by-step installation of the Splunk data platform on Ubuntu 20.04 (Focal Fossa). You can follow the same instructions for Ubuntu 18.04, 16.04, and any other Debian-based distribution like Linux Mint.
Prerequisites
- A server running one of the following operating systems: Ubuntu 20.04, 18.04, 16.04, and any other Debian-based distribution like Linux Mint.
- It’s recommended that you use a fresh OS install to prevent any potential issues.
- A
non-root sudo useror access to theroot user. We recommend acting as anon-root sudo user, however, as you can harm your system if you’re not careful when acting as the root.
Install Splunk on Ubuntu 20.04 LTS Focal Fossa
Step 1. First, make sure that all your system packages are up-to-date by running the following apt commands in the terminal.
sudo apt update
sudo apt upgrade
sudo apt install apt-transport-https wget gnupg ca-certificates
Step 2. Installing Splunk on Ubuntu 20.04.
Now we run the following command to download the Splunk installer from the official page:
wget -O splunk-8.2.1-ddff1c41e5cf-linux-2.6-amd64.deb 'https://www.splunk.com/page/download_track?file=8.2.1/linux/splunk-8.2.1-ddff1c41e5cf-linux-2.6-amd64.deb&ac=&wget=true&name=wget&platform=Linux&architecture=x86_64&version=8.2.1&product=splunk&typed=release''
Once the download is completed, install the downloaded file with the following command:
sudo apt install ./splunk-*-amd64.deb
Then, run the script that will not only enable Splunk service at boot level but also let us set up login details- Admin user and its password:
sudo /opt/splunk/bin/splunk enable boot-start
After entering the above command, We will have to accept Splunk License Agreement. Scroll down pages by pressing Enter or Spacebar on Keyboard, At the end type y to agree on the Splunk License terms:
SPLUNK GENERAL TERMS (v1.2021)

Do you agree with this license? [y/n]: y
Step 4. Configure Firewall.
Now we have to open firewall port 8000:
sudo ufw allow 8000
Step 5. Accessing Spunk Web interface.
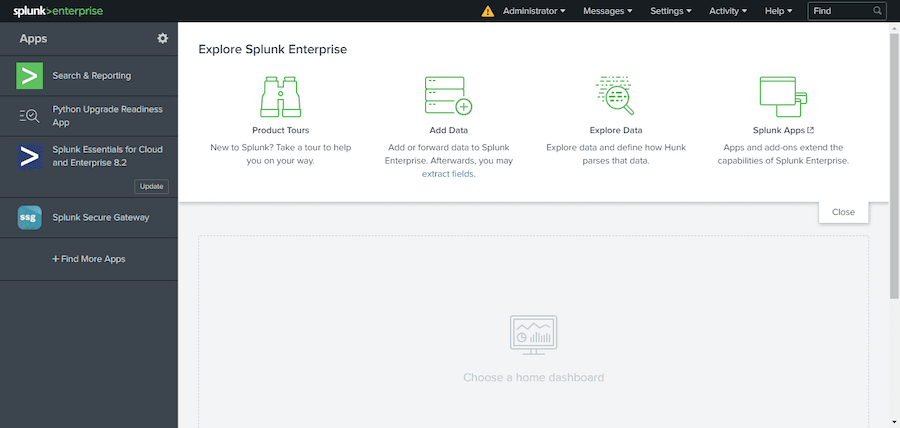
Once successfully installed, open your web browser and access the Splunk interface using the URL http://your-server-ip-address:8000. You should see the following screen:

Congratulations! You have successfully installed Splunk. Thanks for using this tutorial for installing the Splunk log analyzer tool on Ubuntu 20.04 LTS Focal Fossa system. For additional help or useful information, we recommend you check the official Splunk website.