How To Install Splunk on Ubuntu 24.04 LTS

Splunk is a powerful data analysis platform that enables organizations to collect, index, and analyze vast amounts of machine-generated data in real-time. It provides valuable insights into IT operations, security, and business analytics. Ubuntu 24.04 LTS, with its stability and reliability, serves as an ideal platform for installing Splunk. In this article, we will guide you through the process of installing Splunk on Ubuntu 24.04 LTS, ensuring a smooth and successful deployment.
What is Splunk?
Splunk is a software platform that allows you to search, monitor, and analyze machine-generated big data from various sources in real-time. It consists of key components such as the Forwarder, Indexer, and Search Head, which work together to collect, store, and retrieve data efficiently. Splunk is widely used for IT operations monitoring, security incident response, log management, and business analytics. Its ability to provide valuable insights from large volumes of data makes it an essential tool for organizations of all sizes.
Prerequisites for Installation
Before proceeding with the Splunk installation on Ubuntu 24.04 LTS, ensure that your system meets the following minimum requirements:
- Ubuntu 24.04 LTS operating system
- 2GB RAM
- 1 CPU
- SSH access with sudo privileges
- Firewall port 8000 open for web access
How to Download Splunk
To download Splunk, follow these steps:
- Visit the official Splunk website and create a free account.
- Log in to your account and navigate to the Downloads section.
- Select the appropriate Splunk version for your requirements (e.g., Splunk Enterprise).
- Choose the Linux installer package (.deb file) suitable for your Ubuntu 24.04 LTS system.
- Click on the download button to start the download process.

Alternatively, you can use the wget command to download Splunk directly from the command line:
wget -O splunk.deb "https://www.splunk.com/bin/splunk/DownloadActivityServlet?architecture=x86_64&platform=linux&version=8.2.6&product=splunk&filename=splunk-8.2.6-a6fe1ee8894b-linux-2.6-amd64.deb&wget=true"Installing Splunk on Ubuntu
Once you have downloaded the Splunk .deb file, follow these steps to install Splunk on your Ubuntu 24.04 LTS system:
- Open a terminal and navigate to the directory where the Splunk .deb file is located.
- Move the .deb file to the
/tmpdirectory using the following command:
sudo mv splunk-8.2.6-a6fe1ee8894b-linux-2.6-amd64.deb /tmp/- Change to the
/tmpdirectory:
cd /tmp- Install Splunk using the
dpkgcommand:
sudo dpkg -i splunk-8.2.6-a6fe1ee8894b-linux-2.6-amd64.deb- Set up Splunk to start automatically at boot:
sudo /opt/splunk/bin/splunk enable boot-start- Accept the Splunk Software License Agreement when prompted.
Starting Splunk for the First Time
After successfully installing Splunk, you need to start the Splunk services and perform the initial setup:
- Start the Splunk service using the following command:
sudo /opt/splunk/bin/splunk start- When prompted, create an administrator username and password for accessing the Splunk web interface.
- Verify that Splunk is running by checking the status:
sudo /opt/splunk/bin/splunk statusAfter starting Splunk, you can proceed with the initial configuration steps, such as setting up data inputs and configuring user roles and permissions.
Configuring Splunk
To ensure optimal performance and security, you should configure Splunk according to your specific requirements. Here are some basic configuration steps:
- Data Inputs: Configure data inputs to specify the sources from which Splunk should collect data, such as log files, network ports, or system metrics.
- Indexers and Search Heads: If you have a distributed Splunk deployment, configure indexers and search heads to distribute the data processing and searching load.
- User Roles and Permissions: Set up user roles and permissions to control access to Splunk features and data based on user responsibilities and security requirements.
Refer to the official Splunk documentation for detailed instructions on configuring Splunk to suit your specific use case.
Accessing the Splunk Web Interface
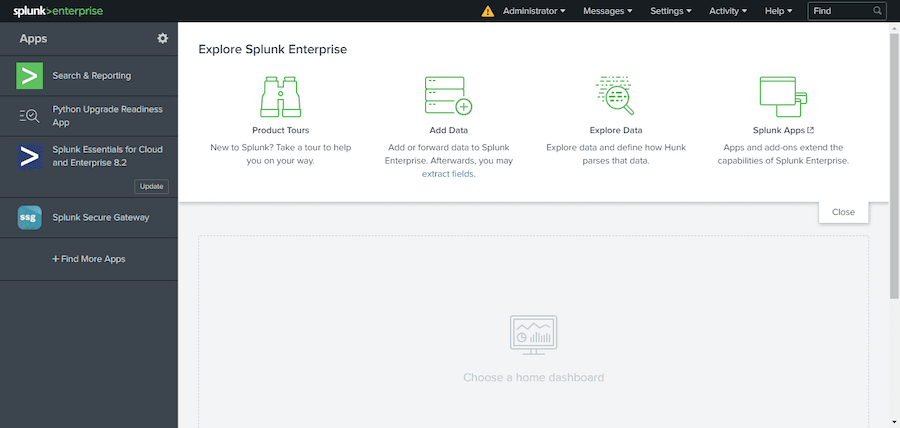
Once Splunk is installed and running, you can access the web interface to perform searches, view dashboards, and manage the system. Follow these steps:
- Open a web browser and enter the following URL:
http://<server_name>:8000Replace <server_name> with the hostname or IP address of your Ubuntu server running Splunk.
- Log in using the administrator username and password you created during the initial setup.
- Explore the Splunk web interface to perform searches, create dashboards, and configure additional settings.

Troubleshooting Common Issues
If you encounter any issues during the installation or while using Splunk, here are some common troubleshooting steps:
- Installation Errors: Double-check that you have met all the prerequisites and followed the installation steps correctly. Ensure that you have sufficient permissions and disk space.
- Web Interface Connectivity: Verify that the Splunk service is running and that the firewall allows access to port 8000. Check the Splunk logs for any error messages.
- Data Input Issues: Ensure that the data sources are properly configured and that Splunk has the necessary permissions to access them. Verify that the data is being indexed correctly.
If you continue to face issues, consult the official Splunk documentation, community forums, or reach out to Splunk support for further assistance.
Uninstalling Splunk
If you need to uninstall Splunk from your Ubuntu 24.04 LTS system, follow these steps:
- Stop the Splunk service:
sudo /opt/splunk/bin/splunk stop- Remove the Splunk package using the
dpkgcommand:
sudo dpkg -r splunk- Delete the Splunk directory:
sudo rm -rf /opt/splunk- Remove any Splunk-related user accounts and directories if necessary.
Congratulations! You have successfully installed Splunk. Thanks for using this tutorial for installing Splunk on Ubuntu 24.04 LTS system. For additional help or useful information, we recommend you check the official Splunk website.