How To Install SQLite on CentOS 9 Stream

In this tutorial, we will show you how to install SQLite on CentOS 9 Stream. For those of you who didn’t know, SQLite is a C-language library that implements a small, fast, self-contained, high-reliability, full-featured, SQL database engine. This makes it ideal for many mobile projects or those applications where we can easily move the database around.
This article assumes you have at least basic knowledge of Linux, know how to use the shell, and most importantly, you host your site on your own VPS. The installation is quite simple and assumes you are running in the root account, if not you may need to add ‘sudo‘ to the commands to get root privileges. I will show you the step-by-step installation of the SQLite database on CentOS 9 Stream.
Prerequisites
- A server running one of the following operating systems: CentOS 9 Stream.
- It’s recommended that you use a fresh OS install to prevent any potential issues.
- SSH access to the server (or just open Terminal if you’re on a desktop).
- A
non-root sudo useror access to theroot user. We recommend acting as anon-root sudo user, however, as you can harm your system if you’re not careful when acting as the root.
Install SQLite on CentOS 9 Stream
Step 1. First, let’s start by ensuring your system is up-to-date.
sudo dnf clean all
sudo dnf install epel-release
sudo dnf update
sudo dnf install make automake cmake gcc
Step 2. Installing SQLite on CentOS 9 Stream.
- Install SQLite via the default repository.
By default, SQLite is available on the CentOS 9 Stream base repository. Let’s install the latest version of SQLite using the following command below:
sudo dnf install sqlite3
Verify the build and version of SQLite:
sqlite3 --version
- Install SQLite from the official source.
Run the following command to download the latest version SQLite from the offficial page using wget command:
wget https://www.sqlite.org/2022/sqlite-autoconf-3390000.tar.gz
Next, extract the downloaded file:
tar xvfz sqlite-autoconf-3390000.tar.gz
sudo mv sqlite-autoconf-3390000 /opt/sqlite3
cd /opt/sqlite3
Finally, compile SQLite using following command below:
./configure --prefix=/usr
make -j 2
nproc
sudo make install
Once that’s complete, check the version, as of this writing, we installed 3.39.0:
sqlite3 --version
Step 3. Using SQLite on the CentOS 9 Stream.
To enter the SQLite command console, simply type the SQLite command. There you create a temporary database to start the work:
sqlite3
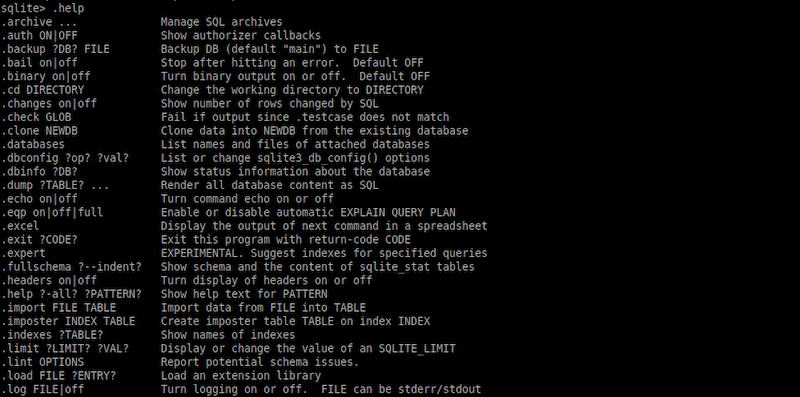
The next step I recommend is to show the SQLite help to know which commands we can apply:
.help

Congratulations! You have successfully installed SQLite. Thanks for using this tutorial to install the SQLite database on CentOS 9 Stream. For additional help or useful information, we recommend you check the official SQLite website.