How To Install Squid Proxy on AlmaLinux 10

Squid proxy server stands as one of the most robust and widely-deployed caching proxy solutions in enterprise environments. This comprehensive guide walks you through installing and configuring Squid proxy on AlmaLinux 10, providing enhanced web caching, access control, and network security for your infrastructure.
Whether you’re managing a corporate network, optimizing bandwidth usage, or implementing content filtering policies, Squid proxy delivers exceptional performance and flexibility. AlmaLinux 10’s stability and security features make it an ideal platform for deploying production-ready proxy services that can handle thousands of concurrent connections while maintaining optimal response times.
What is Squid Proxy Server?
Squid proxy operates as an intelligent intermediary between client devices and internet resources, offering comprehensive caching capabilities for HTTP, HTTPS, and FTP protocols. This powerful open-source solution reduces bandwidth consumption by storing frequently accessed content locally, dramatically improving response times for subsequent requests.
The proxy server architecture enables administrators to implement sophisticated access control policies, content filtering rules, and traffic monitoring capabilities. Squid’s advanced features include SSL bumping for HTTPS inspection, authentication integration with various directory services, and detailed logging mechanisms that provide valuable insights into network usage patterns.
Modern Squid implementations support hierarchical caching configurations, allowing multiple proxy servers to work together efficiently. This distributed approach ensures optimal performance across geographically dispersed locations while maintaining centralized policy management and consistent security enforcement.
Benefits of Squid Proxy on AlmaLinux 10
Deploying Squid proxy on AlmaLinux 10 delivers significant advantages for network infrastructure management. Bandwidth optimization represents the primary benefit, with caching mechanisms reducing external traffic by up to 40% in typical enterprise environments. This reduction translates directly into cost savings for organizations with metered internet connections.
Enhanced security emerges as another critical advantage. Squid proxy provides a security barrier between internal networks and external threats, enabling administrators to block malicious websites, filter content based on categories, and implement granular access controls. The proxy’s logging capabilities facilitate compliance reporting and security incident investigation.
Performance improvements become immediately apparent after implementation. Local cache storage eliminates repeated downloads of identical content, while connection pooling optimizes resource utilization. Users experience faster page load times, especially for frequently accessed websites and multimedia content.
AlmaLinux 10’s enterprise-grade stability ensures consistent proxy service availability, while its security-focused design provides a hardened foundation for critical network infrastructure components.
Prerequisites and System Requirements
AlmaLinux 10 System Requirements
Your AlmaLinux 10 server requires minimum 2GB RAM and 20GB available disk space for basic Squid proxy deployment. Production environments should allocate additional storage based on expected cache requirements, with 1GB cache storage supporting approximately 10,000 cached objects.
Ensure your system runs a fresh AlmaLinux 10 installation with all security updates applied. Root or sudo access remains essential for installation and configuration procedures. Network connectivity should provide stable internet access for package downloads and proxy functionality testing.
Network and Security Prerequisites
Plan your network topology carefully before installation. Squid proxy typically operates on port 3128, though administrators can configure alternative ports based on security policies. Consider firewall implications and ensure client devices can reach the proxy server through designated network paths.
Domain name configuration, while optional, simplifies client configuration and enables advanced features like SSL certificate management. Document your network addressing scheme and identify which client subnets require proxy access.
Required Packages and Dependencies
AlmaLinux 10 includes most necessary dependencies in the base installation. However, certain utility packages enhance management capabilities. The EPEL repository provides additional tools for monitoring and administration, though Squid installation doesn’t strictly require external repositories.
System Preparation and Initial Setup
System Updates and Package Management
Begin by updating your AlmaLinux 10 system to ensure all security patches and package dependencies are current:
sudo dnf update -y
sudo dnf install -y epel-release
sudo dnf install -y wget curl nano vim
These commands update the package database, install the EPEL repository for additional software packages, and add essential utilities for configuration management. The update process may require a system reboot if kernel updates are applied.
Verify system status after updates complete:
sudo systemctl status
hostnamectl
User Account Configuration
Create a dedicated non-root user for Squid proxy management to enhance security:
sudo useradd -m -s /bin/bash squidadmin
sudo usermod -aG wheel squidadmin
sudo passwd squidadmin
This approach follows security best practices by limiting root access requirements. The wheel group membership provides sudo privileges when necessary, while maintaining separation between system administration and proxy management tasks.
Configure sudo access for seamless proxy management:
sudo visudoAdd the following line to grant passwordless sudo for specific Squid-related commands:
squidadmin ALL=(ALL) NOPASSWD: /usr/bin/systemctl * squid, /usr/bin/firewall-cmdBasic Firewall Configuration
AlmaLinux 10 includes firewalld as the default firewall service. Verify firewall status and configure initial rules:
sudo systemctl status firewalld
sudo firewall-cmd --get-default-zone
sudo firewall-cmd --list-all
These commands display current firewall configuration and active rules. Document existing settings before making changes to ensure easy rollback if needed.
Squid Proxy Installation Process
Package Installation Methods
Install Squid proxy using the DNF package manager, which provides the most stable and secure installation method:
sudo dnf install -y squidThis command downloads and installs Squid proxy along with all required dependencies. The installation process typically completes within 2-3 minutes, depending on network connectivity and system performance.
Verify successful installation by checking the package status:
sudo dnf list installed | grep squid
sudo squid -v
The version command displays Squid version information and compiled features, confirming successful installation and available capabilities.
Service Management Setup
Configure Squid proxy to start automatically during system boot:
sudo systemctl enable squid
sudo systemctl start squid
sudo systemctl status squid
The enable command configures automatic startup, while start initiates the service immediately. Status verification ensures the service runs without errors and displays current operational status.
Monitor service logs for potential issues:
sudo journalctl -u squid -fThis command displays real-time log entries for troubleshooting and monitoring service health.
Initial Installation Verification
Confirm Squid proxy installation and basic functionality:
sudo ss -tlnp | grep :3128
sudo netstat -tlnp | grep squid
These commands verify that Squid listens on the default port 3128 and displays process information. Successful installation shows active listening sockets and associated process IDs.
Basic Squid Configuration
Understanding squid.conf Structure
The primary Squid configuration file resides at /etc/squid/squid.conf. This comprehensive configuration file contains hundreds of directives organized into logical sections covering access control, caching policies, and network settings.
Create a backup before making changes:
sudo cp /etc/squid/squid.conf /etc/squid/squid.conf.backup
sudo cp /etc/squid/squid.conf /etc/squid/squid.conf.original
Remove comments for easier navigation:
sudo grep -v '^#' /etc/squid/squid.conf | grep -v '^$' > /tmp/squid.clean
sudo cp /tmp/squid.clean /etc/squid/squid.conf.clean
This creates a clean configuration file showing only active directives, making customization and troubleshooting more manageable.
Essential Configuration Parameters
Edit the main configuration file to implement basic proxy functionality:
sudo nano /etc/squid/squid.confKey configuration directives include:
# HTTP port configuration
http_port 3128

# Access control for local network
acl localnet src 192.168.1.0/24
acl localnet src 10.0.0.0/8
acl localnet src 172.16.0.0/12

# Allow access from local networks
http_access allow localnet
http_access allow localhost

# Deny all other access
http_access deny all

# Cache directory configuration
cache_dir ufs /var/spool/squid 100 16 256

# Memory cache settings
cache_mem 256 MB
These directives establish basic proxy functionality with local network access and reasonable cache settings for small to medium deployments.
Default ACL Rules Analysis
Squid’s default configuration includes several pre-defined Access Control Lists (ACLs) that provide essential security:
- localnet: Defines local network ranges that receive proxy access
- localhost: Grants access to the proxy server itself
- Safe_ports: Specifies allowed destination ports for HTTP connections
- SSL_ports: Defines ports permitted for HTTPS CONNECT method
Review and modify these ACLs based on your network requirements:
sudo grep -E '^acl|^http_access' /etc/squid/squid.confThis command displays all ACL definitions and access rules in your current configuration.
Advanced Access Control Configuration
Custom ACL Creation
Implement sophisticated access control by creating custom ACLs for specific network segments:
sudo nano /etc/squid/squid.confAdd custom ACL definitions:
# Custom network ACLs
acl management_network src 192.168.10.0/24
acl development_network src 192.168.20.0/24
acl guest_network src 192.168.30.0/24

# Time-based ACLs
acl business_hours time MTWHF 08:00-18:00
acl weekend time SA 00:00-23:59
acl weekend time SU 00:00-23:59

# Content-based ACLs
acl blocked_sites dstdomain "/etc/squid/blocked_sites.txt"
acl social_media dstdomain .facebook.com .twitter.com .instagram.com

# Access rules
http_access allow management_network
http_access allow development_network business_hours
http_access deny guest_network social_media
http_access deny blocked_sites
Website Blocking and Content Filtering
Create a blocked sites file for comprehensive content filtering:
sudo nano /etc/squid/blocked_sites.txtAdd domains to block:
gambling.com
malware-site.com
inappropriate-content.com
.adult-content.com
The dot prefix blocks all subdomains of the specified domain. Implement category-based blocking using external blacklist services:
sudo wget -O /etc/squid/ad_block.txt "https://somefilter.org/ad_block.txt"Reference the external file in your Squid configuration:
acl ads dstdomain "/etc/squid/ad_block.txt"
http_access deny ads
Time-Based Access Controls
Implement sophisticated time-based restrictions for different user groups:
# Business hours access
acl staff_hours time MTWHF 07:00-19:00
acl lunch_break time MTWHF 12:00-13:00
acl evening_hours time MTWHF 19:00-23:59

# Different rules for different times
http_access allow management_network
http_access allow development_network staff_hours
http_access deny development_network social_media lunch_break
http_access allow guest_network evening_hours
This configuration provides flexible access control based on time periods, user groups, and content categories.
Authentication and Security Setup
Basic Authentication Implementation
Configure NCSA-style authentication for user-level access control:
sudo dnf install -y httpd-tools
sudo htpasswd -c /etc/squid/passwd user1
sudo htpasswd /etc/squid/passwd user2
Add authentication directives to squid.conf:
# Authentication program
auth_param basic program /usr/lib64/squid/basic_ncsa_auth /etc/squid/passwd
auth_param basic children 5
auth_param basic realm Squid Proxy Server
auth_param basic credentialsttl 2 hours

# Authentication ACL
acl authenticated proxy_auth REQUIRED

# Access rules requiring authentication
http_access allow authenticated localnet
http_access deny all
Set appropriate permissions on the password file:
sudo chown squid:squid /etc/squid/passwd
sudo chmod 640 /etc/squid/passwd
Advanced Security Features
Implement SSL certificate validation and enhanced security measures:
sudo mkdir -p /etc/squid/ssl_cert
sudo openssl req -new -newkey rsa:2048 -days 365 -nodes -x509 \
  -keyout /etc/squid/ssl_cert/squid.key \
  -out /etc/squid/ssl_cert/squid.crt
Configure SSL settings in squid.conf:
# SSL certificate configuration
sslcrtd_program /usr/lib64/squid/ssl_crtd -s /var/lib/squid/ssl_db -M 4MB
sslcrtd_children 8 startup=1 idle=1

# HTTPS inspection
https_port 3129 intercept ssl-bump \
  cert=/etc/squid/ssl_cert/squid.crt \
  key=/etc/squid/ssl_cert/squid.key

# SSL bump configuration
acl step1 at_step SslBump1
ssl_bump peek step1
ssl_bump bump all
Security Hardening Best Practices
Secure configuration files and limit service permissions:
sudo chmod 640 /etc/squid/squid.conf
sudo chown root:squid /etc/squid/squid.conf
sudo semanage fcontext -a -t squid_conf_t "/etc/squid/squid.conf"
sudo restorecon /etc/squid/squid.conf
Configure log rotation to prevent disk space issues:
sudo nano /etc/logrotate.d/squidAdd the following configuration:
/var/log/squid/*.log {
    daily
    rotate 7
    missingok
    notifempty
    sharedscripts
    postrotate
        /usr/bin/systemctl reload squid
    endscript
}
Firewall Configuration and Network Setup
Firewalld Service Configuration
Configure firewall rules to allow Squid proxy traffic:
sudo firewall-cmd --permanent --add-service=squid
sudo firewall-cmd --permanent --add-port=3128/tcp
sudo firewall-cmd --permanent --add-port=3129/tcp
sudo firewall-cmd --reload
Verify firewall configuration:
sudo firewall-cmd --list-services
sudo firewall-cmd --list-ports
sudo firewall-cmd --list-all
Create custom firewall zones for different network segments:
sudo firewall-cmd --permanent --new-zone=proxy-internal
sudo firewall-cmd --permanent --zone=proxy-internal --add-source=192.168.1.0/24
sudo firewall-cmd --permanent --zone=proxy-internal --add-service=squid
sudo firewall-cmd --reload
Network Interface Considerations
For multi-interface servers, configure Squid to listen on specific interfaces:
# Listen on specific interface
http_port 192.168.1.10:3128
https_port 192.168.1.10:3129 ssl-bump cert=/etc/squid/ssl_cert/squid.crt

# Outbound interface selection
tcp_outgoing_address 203.0.113.10
This configuration ensures Squid binds to internal interfaces while using a specific external interface for internet connections.
Testing and Verification
Basic Functionality Testing
Test proxy functionality using command-line tools:
# Test HTTP connectivity
curl -x localhost:3128 http://www.example.com

# Test HTTPS connectivity
curl -x localhost:3128 https://www.google.com

# Test proxy authentication
curl -x user1:password@localhost:3128 http://www.example.com
Monitor access logs during testing:
sudo tail -f /var/log/squid/access.logSuccessful tests display HTTP status codes and response times in the access log.
Performance Testing
Measure proxy performance and caching effectiveness:
# Install performance testing tools
sudo dnf install -y apache-bench

# Test concurrent connections
ab -n 1000 -c 10 -X localhost:3128 http://www.example.com/

# Monitor cache hit rates
sudo squidclient -h localhost -p 3128 mgr:5min
sudo squidclient -h localhost -p 3128 mgr:info
Cache hit rates above 20% indicate effective caching configuration for typical web browsing patterns.
Client Configuration Examples
Configure various client types to use the proxy:
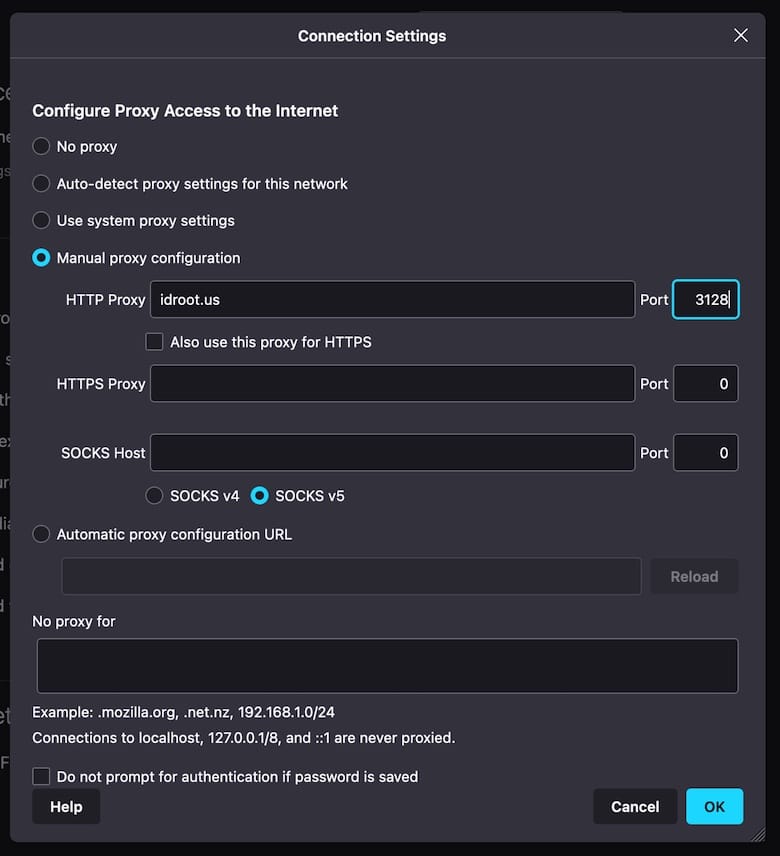
Web Browser Configuration:
- Open browser proxy settings
- Set HTTP Proxy:
your-server-ip:3128 - Set HTTPS Proxy:
your-server-ip:3128 - Test connectivity to verify configuration
System-wide Proxy (Linux):
export http_proxy=http://your-server-ip:3128
export https_proxy=http://your-server-ip:3128
export ftp_proxy=http://your-server-ip:3128
Add these exports to /etc/environment for persistent configuration.
Troubleshooting Common Issues
Installation and Service Issues
Service fails to start:
sudo journalctl -u squid --no-pager
sudo squid -k parse
sudo squid -z
The parse command checks configuration syntax, while -z initializes cache directories.
Permission errors:
sudo chown -R squid:squid /var/spool/squid
sudo chown -R squid:squid /var/log/squid
sudo semanage fcontext -a -t squid_cache_t "/var/spool/squid(/.*)?"
sudo restorecon -R /var/spool/squid
Configuration and Access Problems
ACL debugging:
sudo grep "DENIED" /var/log/squid/access.log
sudo squidclient -h localhost -p 3128 mgr:counters
Review denied requests to identify configuration issues. Enable debug logging temporarily:
debug_options ALL,1 33,2Authentication failures:
sudo tail -f /var/log/squid/cache.log | grep auth
sudo /usr/lib64/squid/basic_ncsa_auth /etc/squid/passwd
Test authentication manually by entering username and password.
Log Analysis and Monitoring
Implement comprehensive log monitoring:
# Install log analysis tools
sudo dnf install -y logwatch awstats

# Configure logwatch for Squid
sudo nano /etc/logwatch/conf/services/squid.conf
Set up automated log analysis with email reports:
# Daily log summary
0 6 * * * /usr/sbin/logwatch --service squid --mailto admin@example.com
Monitor real-time proxy activity:
sudo tail -f /var/log/squid/access.log | grep -E "(TCP_MISS|TCP_HIT)"Performance Optimization and Monitoring
Cache Configuration Optimization
Optimize cache settings for your environment:
# Memory cache optimization
cache_mem 512 MB
maximum_object_size_in_memory 512 KB
memory_replacement_policy heap GDSF

# Disk cache optimization
cache_dir ufs /var/spool/squid 2048 16 256
maximum_object_size 1 GB
minimum_object_size 0 KB

# Cache refresh patterns
refresh_pattern ^ftp:           1440    20%     10080
refresh_pattern ^gopher:        1440    0%      1440
refresh_pattern -i (/cgi-bin/|\?) 0     0%      0
refresh_pattern .               0       20%     4320
Monitor cache performance:
sudo squidclient -h localhost -p 3128 mgr:storedir
sudo du -sh /var/spool/squid
Performance Monitoring Tools
Implement monitoring with system tools:
# Install monitoring utilities
sudo dnf install -y htop iotop sysstat

# Monitor proxy performance
watch 'sudo squidclient -h localhost -p 3128 mgr:5min'
sudo sar -n DEV 1 10
Create performance monitoring scripts:
#!/bin/bash
# /usr/local/bin/squid-monitor.sh
DATE=$(date '+%Y-%m-%d %H:%M:%S')
STATS=$(sudo squidclient -h localhost -p 3128 mgr:info | grep -E "(client_http.requests|client_http.hits)")
echo "$DATE $STATS" >> /var/log/squid/performance.log
Schedule monitoring with cron:
*/5 * * * * /usr/local/bin/squid-monitor.shMaintenance and Best Practices
Regular Maintenance Tasks
Implement automated maintenance procedures:
#!/bin/bash
# /usr/local/bin/squid-maintenance.sh

# Rotate logs
sudo squid -k rotate

# Clean cache directories
sudo find /var/spool/squid -name "*.log" -mtime +7 -delete

# Update blocked sites list
sudo wget -O /etc/squid/blocked_sites_new.txt "https://blocklist.example.com/latest.txt"
sudo mv /etc/squid/blocked_sites_new.txt /etc/squid/blocked_sites.txt

# Reload configuration
sudo systemctl reload squid
Schedule weekly maintenance:
0 2 * * 0 /usr/local/bin/squid-maintenance.shProduction Environment Considerations
Configure high availability with backup proxy servers:
# Primary proxy configuration
cache_peer backup.proxy.local parent 3128 0 no-query backup
cache_peer_access backup.proxy.local allow all

# Health monitoring
heart_beat_interval 60 seconds
dead_peer_timeout 2 minutes
Implement backup and disaster recovery:
#!/bin/bash
# Backup Squid configuration
tar -czf /backup/squid-config-$(date +%Y%m%d).tar.gz \
  /etc/squid/ \
  /var/log/squid/ \
  /var/spool/squid/
Congratulations! You have successfully installed Squid. Thanks for using this tutorial for installing the Squid proxy server on your AlmaLinux OS 10 system. For additional help or useful information, we recommend you check the official Squid website.