How To Install Steam on Linux Mint 21

In this tutorial, we will show you how to install Steam on Linux Mint 21. For those of you who didn’t know, Steam, the popular digital distribution platform developed by Valve Corporation, has revolutionized the gaming industry by providing gamers with a vast library of games, social features, and seamless updates. With its growing support for Linux, Steam has become a go-to choice for Linux users who want to enjoy their favorite games on their preferred operating system. Linux Mint 21, a user-friendly and stable Linux distribution, is an excellent choice for both new and experienced Linux users.
This article assumes you have at least basic knowledge of Linux, know how to use the shell, and most importantly, you host your site on your own VPS. The installation is quite simple and assumes you are running in the root account, if not you may need to add ‘sudo‘ to the commands to get root privileges. I will show you the step-by-step installation of Steam on Linux Mint 21.
Prerequisites
- A server running one of the following operating systems: Linux Mint 21.
- It’s recommended that you use a fresh OS install to prevent any potential issues.
- SSH access to the server (or just open Terminal if you’re on a desktop).
- Steam requires a 64-bit processor and a minimum of 2 GB of RAM, although 4 GB or more is recommended for optimal performance.
- A
non-root sudo useror access to theroot user. We recommend acting as anon-root sudo user, however, as you can harm your system if you’re not careful when acting as the root.
Install Steam on Linux Mint 21 Vanessa
Step 1. To ensure a smooth installation process, it is crucial to update your Linux Mint 21 system to the latest version. Open the Terminal and run the following commands to update your system:
sudo apt update
sudo apt install software-properties-common apt-transport-https wget ca-certificates gnupg2
These commands will update the package list and upgrade any outdated packages to their latest versions.
Step 2. Enable Support for 32-bit Architecture.
To enable support for 32-bit architecture, which is essential for running certain Steam games, open the terminal and execute the following command:
sudo dpkg --add-architecture i386
Lastly, install the necessary dependencies by running:
sudo apt install libc6:i386 libgl1:i386 libnm0:i386 libxcb-xinerama0:i386 libgcc-s1:i386 libstdc++6:i386 libx11-6:i386 libasound2:i386 libudev1:i386 libdbus-1-3:i386 libxtst6:i386 libnm-glib4:i386 libnm-util2:i386 libcurl3-gnutls:i386
Step 3. Installing Steam on Linux Mint 21.
By default, Steam is not available on the Linux Mint 21 base repository. Now we add the Steam repository to your system using the following command:
echo deb [arch=amd64 signed-by=/usr/share/keyrings/steam.gpg] http://repo.steampowered.com/steam/ stable steam | sudo tee /etc/apt/sources.list.d/steam.list
Next, import the GPG key:
curl -s http://repo.steampowered.com/steam/archive/stable/steam.gpg | sudo tee /usr/share/keyrings/steam.gpg > /dev/null
Now start by updating the packages list and install Steam stable by using the command below:
sudo apt update
sudo apt-get install \
  libgl1-mesa-dri:amd64 \
  libgl1-mesa-dri:i386 \
  libgl1-mesa-glx:amd64 \
  libgl1-mesa-glx:i386 \
  steam-launcher
Step 3. Accessing Steam on Linux Mint 21.
Once we finish with the installation, we will find Steam in the Mint menu, in the Internet section or you can launch it through the terminal with the help of the command shown below:
steam
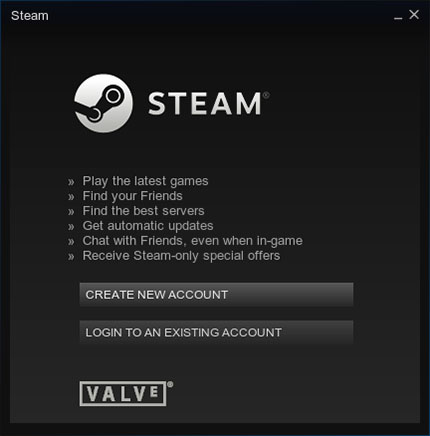
As you are running for the first time, you’ll be asked to either create an account or log in to an existing account. It will also ask for agreeing to terms and conditions.

Congratulations! You have successfully installed Steam. Thanks for using this tutorial for installing the latest version of Steam on the Linux Mint system. For additional help or useful information, we recommend you check the official Steam website.