How To Install Symfony Framework on AlmaLinux 9

The Symfony Framework is a powerful and flexible PHP framework that facilitates the development of web applications. Known for its robustness and scalability, Symfony is an excellent choice for developers looking to create high-performance applications. This article provides a comprehensive guide on installing the Symfony Framework on AlmaLinux 9, ensuring that you have all the necessary tools and configurations to get started.
Prerequisites
Before diving into the installation process, it’s essential to ensure that your environment meets the necessary prerequisites:
- AlmaLinux 9 Server: You should have access to a server running AlmaLinux 9. This can be a local machine or a cloud-based server.
- User Privileges: Ensure you have a non-root user with sudo privileges to execute administrative commands.
- System Update: Keeping your system updated is crucial for security and compatibility. Always start by updating your system packages.
Step 1: Update System Packages
Updating your system packages ensures that you have the latest security patches and software versions. Run the following command:
sudo dnf update -yThis command will refresh your package manager and install any available updates. It’s advisable to perform this step regularly to maintain system integrity.
Step 2: Install PHP
The Symfony Framework requires PHP, specifically version 8.2 or higher. To install PHP along with essential extensions, execute the following commands:
sudo dnf install php php-cli php-common php-xml libpcre3 git zip unzip -yThis command installs PHP and several commonly used extensions that are crucial for running Symfony applications. After installation, verify that PHP is correctly installed by checking its version:
php -vYou should see output indicating the installed PHP version. If there are any issues, consider reinstalling or checking your repository settings.
Necessary PHP Extensions
In addition to the basic installation, consider installing other useful PHP extensions such as:
- php-mbstring: Required for multibyte string handling.
- php-xml: Essential for XML parsing.
- php-intl: Provides internationalization support.
- php-curl: Allows you to make HTTP requests.
Step 3: Install Composer
Composer is a dependency manager for PHP that simplifies managing libraries and packages. To install Composer, follow these steps:
curl -sS https://getcomposer.org/installer | phpThis command downloads Composer’s installer script and executes it. Next, move Composer to a global location so you can use it from anywhere:
sudo mv composer.phar /usr/local/bin/composerYou can verify the installation by checking the version of Composer:
composer -VStep 4: Install Symfony CLI
The Symfony CLI tool simplifies various tasks related to Symfony projects. To install it, run the following command:
wget https://get.symfony.com/cli/installer -O - | bashThis command downloads and installs the Symfony CLI tool into your home directory. To make it accessible globally, add it to your PATH variable by editing your shell configuration file (e.g., ~/.bashrc or ~/.bash_profile):
export PATH="$HOME/.symfony*/bin:$PATH"source ~/.bashrcYou can confirm that Symfony CLI is installed correctly by running:
symfony -vStep 5: Check System Requirements
Before creating a new project, it’s essential to check if your system meets all requirements for running Symfony applications. Use the following command:
symfony check:reqThis command will evaluate your system configuration and report any missing components or issues. Address any highlighted problems before proceeding.
Step 6: Create a New Symfony Project
You are now ready to create a new Symfony project. Use the following command to create a new web application project called “my_project”:
symfony new my_project --webappThe `--webapp` option sets up a skeleton application tailored for web development. Navigate into your project directory after creation:
cd my_projectStep 7: Start the Local Web Server
Your Symfony project is now set up! You can start the built-in local web server with this command:
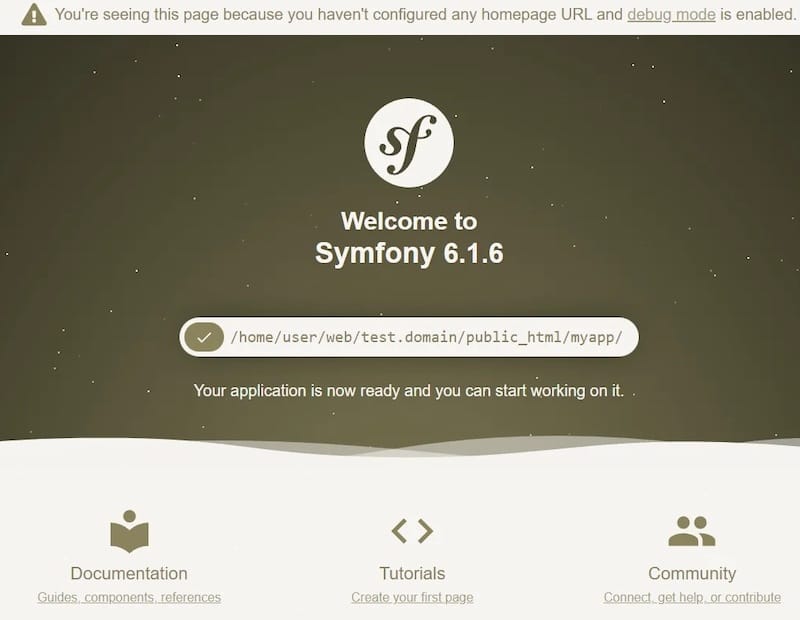
symfony server:startThis will start the server at `http://localhost:8000`. Open this URL in your web browser to view your new Symfony application.

Step 8: Install and Configure Database
Many web applications require a database for data storage. You can choose between MySQL or PostgreSQL based on your requirements.
Installing MySQL
To install MySQL on AlmaLinux 9, execute:
sudo dnf install mysql-server -y
After installation, start the MySQL service:
sudo systemctl start mysqld
sudo systemctl enable mysqld
Secure your MySQL installation by running:
sudo mysql_secure_installation
Follow the prompts to set up root password policies and remove test databases.
Creating a Database for Symfony
Log into MySQL:
mysql -u root -p
Create a new database for your Symfony application:
CREATE DATABASE my_project_db;
Grant privileges:
GRANT ALL PRIVILEGES ON my_project_db.* TO 'your_username'@'localhost' IDENTIFIED BY 'your_password';
FLUSH PRIVILEGES;
EXIT;
Step 9: Configure Nginx or Apache
A web server is necessary for serving your application in production. You can choose either Nginx or Apache based on preference.
Nginx Configuration
If you opt for Nginx, install it using:
sudo dnf install nginx -yCreate an Nginx configuration file in `/etc/nginx/conf.d/` called `my_project.conf` with the following content:
server {
     listen 80;
     server_name example.com; # Replace with your domain name or IP address

     root /path/to/my_project/public; # Adjust path accordingly

     index index.php;

     location / {
         try_files $uri $uri/ /index.php$is_args$args;
     }

     location ~ \.php$ {
         include fastcgi_params;
         fastcgi_pass unix:/var/run/php-fpm/www.sock; # Adjust if using different setup
         fastcgi_index index.php;
         fastcgi_param SCRIPT_FILENAME $document_root$fastcgi_script_name;
     }
}
Test Nginx configuration and restart the service:
sudo nginx -t
sudo systemctl restart nginx
Apache Configuration
If you prefer Apache, install it using:
sudo dnf install httpd -yCreate an Apache configuration file in `/etc/httpd/conf.d/` called `my_project.conf` with similar content adjusted for Apache syntax:
nano /etc/httpd/conf.d/my_project.conf<VirtualHost *:80> ServerName example.com DocumentRoot /path/to/my_project/public <Directory /path/to/my_project/public> AllowOverride All Require all granted </Directory> ErrorLog logs/my_project-error.log CustomLog logs/my_project-access.log combined </VirtualHost>
Test Apache configuration and restart the service:
sudo apachectl configtest
sudo systemctl restart httpd
Congratulations! You have successfully installed Symfony. Thanks for using this tutorial for installing the Symfony Framework on your AlmaLinux 9 system. For additional help or useful information, we recommend you check the official Symfony website.