How To Install Taiga on Ubuntu 22.04 LTS

In this tutorial, we will show you how to install Taiga on Ubuntu 22.04 LTS. Taiga is a versatile, open-source project management tool designed to cater to multi-functional teams. With its intuitive interface and robust features, Taiga simplifies the process of project management, making it an ideal choice for teams of all sizes.
This article assumes you have at least basic knowledge of Linux, know how to use the shell, and most importantly, you host your site on your own VPS. The installation is quite simple and assumes you are running in the root account, if not you may need to add ‘sudo‘ to the commands to get root privileges. I will show you the step-by-step installation of the Taiga project management on Ubuntu 22.04. You can follow the same instructions for Ubuntu 22.04 and any other Debian-based distribution like Linux Mint, Elementary OS, Pop!_OS, and more as well.
Prerequisites
- A server running one of the following operating systems: Ubuntu 22.04, 20.04, and any other Debian-based distribution like Linux Mint.
- It’s recommended that you use a fresh OS install to prevent any potential issues.
- Access the terminal on your Ubuntu system, where we’ll execute the commands for a seamless Taiga installation.
- An active internet connection. You’ll need an internet connection to download the necessary packages and dependencies for Taiga.
- A
non-root sudo useror access to theroot user. We recommend acting as anon-root sudo user, however, as you can harm your system if you’re not careful when acting as the root.
Install Taiga on Ubuntu 22.04 LTS Jammy Jellyfish
Step 1. Before diving into the installation process, it’s crucial to ensure your system is up-to-date. Open your terminal and enter the following commands to update and upgrade your system packages:
sudo apt update
sudo apt upgrade
Next, install the necessary dependencies. Taiga requires Git, PIP, and virtualenv. Use the following commands to install these dependencies:
sudo apt install git
sudo apt install python3-pip
pip install virtualenv
Step 2. Installing Nginx.
Taiga operates with the Nginx web server. If you haven’t installed Nginx on your system, use the following command:
sudo apt install nginx
Once the installation is complete, start the Nginx service with this command:
sudo systemctl start nginx
Step 3. Installing Node.js.
Taiga’s frontend requires Node.js. To install Node.js, use the following commands:
sudo apt install nodejs
sudo apt install npm
Verify the installation by checking the version of Node.js:
nodejs -v
Step 4. Installing PostgreSQL.
Taiga uses PostgreSQL as its database. Install PostgreSQL using the following command:
sudo apt install postgresql postgresql-contrib
Once installed, create a new PostgreSQL user and database for Taiga:
sudo -u postgres createuser taiga
sudo -u postgres createdb taiga -O taiga
Step 5. Installing Taiga on Ubuntu 22.04.
Now that the prerequisites are in place, it’s time to install Taiga. First, clone the Taiga repository from GitHub:
git clone https://github.com/kaleidos-ventures/taiga-back
Navigate to the taiga directory and create a new Python virtual environment:
cd taiga-back
virtualenv -p python3.8 .env
Activate the virtual environment and install the required Python packages:
source .env/bin/activate
pip install -r requirements.txt
Next, copy the sample settings/local.py file and modify it to match your configuration:
cp settings/local.py.example settings/local.py
Now, migrate the database and load the initial data:
python manage.py migrate
python manage.py loaddata initial_user
python manage.py loaddata initial_project_templates
python manage.py compilemessages
python manage.py collectstatic --noinput
For the frontend, clone the Taiga frontend repository and install the required Node.js packages:
git clone https://github.com/kaleidos-ventures/taiga-front.git
cd taiga-front
npm install
Copy the sample conf.json file and modify it to match your configuration:
cp dist/conf.example.json dist/conf.json
Step 6. Configuring Nginx for Taiga.
To make Taiga accessible via a web browser, configure Nginx to serve the Taiga frontend. Create a new Nginx server block file:
sudo nano /etc/nginx/sites-available/taiga
In this file, add the following server block, replacing server_name with your domain name or IP address:
server {
    listen 80;
    server_name _;
    large_client_header_buffers 4 32k;
    client_max_body_size 50M;
    charset utf-8;

    access_log /var/log/nginx.access.log;

    include /etc/nginx/mime.types;
    default_type application/octet-stream;

    location / {
        root /home/taiga/taiga-front-dist/dist/;
        try_files $uri $uri/ /index.html;
    }

    location /api {
        proxy_set_header Host $http_host;
        proxy_set_header X-Real-IP $remote_addr;
        proxy_set_header X-Scheme $scheme;
        proxy_set_header X-Forwarded-Proto $scheme;
        proxy_set_header X-Forwarded-For $proxy_add_x_forwarded_for;
        proxy_pass http://127.0.0.1:8001/api;
        proxy_redirect off;
    }

    location /admin {
        proxy_set_header Host $http_host;
        proxy_set_header X-Real-IP $remote_addr;
        proxy_set_header X-Scheme $scheme;
        proxy_set_header X-Forwarded-Proto $scheme;
        proxy_set_header X-Forwarded-For $proxy_add_x_forwarded_for;
        proxy_pass http://127.0.0.1:8001/admin;
        proxy_redirect off;
    }

    location /static {
        alias /home/taiga/taiga-back/static;
    }

    location /media {
        alias /home/taiga/taiga-back/media;
    }
}
Enable the new server block by creating a symbolic link to the sites-enabled directory:
sudo ln -s /etc/nginx/sites-available/taiga /etc/nginx/sites-enabled/
sudo systemctl restart nginx
Step 7. Creating a Superuser for Taiga.
To manage your Taiga instance, create a superuser account. Run the following command and follow the prompts to create a new superuser:
python manage.py createsuperuser
Step 8. Accessing Taiga Web UI.
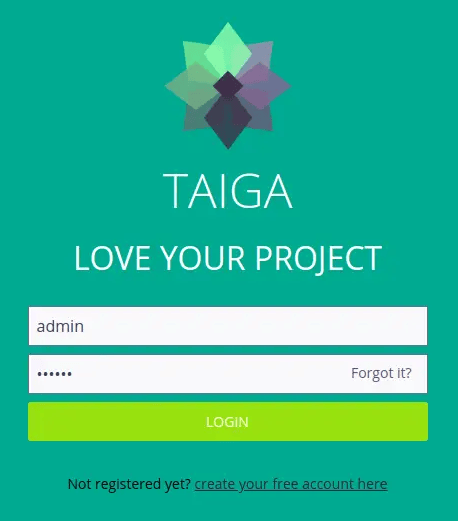
You can now access your Taiga instance by opening a web browser and navigating to your server’s IP address or domain name. Log in with the superuser credentials you created earlier.

Congratulations! You have successfully installed Taiga. Thanks for using this tutorial for installing the Taiga project management tool on the Ubuntu system. For additional help or useful information, we recommend you check the official Taiga website.