How To Install Timeshift on Debian 12

In this tutorial, we will show you how to install Timeshift on Debian 12. In the ever-evolving world of technology, ensuring the stability and security of your digital assets is paramount. System backups and restoration are the foundation of this stability, acting as a safety net against unexpected data loss or system failures. In this comprehensive guide, we will delve into the world of Timeshift – a powerful tool that simplifies the creation and restoration of system snapshots on Debian Linux.
This article assumes you have at least basic knowledge of Linux, know how to use the shell, and most importantly, you host your site on your own VPS. The installation is quite simple and assumes you are running in the root account, if not you may need to add ‘sudo‘ to the commands to get root privileges. I will show you the step-by-step installation of the Timeshift on a Debian 12 (Bookworm).
Features and Benefits of Timeshift
Timeshift isn’t just another backup tool; it’s a system administrator’s best friend. Its robust features include:
- Full System Snapshots: Timeshift creates snapshots of the entire system, including configurations, settings, and user data.
- Incremental Backups: It uses an incremental backup method, saving space by only storing changes between snapshots.
- Snapshot Scheduling: Automate the snapshot creation process with scheduled backups to ensure consistent data protection.
- Ease of Restoration: Timeshift makes restoring your system to a previous state a breeze, reducing downtime and frustration.
- Snapshot Management: You can manage, delete, and customize snapshots to optimize storage utilization.
Prerequisites
- A server running one of the following operating systems: Debian 12 (Bookworm).
- It’s recommended that you use a fresh OS install to prevent any potential issues.
- SSH access to the server (or just open Terminal if you’re on a desktop).
- An active internet connection. You’ll need an internet connection to download the necessary packages and dependencies for Timeshift.
- A
non-root sudo useror access to theroot user. We recommend acting as anon-root sudo user, however, as you can harm your system if you’re not careful when acting as the root.
Install Timeshift on Debian 12 Bookworm
Step 1. Before we install any software, it’s important to make sure your system is up to date by running the following apt commands in the terminal:
sudo apt update
This command will refresh the repository, allowing you to install the latest versions of software packages.
Step 2. Installing Timeshift on Debian 12.
With your repositories updated, proceed to install Timeshift. Type the following command in the terminal:
sudo apt install timeshift
Confirm the installation by entering ‘Y‘ and pressing Enter. Debian’s APT package manager will fetch the necessary files and dependencies for installation.
Step 3. Launching Timeshift on Debian.
Once installation is complete, locate Timeshift in the application menu. Simply search for “Timeshift” and click on the icon to launch the application.

Step 4. Configuring Timeshift.
Configuring Timeshift optimally is key to a successful backup strategy. Let’s explore how to tailor Timeshift’s settings to suit your requirements.
- Backup Settings:
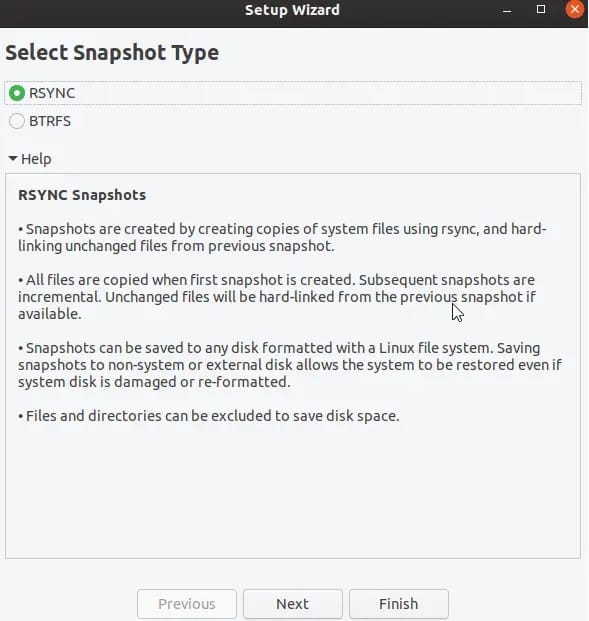
- Snapshot Type: Choose between ‘Rsync’ and ‘BTRFS’ snapshot modes based on your filesystem preference.
- Snapshot Levels: Determine which directories to include in the snapshot, such as the root filesystem or user-specific folders.
- Snapshot Location: Select the destination for storing snapshots, considering available storage space.
- Frequency and Scheduling:
- Manual Snapshots: Create snapshots manually as needed from the Timeshift application.
- Scheduled Snapshots: Automate the process by configuring scheduled backups. Open the terminal and enter:
sudo timeshift --create --schedule
This command sets up a scheduled backup, ensuring your system remains protected at regular intervals.
- Creating and Managing Snapshots:
Creating snapshots is the essence of Timeshift’s functionality. Let’s explore how to create, manage, and restore snapshots with ease.
- Manual Snapshot Creation:
- Open Timeshift from the application menu.
- Click “Create” to initiate a new snapshot.
- Add a meaningful description to identify the snapshot.
- Choose the snapshot type (Rsync or BTRFS).
- Select the snapshot level based on your desired backup scope.
- Click “Create” to generate the snapshot.
- Automated Snapshot Management:
- Regularly review and manage snapshots to prevent excessive storage consumption.
- Open Timeshift and select “Settings.”
- Adjust the snapshot levels and retention settings to maintain an optimal snapshot history.
- Restoring Your System:
Restoring your system to a previous state becomes effortless when using Timeshift. Whether you’re facing software conflicts or system errors, Timeshift’s restoration capabilities can save the day.
- Manual Restoration:
- Open Timeshift and click “Restore” to access the list of available snapshots.
- Select the snapshot you want to restore.
- Choose the restored location (original location or custom).
- Confirm your choices and initiate the restoration process.
- Command-Line Restoration:
In the terminal, enter the command:
sudo timeshift --restore
Step 5. Troubleshooting and Common Issues.
As with any software, Timeshift might encounter hiccups along the way. Here are some common issues and troubleshooting steps:
1. Insufficient Disk Space: If you receive an error about insufficient disk space during snapshot creation, ensure your selected snapshot location has ample storage. You might need to clear space or choose a different location.
2. Snapshot Creation Failure: In case snapshot creation fails, run Timeshift from the terminal with administrative privileges using:
sudo timeshift --create
3. BTRFS-Specific Issues: If using the BTRFS snapshot mode, ensure your filesystem supports it, and consider seeking assistance from the Debian community or Timeshift documentation.
Congratulations! You have successfully installed Timeshift. Thanks for using this tutorial for installing the latest version of Timeshift on Debian 12 Bookworm. For additional help or useful information, we recommend you check the official Timeshift website.