How To Install Ubuntu Cleaner on Ubuntu 24.04 LTS

Ubuntu Cleaner is an essential tool for maintaining a clean and optimized Ubuntu system. As a user of Ubuntu 24.04 LTS, it’s crucial to keep your system running smoothly by removing unnecessary files, caches, and old kernels. In this comprehensive guide, we’ll walk you through the step-by-step process of installing Ubuntu Cleaner on your Ubuntu 24.04 LTS system, providing you with the knowledge and tools to enhance your system’s performance and protect your privacy.
Understanding Ubuntu Cleaner
Ubuntu Cleaner is a powerful system maintenance and optimization tool that evolved from the popular Ubuntu Tweak utility. It offers a range of features designed to help users clean up their Ubuntu systems, including removing unnecessary caches, deleting old kernel versions, and freeing up valuable disk space. By utilizing Ubuntu Cleaner, you can significantly improve your system’s performance, ensuring a faster and more responsive experience. Additionally, Ubuntu Cleaner helps enhance your privacy by removing private data and traces of your activities, giving you peace of mind while using your Ubuntu 24.04 LTS system.
Prerequisites for Installation
Before proceeding with the installation of Ubuntu Cleaner on your Ubuntu 24.04 LTS system, it’s essential to ensure that your system meets the necessary requirements. Ubuntu 24.04 LTS is a stable and reliable operating system, and Ubuntu Cleaner is fully compatible with this version. To install Ubuntu Cleaner, you’ll need to have root or sudo access to your system, allowing you to execute commands with administrative privileges. It’s also recommended to start with a fresh installation of Ubuntu 24.04 LTS to minimize potential conflicts and ensure a smooth installation process.
Step-by-Step Installation Guide
Updating System Packages
Before installing Ubuntu Cleaner, it’s crucial to update your system packages to ensure you have the latest versions and security patches. Open a terminal and run the following commands:
sudo apt update
sudo apt upgrade
These commands will refresh the package list and upgrade any outdated packages to their latest versions, providing a stable foundation for installing Ubuntu Cleaner.
Installing via PPA (Personal Package Archive)
The easiest and most straightforward method to install Ubuntu Cleaner on Ubuntu 24.04 LTS is by using a PPA (Personal Package Archive). PPAs are repositories that contain software packages not included in the official Ubuntu repositories. To install Ubuntu Cleaner via PPA, follow these steps:
1. Install the software-properties-common package, which is required for adding PPAs:
sudo apt install software-properties-common2. Add the Ubuntu Cleaner PPA to your system:
sudo add-apt-repository ppa:gerardpuig/ppa3. Update the package list to include the newly added PPA:
sudo apt update4. Install Ubuntu Cleaner using the following command:
sudo apt install ubuntu-cleanerBy following these steps, you’ll have Ubuntu Cleaner installed on your Ubuntu 24.04 LTS system, ready to optimize and clean your system.
Alternative Installation from Source Code
In some cases, you may prefer to install Ubuntu Cleaner from its source code. This method is useful if you want to use the latest development version or if the PPA is not available for your system. To install Ubuntu Cleaner from source code, follow these steps:
1. Install the required packages and dependencies:
sudo apt install git python3-dev python3-setuptools python3-distutils-extra python3-pil python3-pil.imagetk2. Clone the Ubuntu Cleaner repository from GitHub:
git clone https://github.com/gerardpuig/ubuntu-cleaner.git3. Navigate to the cloned directory:
cd ubuntu-cleaner4. Run the installation command:
sudo python3 setup.py installThis alternative installation method provides flexibility for users who prefer to compile and install software from source code.
Verifying Installation
After completing the installation process, it’s essential to verify that Ubuntu Cleaner is installed correctly on your Ubuntu 24.04 LTS system. To check the installation, open a terminal and run the following command:
ubuntu-cleaner --versionIf Ubuntu Cleaner is installed correctly, the command will display the version number of the installed package. This confirmation ensures that you can proceed with using Ubuntu Cleaner to optimize and clean your system.
Using Ubuntu Cleaner
With Ubuntu Cleaner installed on your Ubuntu 24.04 LTS system, you can now take advantage of its powerful features to maintain a clean and optimized system. To launch Ubuntu Cleaner, you can either search for it in the application menu or run the following command in the terminal:
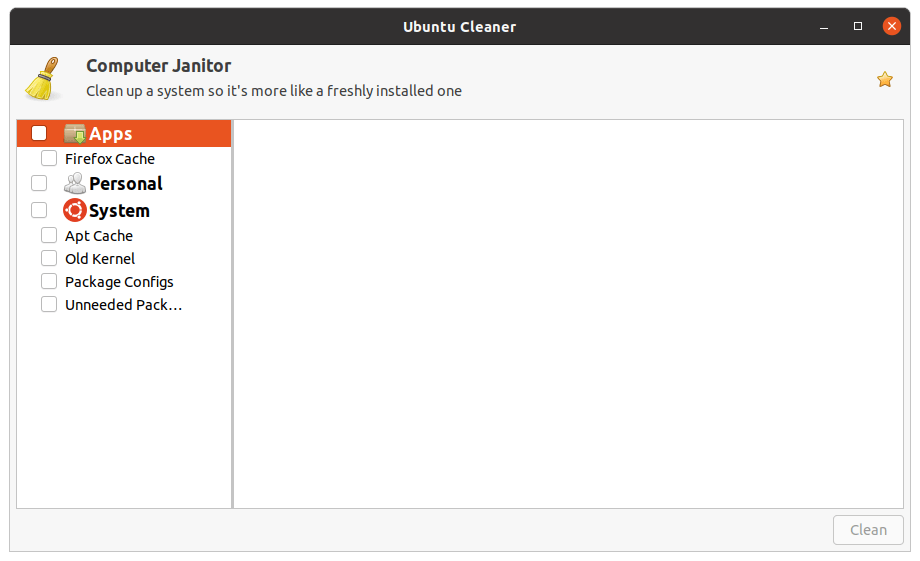
ubuntu-cleanerUpon launching Ubuntu Cleaner, you’ll be greeted with a user-friendly interface that provides access to various cleaning and optimization tools. The main functionalities of Ubuntu Cleaner include cleaning system caches, removing old kernel versions, and freeing up disk space by deleting unnecessary files. By regularly using these features, you can ensure that your Ubuntu 24.04 LTS system remains fast, efficient, and clutter-free.

Troubleshooting Common Issues
While the installation process of Ubuntu Cleaner is generally straightforward, you may encounter some common issues. If you experience any errors during the installation, double-check that you have followed the steps correctly and have the necessary permissions to execute the commands. If you encounter any dependency issues, ensure that you have installed all the required packages and dependencies listed in the installation guide.
Congratulations! You have successfully installed Ubuntu Cleaner. Thanks for using this tutorial for installing the Ubuntu Cleaner on Ubuntu 24.04 LTS system. For additional help or useful information, we recommend you check the official Ubuntu Cleaner website.