How To Install Umami Analytics on Debian 12

In this tutorial, we will show you how to install Umami Analytics on Debian 12. In the era of data-driven decision-making, having a reliable analytics tool is crucial for understanding user behavior on your website. Umami Analytics is a self-hosted, open-source web analytics solution that provides a privacy-focused alternative to traditional analytics platforms like Google Analytics. This guide will walk you through the entire process of installing Umami Analytics on a Debian 12 server, ensuring you have all the necessary prerequisites and configurations in place for a successful setup.
Prerequisites
Before diving into the installation process, ensure you have the following prerequisites:
- A server running Debian 12.
- A non-root user with sudo privileges.
- A fully qualified domain name (FQDN) pointing to your server, such as
umami.example.com. - Access to the command line interface (CLI) of your server.
Additionally, it’s recommended to have a basic understanding of Linux command-line operations and web server management.
1. Configure the Firewall
The first step is to configure the firewall on your Debian 12 server. Debian comes with UFW (Uncomplicated Firewall) by default. To check if UFW is active, run:
sudo ufw statusIf UFW is inactive, enable it and allow necessary ports:
sudo ufw allow OpenSSH
sudo ufw allow http
sudo ufw allow https
sudo ufw enable
After enabling the firewall, verify its status again:
sudo ufw status2. Install Required Software
2.1 Install Git
Git is required to clone Umami’s official repository. Install Git by executing:
sudo apt install gitVerify the installation by checking the Git version:
git --version2.2 Install Node.js
Umami is a JavaScript application that runs on Node.js. To install Node.js, we will use Nodesource’s installer. Execute the following commands to install Node.js version 18 or newer:
curl -fsSL https://deb.nodesource.com/setup_18.x | sudo -E bash -
sudo apt install -y nodejs
Verify the installation of Node.js:
node --version2.3 Install MariaDB Server
Debian 12 does not ship with MySQL by default; hence, we will use MariaDB as an alternative. Execute the following command to install MariaDB:
sudo apt install mariadb-serverCheck the installed version of MariaDB:
mysql --version2.4 Install Yarn Package Manager
You will also need Yarn, a package manager for Node.js applications. Install Yarn using npm:
sudo npm install -g yarn3. Download and Configure Umami Analytics
3.1 Clone Umami Repository
Now that all required software is installed, clone Umami’s GitHub repository:
git clone https://github.com/umami-software/umami.git
cd umami
3.2 Install Dependencies
Navigate into the cloned directory and install all necessary dependencies:
yarn install3.3 Set Up Database for Umami
You need to create a database for Umami in MariaDB. First, log into the MariaDB shell:
sudo mysqlCreate a new database and user for Umami:
CREATE DATABASE umami;
CREATE USER 'umamiuser'@'localhost' IDENTIFIED BY 'YourPassword';
GRANT ALL PRIVILEGES ON umami.* TO 'umamiuser'@'localhost';
FLUSH PRIVILEGES;
EXIT;
This creates a new database named umami, along with a user umamiuser. Replace YourPassword with a strong password of your choice.
3.4 Configure Environment Variables
Create a `.env` file in the Umami directory to store environment variables:
touch .env
nano .env
Add the following configuration to your `.env` file:
DATABSE_URL=mysql://umamiuser:YourPassword@localhost:3306/umami
APP_SECRET=your_app_secret_here
DISABLE_TELEMETRY=1
TRACKER_SCRIPT_NAME=custom
This configuration sets up Umami to connect to your MariaDB database.
4. Running Umami Analytics
4.1 Build and Start Umami Application
You can now build and start the application using Yarn:
yarn build
yarn start
The application will run on port 3000 by default.
4.2 Accessing Umami Dashboard
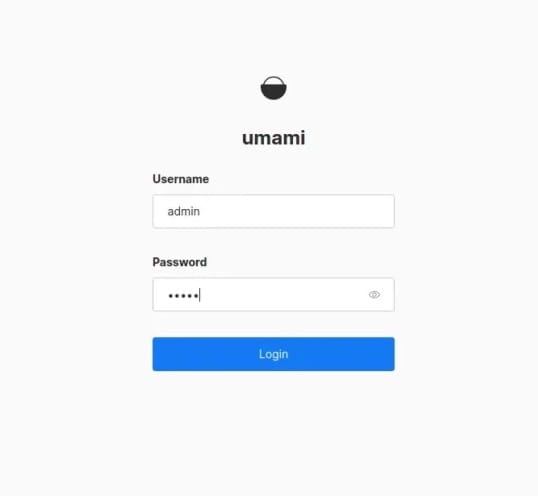
You can access Umami’s dashboard by opening your web browser and navigating to `http://your_domain_or_ip:3000` . Log in using default credentials (username: `admin` , password: `umami` ). Make sure to change this password after your first login.

5. Setting Up Nginx as a Reverse Proxy (Optional)
5.1 Install Nginx Web Server
If you prefer accessing Umami via standard HTTP/S ports (80/443), you can set up Nginx as a reverse proxy.
sudo apt install nginx
systemctl start nginx
systemctl enable nginx
5.2 Configure Nginx for Umami
Create an Nginx configuration file for Umami:
sudo nano /etc/nginx/sites-available/umami.conf
Add the following configuration:
server {
    listen 80;
    server_name umami.example.com; # Replace with your domain

    location / {
        proxy_pass http://localhost:3000;
        proxy_http_version 1.1;
        proxy_set_header Upgrade $http_upgrade;
        proxy_set_header Connection 'upgrade';
        proxy_set_header Host $host;
        proxy_cache_bypass $http_upgrade;
    }
}
5.3 Enable Nginx Configuration
Create a symbolic link to enable this configuration:
sudo ln -s /etc/nginx/sites-available/umami.conf /etc/nginx/sites-enabled/
nginx -t # Test Nginx configuration for errors
sudo systemctl restart nginx # Restart Nginx service
6. Securing Umami with SSL (Optional)
6.1 Install Certbot for SSL Certificates
You can secure your site using Let’s Encrypt SSL certificates via Certbot.
sudo apt install certbot python3-certbot-nginx
sudo certbot --nginx -d umami.example.com # Replace with your domain
7. Troubleshooting Tips
- If you cannot access the dashboard, ensure that firewall rules are correctly set up and that Nginx is configured properly.
- If you encounter issues while starting Umami, check logs in the terminal where you started it or look for logs in the
/var/log/nginx/error.log. - If data isn’t being tracked correctly, ensure that the tracking script is added correctly to your website.
- If you experience performance issues, consider optimizing your server resources or reviewing database performance settings.
- If you’re behind a load balancer or proxy, ensure that client IP addresses are forwarded correctly.
Congratulations! You have successfully installed Umami Analytics. Thanks for using this tutorial for installing the Umami modern analytics platform on Debian 12 “Bookworm”. For additional help or useful information, we recommend you check the official Umami website.