How To Install Uptime Kuma on Ubuntu 24.04 LTS

In this tutorial, we will show you how to install Uptime Kuma on Ubuntu 24.04 LTS. In today’s digital landscape, monitoring the uptime and performance of your servers and websites is crucial. Enter Uptime Kuma, a powerful, self-hosted monitoring tool that provides real-time status updates, notifications, and detailed reports. This guide will walk you through the process of installing Uptime Kuma on Ubuntu 24.04, ensuring you have a robust monitoring solution at your fingertips.
Uptime Kuma has gained popularity among system administrators and website owners due to its user-friendly interface and comprehensive feature set. By following this step-by-step tutorial, you’ll be able to set up your own instance of Uptime Kuma and start monitoring your digital assets with ease.
Prerequisites
Before we dive into the installation process, let’s ensure you have everything you need to successfully set up Uptime Kuma on your Ubuntu 24.04 system:
- A server running Ubuntu 24.04 LTS
- SSH access with root or sudo privileges
- Basic familiarity with the Linux command line
- A domain name pointing to your server (optional, but recommended for secure access)
Additionally, we’ll be installing the following software during the process:
- Node.js (version 14 or newer)
- NPM (Node Package Manager)
- Git
- PM2 (Process Manager)
With these prerequisites in place, let’s begin the installation process.
Step 1: Updating the System
As with any new installation, it’s crucial to start with an up-to-date system. This ensures compatibility and security. Open your terminal and run the following command:
sudo apt update && sudo apt upgrade -yThis command updates the package lists and upgrades all installed packages to their latest versions. The ‘-y’ flag automatically answers “yes” to any prompts, streamlining the process.
Step 2: Installing Node.js and NPM
Uptime Kuma is built on Node.js, so we need to install Node.js and its package manager, NPM. We’ll use the NodeSource repository to ensure we get the latest LTS (Long Term Support) version.
First, add the NodeSource repository:
curl -fsSL https://deb.nodesource.com/setup_lts.x | sudo -E bash -This command downloads and executes the NodeSource setup script, which adds the appropriate repository to your system.
Next, install Node.js and NPM:
sudo apt-get install -y nodejsTo verify the installation, check the versions of Node.js and NPM:
node -v && npm -vYou should see the version numbers displayed in your terminal. If you encounter any issues, ensure that your system meets the minimum requirements and that the NodeSource repository was added successfully.
Step 3: Installing Git
Git is essential for cloning the Uptime Kuma repository. Install it using the following command:
sudo apt install git -yThis command installs Git on your Ubuntu system. The ‘-y’ flag automatically confirms the installation, saving you an extra step.
Step 4: Cloning Uptime Kuma Repository
With Git installed, we can now clone the Uptime Kuma repository from GitHub. Run the following commands:
git clone https://github.com/louislam/uptime-kuma.git
cd uptime-kuma
These commands clone the Uptime Kuma repository into a new directory named ‘uptime-kuma’ and then navigate into that directory. If the cloning process is slow, it might be due to network issues or GitHub being temporarily slow. You can try again later if needed.
Step 5: Setting Up Uptime Kuma
Now that we have the Uptime Kuma files on our system, it’s time to set it up. Run the following command:
npm run setupThis command initiates the setup process, which includes:
- Installing all necessary dependencies
- Compiling the frontend assets
- Setting up the initial configuration
The setup process may take several minutes, depending on your system’s performance and internet connection speed. Be patient and allow it to complete without interruption.
Step 6: Installing PM2 for Process Management
PM2 is a process manager for Node.js applications that helps keep your app running continuously. Install PM2 globally using NPM:
sudo npm install pm2 -gOnce PM2 is installed, you can start Uptime Kuma as a managed process:
pm2 start server/server.js --name uptime-kumaThis command starts the Uptime Kuma server and assigns it the name “uptime-kuma” in PM2’s process list.
To ensure Uptime Kuma starts automatically on system boot, run:
pm2 startup systemd && pm2 saveThese commands create a systemd service for PM2 and save the current process list, ensuring Uptime Kuma restarts automatically if your server reboots.
Step 7: Configuring a Reverse Proxy with Nginx (Optional)
While Uptime Kuma can run on its own, setting up a reverse proxy with Nginx provides additional benefits such as SSL termination and the ability to host multiple applications on the same server.
First, install Nginx:
sudo apt install nginx -yNext, create a new Nginx configuration file for Uptime Kuma:
sudo nano /etc/nginx/sites-available/uptime-kumaAdd the following configuration, replacing ‘your-domain.com‘ with your actual domain:
server {
    listen 80;
    server_name your-domain.com;

    location / {
        proxy_pass http://localhost:3001;
        proxy_http_version 1.1;
        proxy_set_header Upgrade $http_upgrade;
        proxy_set_header Connection 'upgrade';
        proxy_set_header Host $host;
    }
}
Save the file and exit the editor. Then, create a symbolic link to enable the site:
sudo ln -s /etc/nginx/sites-available/uptime-kuma /etc/nginx/sites-enabled/Finally, test the Nginx configuration and restart the service:
sudo nginx -t && sudo systemctl restart nginxIf you encounter any issues with the Nginx configuration, double-check the syntax in the configuration file and ensure that Uptime Kuma is running on port 3001.
Step 8: Securing with Let’s Encrypt SSL Certificate (Optional)
To secure your Uptime Kuma instance with HTTPS, you can use Let’s Encrypt to obtain a free SSL certificate. First, install Certbot:
sudo apt install certbot python3-certbot-nginx -yThen, obtain an SSL certificate for your domain:
sudo certbot --nginx -d yourdomain.comFollow the prompts to complete the certificate installation. Certbot will automatically modify your Nginx configuration to use the new SSL certificate.
To ensure your certificate renews automatically, Certbot adds a renewal job to the system’s crontab. You can test the renewal process with:
sudo certbot renew --dry-runIf you encounter any issues with SSL configuration, check the Certbot logs and ensure your domain’s DNS is correctly configured.
Accessing Uptime Kuma Dashboard
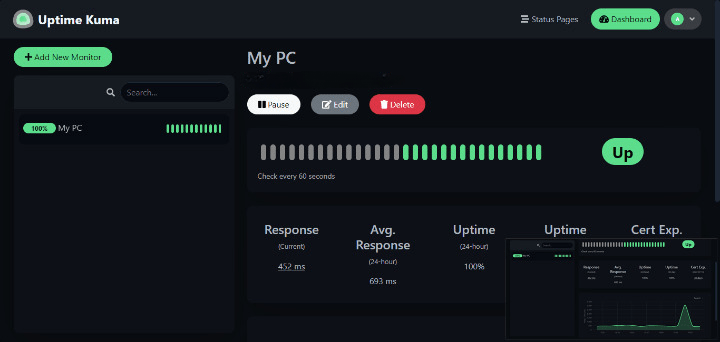
With the installation complete, it’s time to access your Uptime Kuma dashboard. Open your web browser and navigate to:
http://your-domain.com(if you’re not using SSL)https://your-domain.com(if you’ve set up SSL with Let’s Encrypt)
If you haven’t set up a domain, you can access Uptime Kuma using your server’s IP address: http://your_server_ip:3001

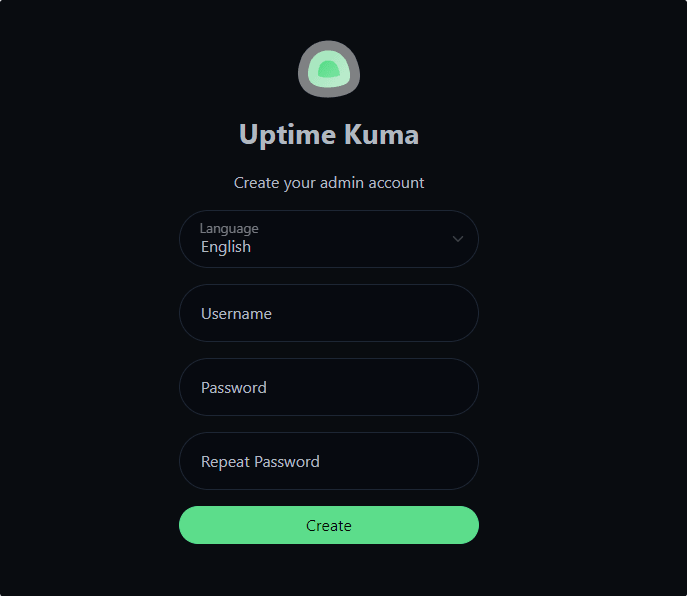
Upon your first visit, you’ll be prompted to create an admin user account. Follow the on-screen instructions to set up your credentials and complete the initial configuration.

Troubleshooting Tips
If you encounter any issues during the installation or while accessing Uptime Kuma, try these troubleshooting steps:
- Check the Uptime Kuma logs:
pm2 logs uptime-kuma - Ensure all required ports are open in your firewall
- Verify that Node.js and NPM are correctly installed
- Restart the Uptime Kuma process:
pm2 restart uptime-kuma - Check Nginx error logs:
sudo tail -f /var/log/nginx/error.log
Congratulations! You have successfully installed Uptime Kuma. Thanks for using this tutorial for installing the Uptime Kuma monitoring tool on Ubuntu 24.04 LTS system. For additional help or useful information, we recommend you check the official Uptime Kuma website.