How To Install Ventoy on AlmaLinux 9

In the world of Linux, having a reliable method for creating multiboot USB drives is essential for system administrators, developers, and tech enthusiasts alike. Ventoy is an innovative tool that simplifies this process, allowing users to create bootable USB drives that can hold multiple ISO files without the need for repeated formatting. This article will guide you through the step-by-step process of installing Ventoy on AlmaLinux 9, ensuring you have a seamless experience.
What is Ventoy?
Ventoy is an open-source tool designed to create bootable USB drives effortlessly. Unlike traditional methods that require formatting the USB drive for each new ISO file, Ventoy allows users to simply copy ISO files onto the USB drive. This feature not only saves time but also makes it easy to manage multiple operating systems or recovery tools in one place.
Key features of Ventoy include:
- Supports Multiple ISO Files: Users can store multiple ISO images on a single USB drive and select which one to boot at startup.
- No Need to Format: There’s no need to reformat the USB drive every time you want to add or change an ISO file.
- Compatibility: Ventoy works with a wide range of operating systems, including various Linux distributions and Windows.
The benefits of using Ventoy are clear: it streamlines the process of creating bootable drives and enhances flexibility when working with different systems.
Prerequisites for Installing Ventoy on AlmaLinux 9
Before diving into the installation process, ensure your system meets the following prerequisites:
-
- System Requirements: A computer running AlmaLinux 9 with internet access.
- Necessary Packages: Ensure you have essential packages installed such as
tar,gzip, andsudo. You can install any missing packages using:
sudo dnf install tar gzip- Prepare Your USB Drive: Backup any important data on your USB drive, as the installation process will erase all existing data.
Downloading Ventoy
The first step in installing Ventoy is downloading the latest version from its official website. Follow these steps:
-
- Open your terminal and navigate to the official Ventoy GitHub releases page using a web browser.
- Select the latest release version and download the tar.gz file. You can use the following command in your terminal (replace accordingly):
wget https://github.com/ventoy/Ventoy/releases/download/v1.0.99/ventoy-1.0.99-linux.tar.gz-
- Once downloaded, verify the integrity of the file by checking its checksum. This step ensures that the file has not been tampered with. You can find checksum values on the same release page.
- Extract the downloaded package using:
tar -zxvf ventoy-1.0.99-linux.tar.gzInstalling Ventoy on AlmaLinux 9
The installation of Ventoy involves executing a script that sets up your USB drive. This can be done via terminal commands. Here’s how:
Using Terminal
1. Open your terminal and navigate to the extracted directory:
cd ventoy-1.0.99-linux2. Identify your USB device by running:
lsblkThis command lists all block devices connected to your system. Look for your USB drive (it will typically be listed as /dev/sdX, where X is a letter representing your device).
3. Run the installation script with root privileges (replace /dev/sdX with your actual USB device identifier):
sudo sh Ventoy2Disk.sh -i /dev/sdXThis command initializes Ventoy on your selected USB drive. You will see prompts confirming that all data will be erased; confirm by typing ‘y’ and pressing Enter.
Using GUI (if applicable)
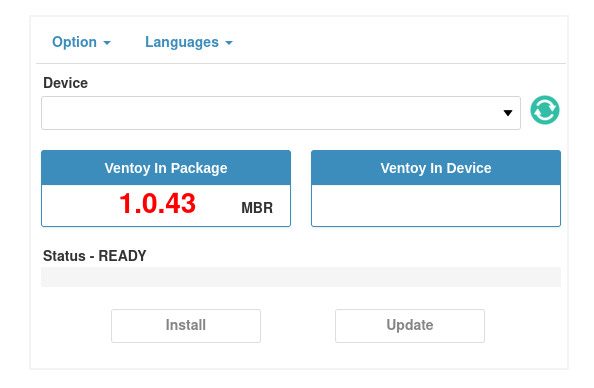
If you prefer a graphical interface, some distributions may offer GUI tools for installing Ventoy. Check if there’s an application available in your software center or use a third-party tool like GParted to format and partition your USB drive before using the terminal method above.

Configuring Ventoy After Installation
Once installed, it’s time to configure Ventoy by adding ISO files to your USB drive:
- Understanding Partition Layout: After installation, Ventoy creates two partitions: one for its boot files and another for storing ISO images.
- Add ISO Files: Simply mount your USB drive and copy ISO files directly into the second partition (usually labeled as “Ventoy”). You can also create subdirectories for better organization, such as “Linux” or “Windows” folders.
- Create Bootable ISOs: Ensure that the ISO files you are adding are bootable images; otherwise, they won’t work when selected during boot.
Booting from the Ventoy USB Drive
The next step is booting from your newly created Ventoy USB drive. Follow these instructions based on your system’s firmware settings:
- Bios Settings: Restart your computer and enter BIOS/UEFI settings (usually by pressing F2, F10, or DEL during startup). Change the boot order to prioritize USB devices.
- Selecting ISO Files: Once you boot from the USB drive, you’ll see a menu displaying all available ISO files. Use arrow keys to select the desired ISO and press Enter to boot from it.
- Troubleshooting Boot Issues: If you encounter issues booting from certain ISOs, ensure they are compatible with UEFI or Legacy BIOS modes based on your system configuration.
Troubleshooting Common Issues
If you run into problems during installation or usage, here are some common issues and their solutions:
- Error Selecting Device: If you accidentally select the wrong device during installation, it could lead to data loss on another drive. Always double-check using
lsblk. - No Boot Menu Appears: If no menu shows up when booting from USB, ensure that you have copied valid ISO files and that they are located in the correct partition.
- Ineffective Booting of Certain ISOs: If specific ISOs do not boot correctly, check their compatibility with Ventoy or consider updating Ventoy itself as newer versions may support more images.
- Error Messages During Boot: If error messages appear while trying to boot an image, consult documentation specific to that OS or check forums for known issues related to that particular ISO file.
Congratulations! You have successfully installed Ventoy. Thanks for using this tutorial for installing the Ventoy bootable USB drive on the AlmaLinux 9 system. For additional help or useful information, we recommend you check the Ventoy website.