How To Install Visual Studio Code on CentOS Stream 9

Visual Studio Code (VS Code) has become an indispensable tool for developers across various programming languages and platforms. Its lightweight yet powerful features make it a go-to choice for coding, debugging, and version control. For CentOS Stream 9 users, installing VS Code can significantly enhance their development environment. This comprehensive guide will walk you through multiple methods to install Visual Studio Code on CentOS Stream 9, ensuring you can choose the approach that best suits your needs.
Prerequisites
Before we dive into the installation process, let’s ensure you have everything needed to successfully install VS Code on your CentOS Stream 9 system:
- System Requirements: CentOS Stream 9 installed and updated to the latest version
- Root Access: You’ll need sudo privileges or root access to install packages
- Internet Connection: A stable internet connection is required to download packages
- Terminal Access: Familiarity with basic terminal commands is helpful
Additionally, ensure your system is up-to-date by running:
sudo dnf update -yMethod 1: Installing VS Code using RPM Package
The RPM (Red Hat Package Manager) method is straightforward and suitable for most users. Here’s how to proceed:
1. Downloading the RPM Package
First, navigate to the official Visual Studio Code website and download the latest RPM package:
wget https://code.visualstudio.com/sha/download?build=stable&os=linux-rpm-x64 -O vscode.rpm2. Installing the RPM Package
Once the download is complete, install the package using the following command:
sudo dnf install ./vscode.rpmThe system will prompt you to confirm the installation. Type ‘y’ and press Enter to proceed.
3. Verifying the Installation
After the installation completes, verify that VS Code has been installed correctly by running:
code --versionThis command should display the version number of VS Code, confirming a successful installation.
Method 2: Installing VS Code using YUM Repository
Using the YUM repository allows for easier updates and management of VS Code. Follow these steps:
1. Adding the Microsoft YUM Repository
First, import the Microsoft GPG key:
sudo rpm --import https://packages.microsoft.com/keys/microsoft.ascNext, add the Microsoft Visual Studio Code repository:
sudo tee /etc/yum.repos.d/vscode.repo <<EOF
[code]
name=Visual Studio Code
baseurl=https://packages.microsoft.com/yumrepos/vscode
enabled=1
gpgcheck=1
gpgkey=https://packages.microsoft.com/keys/microsoft.asc
EOF
2. Installing VS Code via YUM
With the repository added, install VS Code using dnf:
sudo dnf install code3. Updating VS Code
To update VS Code in the future, simply run:
sudo dnf update codeMethod 3: Installing VS Code using Snap
Snap packages offer another convenient way to install and manage applications on CentOS Stream 9.
1. Installing Snap on CentOS Stream 9
First, enable the EPEL repository:
sudo dnf install epel-releaseThen, install Snap:
sudo dnf install snapdEnable the Snap socket:
sudo systemctl enable --now snapd.socket2. Installing VS Code via Snap
With Snap installed, you can now install VS Code:
sudo snap install --classic code3. Managing VS Code with Snap
To update VS Code installed via Snap, use:
sudo snap refresh codeLaunching and Configuring VS Code
Now that you’ve installed VS Code, let’s get it up and running:
1. Starting VS Code
You can launch VS Code from the application menu or by typing code in the terminal.

2. Initial Setup and Preferences
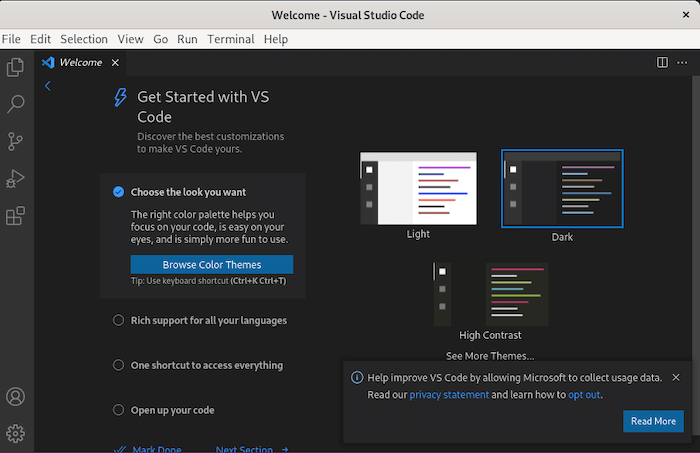
Upon first launch, VS Code will prompt you to select a color theme and configure basic settings. You can access the settings anytime by pressing Ctrl+, or navigating to File > Preferences > Settings.
3. Installing Extensions
Enhance your development experience by installing extensions. Click on the Extensions icon in the sidebar (or press Ctrl+Shift+X) to browse and install extensions for your preferred programming languages and tools.
Troubleshooting Common Installation Issues
While installing VS Code on CentOS Stream 9 is generally straightforward, you might encounter some issues. Here are solutions to common problems:
1. Dependency Conflicts
If you encounter dependency conflicts, try updating your system first:
sudo dnf update -yIf the issue persists, you may need to manually install missing dependencies:
sudo dnf install libXScrnSaver libX11-xcb libxkbfile2. Repository Errors
If you’re having trouble accessing the Microsoft repository, ensure your system’s DNS settings are correct. You can also try switching to a different DNS server temporarily:
sudo nano /etc/resolv.confAdd the following line:
nameserver 8.8.8.83. Permission Issues
If you’re encountering permission errors, make sure you’re using sudo when necessary. If issues persist, check the ownership and permissions of your home directory:
ls -l /home | grep yourusernameCorrect any issues with:
sudo chown -R yourusername:yourusername /home/yourusernameCongratulations! You have successfully installed VS Code. Thanks for using this tutorial to install the Visual Studio Code on CentOS Stream 9. For additional help or useful information, we recommend you check the official VS Code website.