How To Install Visual Studio Code on Fedora 41

Visual Studio Code (VS Code) has become one of the most popular code editors among developers due to its versatility, rich feature set, and extensive extension marketplace. For users of Fedora 41, installing VS Code can significantly enhance productivity and streamline the coding process. This guide provides a comprehensive, step-by-step approach to installing Visual Studio Code on Fedora 41, covering various installation methods, post-installation configurations, and troubleshooting tips.
Prerequisites for Installation
System Requirements
Before installing Visual Studio Code, ensure that your system meets the following minimum requirements:
- Operating System: Fedora 41 or later.
- Processor: 1.6 GHz or faster.
- RAM: At least 1 GB (2 GB recommended).
- Disk Space: Minimum of 500 MB available space.
Updating Your System
It is crucial to ensure that your Fedora system is up-to-date before proceeding with any software installation. Use the following command to update your system:
sudo dnf updateThis command refreshes your package database and installs any available updates, ensuring compatibility with new software installations.
Methods to Install Visual Studio Code
There are several methods to install Visual Studio Code on Fedora 41. The most common methods include:
- Using the official Microsoft repository (RPM).
- Installing via Flatpak.
- Using Snap packages (if applicable).
Installing Visual Studio Code via Official Repository
Step 1: Import Microsoft’s GPG Key
The first step in installing Visual Studio Code from the official repository is to import Microsoft’s GPG key. This key ensures that the packages you install are authentic and have not been tampered with. Use the following command:
sudo rpm --import https://packages.microsoft.com/keys/microsoft.ascStep 2: Add the Visual Studio Code Repository
The next step is to add the Visual Studio Code repository to your system’s package manager. This allows you to easily install and update VS Code using DNF. Execute this command:
sudo sh -c 'echo -e "[code]\nname=Visual Studio Code\nbaseurl=https://packages.microsoft.com/yumrepos/vscode\nenabled=1\ngpgcheck=1\ngpgkey=https://packages.microsoft.com/keys/microsoft.asc" > /etc/yum.repos.d/vscode.repo'Step 3: Update Package Cache
After adding the repository, it is essential to update the package cache to ensure that DNF recognizes the new repository. Run the following command:
sudo dnf check-updateStep 4: Install Visual Studio Code
You are now ready to install Visual Studio Code. Use the following command to initiate the installation process:
sudo dnf install codeThis command will download and install VS Code along with its dependencies.
Step 5: Launching Visual Studio Code
Once installed, you can launch Visual Studio Code either from the terminal by typing:
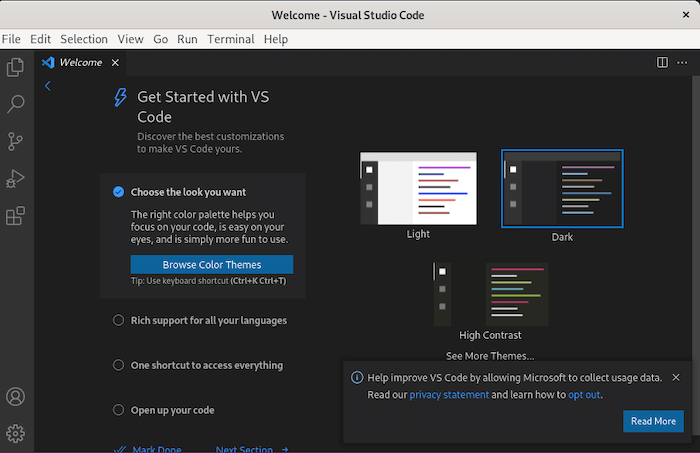
codeOr by searching for “Visual Studio Code” in your application menu. Upon launching, you will be greeted with a user-friendly interface that allows for easy navigation and customization.
Installing Visual Studio Code via Flatpak
Step-by-Step Guide to Flatpak Installation
If you prefer using Flatpak for application management, you can install Visual Studio Code through this method as well. First, ensure Flatpak is installed on your system by running:
sudo dnf install flatpakIf Flatpak is already installed, proceed with installing VS Code using Flatpak with this command:
flatpak install flathub com.visualstudio.codeLaunching VS Code Installed via Flatpak
You can find and launch VS Code installed via Flatpak in your application menu or by executing:
flatpak run com.visualstudio.codeUninstalling VS Code via Flatpak
If you need to remove the Flatpak version of Visual Studio Code, use this command:
flatpak uninstall com.visualstudio.code
Post-Installation Setup and Configuration
Selecting a Theme and Layout
The first time you launch Visual Studio Code, you can personalize your experience by selecting a theme. Navigate to File > Preferences > Color Theme, where you can choose from a variety of pre-installed themes or download new ones from the marketplace.
Installing Extensions for Enhanced Functionality
The true power of VS Code lies in its extensions. To install extensions, click on the Extensions view icon on the Activity Bar on the side of the window or press Ctl+Shift+X. Here are some popular extensions worth considering:
- C/C++ Extension Pack: For C/C++ development.
- Pylance: For Python programming.
- Prettier – Code formatter: For consistent code formatting.
Setting Up Version Control with Git
If you’re working with Git repositories, integrating Git into VS Code is straightforward. Ensure Git is installed on your system by running:
sudo dnf install gitYou can then open a terminal within VS Code and use Git commands directly from there.
Troubleshooting Common Installation Issues
Common Problems and Solutions
- Error: GPG Key Not Found: If you encounter issues related to GPG keys during installation, double-check that you’ve correctly imported Microsoft’s GPG key using the appropriate command.
- Error: Repository Not Found: If DNF cannot find the repository, ensure that you’ve added it correctly by reviewing your `
/etc/yum.repos.d/vscode.repo` file for any typos or errors. - Error: Dependency Issues: If there are dependency issues during installation, try running `
sudo dnf clean all` followed by `sudo dnf update` before attempting to reinstall VS Code.
Checking Logs for Errors
If installation fails or if there are issues launching VS Code, checking logs can provide insights into what went wrong. Use this command to view recent logs related to DNF operations:
dmesg | grep dnfCongratulations! You have successfully installed Visual Studio Code. Thanks for using this tutorial for installing the Visual Studio Code on Fedora 41 system. For additional help or useful information, we recommend you check the Visual Studio Code website.