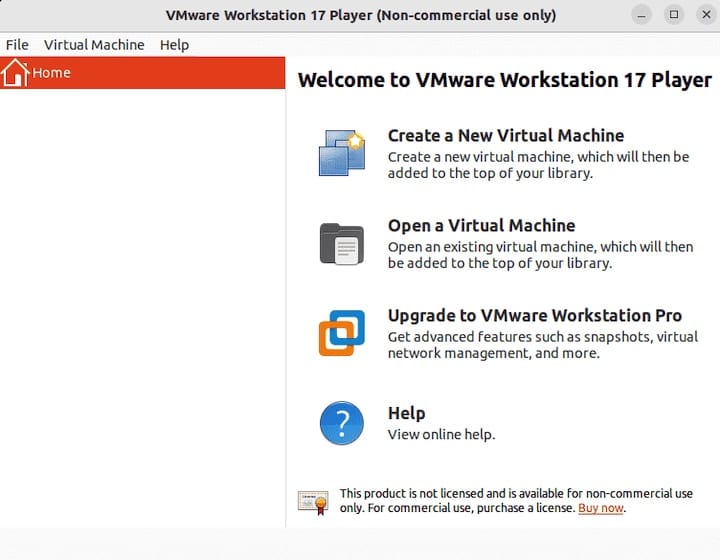
How To Install VMware Workstation on Fedora 41

In this tutorial, we will show you how to install VMware Workstation on Fedora 41. Virtualization technology has become increasingly essential in the modern computing landscape, enabling developers and IT professionals to create isolated environments for testing and development. VMware Workstation is a leading virtualization software that allows users to run multiple operating systems on a single physical machine. This guide provides a comprehensive step-by-step approach to installing VMware Workstation on Fedora 41, ensuring a smooth and efficient setup process.
Prerequisites
System Requirements
Before diving into the installation process, it’s crucial to ensure that your system meets the necessary hardware specifications:
- Processor: A 64-bit processor with Intel VT-x or AMD-V support.
- RAM: Minimum of 4 GB (8 GB or more recommended for optimal performance).
- Storage: At least 1 GB of free disk space for VMware Workstation installation, plus additional space for virtual machines.
Software Requirements
Your system should have Fedora 41 installed and fully updated. Additionally, you will need some essential packages to ensure a successful installation of VMware Workstation:
- Kernel headers
- Development tools (like GCC and make)
Step-by-Step Installation Guide
Step 1: Download VMware Workstation
The first step in the installation process is to download the latest version of VMware Workstation for Linux. Follow these steps:
- Go to the official VMware website.
- Select the appropriate version for Linux and click on the download link.
- Once the download is complete, verify the integrity of the downloaded file using SHA256 checksum to ensure it hasn’t been corrupted during download.
Step 2: Prepare the System
Before installing VMware Workstation, it’s essential to prepare your system by updating it and installing any required dependencies.
Update the System
Open your terminal and run the following command to update your Fedora system:
sudo dnf updateInstall Required Dependencies
You will need several packages for the installation. Run these commands in your terminal:
sudo dnf install kernel-devel kernel-headers gcc make patch wgetStep 3: Make the Installer Executable
After downloading VMware Workstation, you need to make the installer executable. Navigate to your Downloads folder (or wherever you saved the installer) and run:
chmod +x ~/Downloads/VMware-Workstation-Full-*.bundleStep 4: Run the Installer
The next step is to execute the installer. This requires root privileges:
sudo ~/Downloads/VMware-Workstation-Full-*.bundleThis command will launch the graphical installer. Follow the on-screen instructions carefully. Accept the license agreement and choose your installation preferences as prompted.
Step 5: Install VMware Kernel Modules
The installation process will automatically attempt to compile kernel modules required for VMware Workstation. However, if you encounter issues, you may need to install patches manually.
Patching Installation
If you experience problems with kernel modules like `vmmon` or `vmnet`, you can use GitHub repositories that provide patches. Follow these steps:
git clone -b workstation-x.y.z https://github.com/mkubecek/vmware-host-modules.git
cd vmware-host-modules/
sudo cp vmmon.tar vmnet.tar /usr/lib/vmware/modules/source/
Build Modules
You can build the modules by executing this command:
sudo /usr/bin/vmware-modconfig --console --install-allStep 6: Start VMware Workstation
Your installation should now be complete! To launch VMware Workstation, either find it in your application menu or type the following command in your terminal:
/usr/bin/vmwareThe first time you start VMware Workstation, you’ll need to accept its license agreement and configure initial settings according to your preferences.

Troubleshooting Common Issues
Kernel Module Issues
If you encounter errors related to kernel modules after installation, here are some common troubleshooting steps:
- Error: “vmmon not found”: This typically indicates that the module was not built correctly. Re-run the module configuration command mentioned earlier.
- Error: “vmnet not found”: Similar to `vmmon`, ensure that you have installed all necessary dependencies and recompile modules if needed.
- Error during kernel updates: After a kernel update, you may need to rebuild your VMware modules using `vmware-modconfig` again.
Installation Errors
If you face issues during installation, check log files located at `/var/log/vmware-installer/`. These logs can provide insights into what went wrong during installation.
Updating Kernel
If Fedora updates its kernel, it may affect VMware’s functionality. To resolve this issue, follow these steps after updating your kernel:
- Reboot your system into the new kernel.
- Open a terminal and run:
sudo /usr/bin/vmware-modconfig --console --install-all - This command will rebuild all necessary modules for compatibility with the new kernel.
Congratulations! You have successfully installed VMware Workstation. Thanks for using this tutorial for installing the VMware Workstation on your Fedora 41 system. For additional help or useful information, we recommend you check the official VMware website.