How To Install VMware Workstation on Linux Mint 22

Virtualization has become an essential tool for developers, system administrators, and tech enthusiasts. It allows users to run multiple operating systems on a single physical machine, making it easier to test applications, manage servers, and explore new environments without the need for additional hardware. VMware Workstation is one of the most popular virtualization platforms available today, providing a robust set of features for Linux users. This guide will walk you through the process of installing VMware Workstation on Linux Mint 22, ensuring you have a smooth experience from start to finish.
Understanding VMware Workstation
What is VMware Workstation?
VMware Workstation is a powerful desktop virtualization software that enables users to create and manage virtual machines (VMs). It allows you to run multiple operating systems concurrently on your computer, providing a flexible environment for development, testing, and learning.
Key Features
- Multi-OS Support: Run various operating systems including Windows, Linux, and others simultaneously.
- Snapshots: Take snapshots of your virtual machines to save their current state. This feature is invaluable for testing software or configurations.
- Integration with Cloud Services: Seamlessly connect your VMs with cloud services for enhanced functionality.
Differences Between VMware Workstation Pro and Player
VMware offers two primary versions: Workstation Pro and Workstation Player. While both allow you to run virtual machines, Workstation Pro provides advanced features such as advanced networking options, remote connections, and the ability to create encrypted VMs. In contrast, Workstation Player is more suited for basic virtualization needs without the extensive feature set.
Prerequisites for Installation
System Requirements
Before installing VMware Workstation on Linux Mint 22, ensure your system meets the following minimum hardware requirements:
- Processor: 64-bit x86 CPU with VT-x or AMD-V support.
- RAM: Minimum 4 GB (8 GB recommended).
- Disk Space: At least 1 GB free space for the application plus additional space for virtual machines.
Software Requirements
You will also need some essential packages installed on your system. These include:
- build-essential: A package that includes necessary tools for building software.
- linux-headers: The kernel headers required for compiling kernel modules.
User Permissions
A user account with sudo privileges is necessary to install VMware Workstation. Ensure you have administrative access to your Linux Mint system before proceeding.
Preparing Your System
Updating Linux Mint
The first step in preparing your system is to ensure that it is up-to-date. Open a terminal and execute the following commands:
sudo apt update
sudo apt upgrade
This will refresh your package lists and install any available updates. Keeping your system updated helps prevent compatibility issues during installation.
Installing Required Dependencies
You need to install some essential packages before proceeding with the VMware installation. Use the following command in the terminal:
sudo apt install build-essential linux-headers-$(uname -r)This command installs the build tools and kernel headers required by VMware Workstation.
Downloading VMware Workstation
Accessing the Official Website
Navigating to the official VMware website is straightforward. Open your web browser and go to the VMware download page. Look for the latest version of VMware Workstation suitable for Linux.
Choosing the Right Version
Select VMware Workstation 17 Pro for Linux from the download options. This version includes all necessary features and enhancements that cater to advanced users and developers alike.
Downloading via Browser vs. Command Line
You can download the installer using either a web browser or command line. For command line enthusiasts, use `wget` to download directly:
wget https://download3.vmware.com/software/WKST-1750-LX/VMware-Workstation-Full-17.5.0-22583795.x86_64.bundleThis command fetches the installer file directly into your current directory.

Installing VMware Workstation
Setting Executable Permissions
Once downloaded, you need to set executable permissions on the installer file. Run the following command in your terminal:
sudo chmod +x VMware-Workstation-Full-17.5.0-22583795.x86_64.bundleRunning the Installer
You can now start the installation process by executing the installer with sudo privileges:
sudo ./VMware-Workstation-Full-17.5.0-22583795.x86_64.bundleInstallation Process Walkthrough
The installation wizard will launch, guiding you through several steps:
- Welcome Screen: Click “Next” to proceed.
- EULA Agreement: Read through the End User License Agreement (EULA) and accept it by checking the box.
- Select Installation Type: Choose between typical or custom installation based on your preferences.
- Select Installation Location: Specify where you want VMware installed or accept default settings.
- User Experience Settings: Configure user experience settings as per your needs (e.g., enabling enhanced keyboard driver).
- Create Shortcuts: Decide whether you want desktop shortcuts created for easy access.
- Installation Progress: Wait for the installation process to complete; this may take several minutes.
If prompted, allow any required kernel modules to be compiled automatically during installation.
Post-installation Configuration
Launching VMware Workstation
Your installation is complete! You can launch VMware Workstation from your applications menu or by typing `vmware` in a terminal window. The first time you open it, you may be prompted to enter your license key if you’re using a paid version.

Initial Setup Wizard
The initial setup wizard will guide you through configuring basic settings such as network options and preferences for virtual machines. Follow these steps carefully to ensure optimal performance and functionality of your virtual environment.
Create Your First Virtual Machine
A Step-by-Step Guide to Create a VM
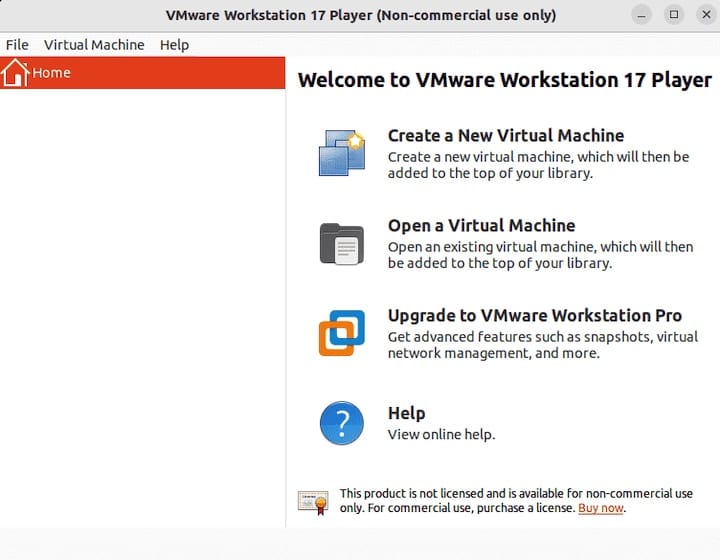
Create your first virtual machine by selecting “Create a New Virtual Machine” from the home screen of VMware Workstation. You will be presented with two options: Typical (recommended) or Custom (advanced). For most users, Typical will suffice.
Selecting OS Type and Version
- Select the operating system type (e.g., Windows or Linux).
- Select the version corresponding to your OS choice (e.g., Windows 10 or Ubuntu).
Name Your Virtual Machine
You can name your VM anything you like; however, it’s advisable to choose a name that reflects its purpose or operating system type for easy identification later on.
Select Disk Capacity and Type
- Select how much disk space you want to allocate to this VM (recommended at least 20 GB).
- You can choose whether to store this virtual disk as a single file or split it into multiple files based on preference.
Troubleshooting Common Issues
Installation Failures
If you encounter issues during installation, consider these common problems and their solutions:
- Error: Kernel Module Compilation Failed:
- This often occurs if kernel headers are missing or not matching your running kernel version. Ensure you’ve installed `linux-headers` correctly using:
sudo apt install linux-headers-$(uname -r) - Error: Cannot Find Required Packages:
- If dependencies are missing during installation, double-check that you’ve installed all required packages mentioned in earlier sections of this guide.
- Error: License Key Issues:
- If you’re using a trial version but are prompted for a license key after installation, ensure you’ve selected “Try” during setup if applicable.
- Error: Insufficient Permissions:
- If you’re unable to execute commands due to permission issues, make sure you’re using `sudo` where necessary or logged in as an administrator user.
- Error: Unable To Start Virtual Machine:
- This could be due to insufficient resources allocated (like RAM). Ensure that your host machine has enough resources available before starting VMs.
Your First Virtual Machine: Performance Optimization Tips
- Avoid Overcommitting Resources:
- Avoid allocating too much RAM or CPU cores beyond what your host machine can handle; this may lead to performance degradation across VMs and host OS alike.
- NAT vs Bridged Networking Options:
- If you’re connecting VMs online frequently consider using NAT networking mode which allows sharing of IP addresses while providing better security.
- Suspend Instead Of Shutdown When Not In Use:
- Suspend VMs rather than shutting them down completely when not in use; this saves time when resuming work later while keeping state intact.
The Uninstallation Process
If at any point you decide that VMware Workstation no longer meets your needs or wish simply remove it from Linux Mint 22 follow these steps:
# Uninstalling via Terminal
sudo vmware-installer -u vmware-workstation
# Confirm uninstallation when prompted.
# Clean up residual files if necessary.
sudo apt autoremove
# Check if any leftover configuration files remain.
sudo find / -name '*vmware*' -exec rm -rf {} +
This will ensure that all components related to VMware are thoroughly removed from your system.
Congratulations! You have successfully installed VMware. Thanks for using this tutorial for installing the latest version of the VMware Workstation on the Linux Mint 22 system. For additional help or useful information, we recommend you check the official VMware website.