
In this tutorial, we will show you how to install VMware Workstation on Ubuntu 16.04 LTS. Virtualization has become an indispensable technology in today’s computing landscape, enabling users to run multiple operating systems and applications on a single physical machine. Among the leading virtualization solutions, VMware Workstation stands out as a powerful and versatile tool for developers, IT professionals, and power users alike.
This article assumes you have at least basic knowledge of Linux, know how to use the shell, and most importantly, you host your site on your own VPS. The installation is quite simple and assumes you are running in the root account, if not you may need to add ‘sudo‘ to the commands to get root privileges. I will show you the step-by-step installation of the VMware Workstation on an Ubuntu 16.04 (Xenial Xerus) server.
Prerequisites
- A server running one of the following operating systems: Ubuntu 16.04 (Xenial Xerus).
- It’s recommended that you use a fresh OS install to prevent any potential issues.
- SSH access to the server (or just open Terminal if you’re on a desktop).
- A
non-root sudo useror access to theroot user. We recommend acting as anon-root sudo user, however, as you can harm your system if you’re not careful when acting as the root.
Install VMware Workstation on Ubuntu 16.04 LTS
Step 1. First, make sure that all your system packages are up-to-date by running the following apt-get commands in the terminal.
sudo apt-get update
sudo apt-get upgrade
Before installing VMware Workstation Pro, you’ll need to ensure that your Ubuntu system has the required dependencies installed. Open the terminal and run the following command to install the necessary packages:
sudo apt-get install build-essential linux-headers-$(uname -r)
Step 2. Installing VMware Workstation on Ubuntu.
First, download the Vmware Workstation 14 Pro bundle package from the official page.
Once you’ve downloaded the VMware Workstation Pro package and prepared your Ubuntu system, it’s time to begin the installation process. First, navigate to the directory where you downloaded the package and make the installer executable by running the following command:
chmod +x VMware-Workstation-Full-17.x.x-xxxxxxx.x86_64.bundle
Now let’s go ahead and start the installation of Vmware Workstation 17 pro by running the .bundle package. Refer to the command below:
sudo ./VMware-Workstation-Full-17.x.x-xxxxxxx.x86_64.bundle
Accept the End User License Agreement:
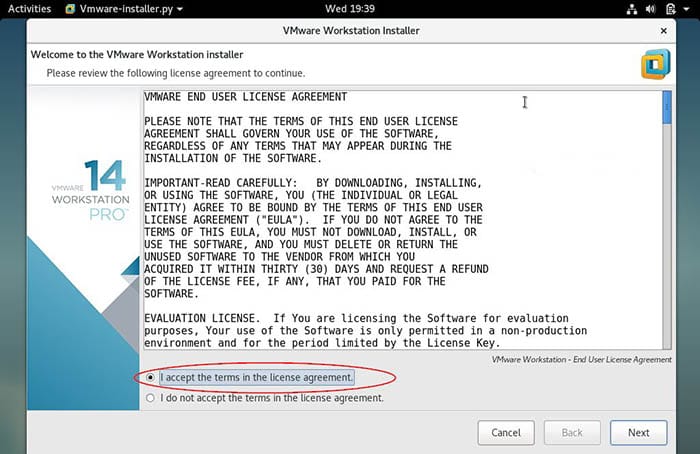
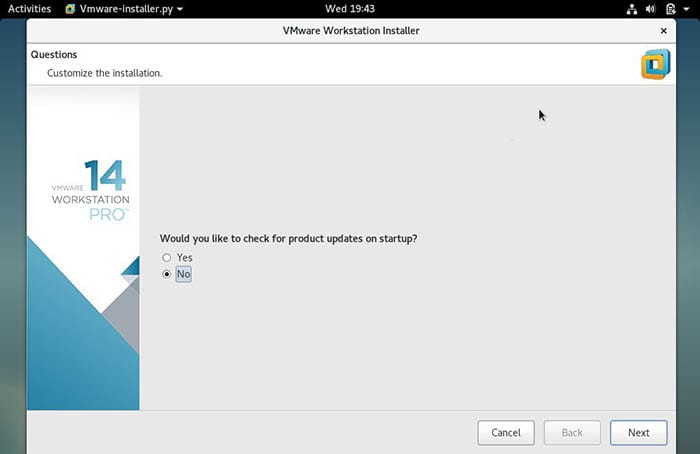
Click on Next and disable product updates on startup:
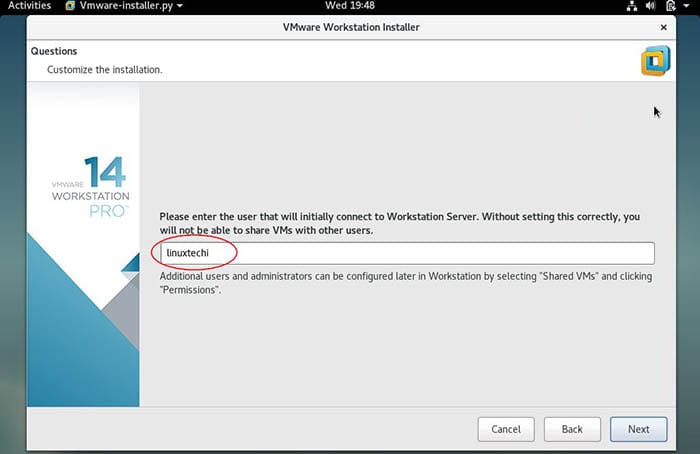
Specify the User Name that will have rights to connect to the VMware workstation, in my case I using ‘idroot‘ as the user name:
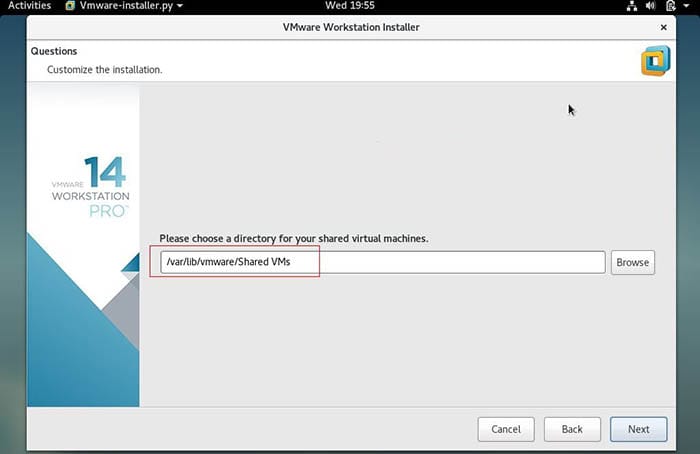
Click on next to proceed, you can also keep the default path. In my case I am also keeping the default directory:
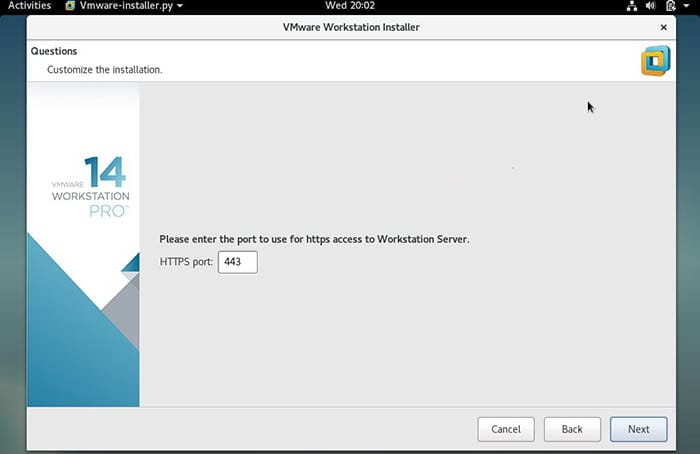
Specify the HTTPS port or keep the default one:
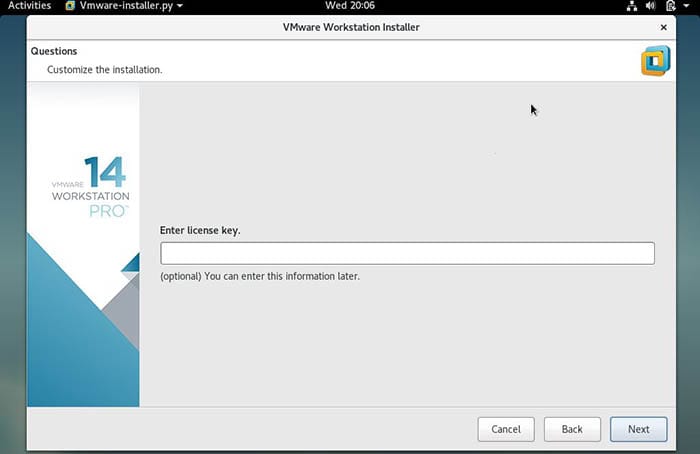
Enter the License key in case you have already buy its license, else you can leave it blank:
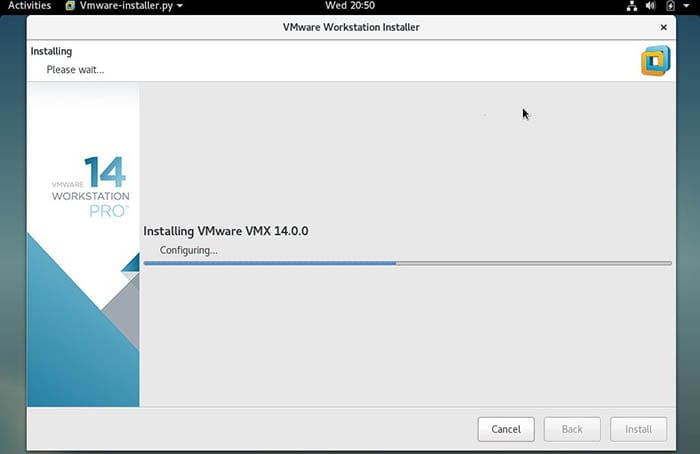
In the next window, click on the ‘Install‘ option to start its installation:
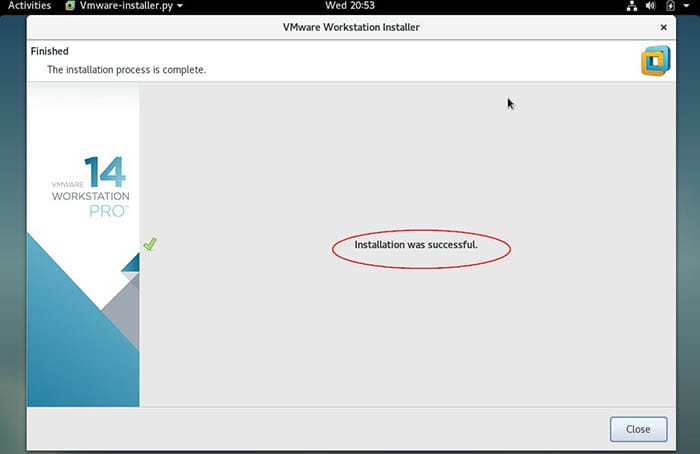
Once the Installation is successful, we will get the below window:
Congratulations! You have successfully installed VMware Workstation. Thanks for using this tutorial for installing VMware Workstation on your Ubuntu 16.04 system. For additional help or useful information, we recommend you check the official VMware website.