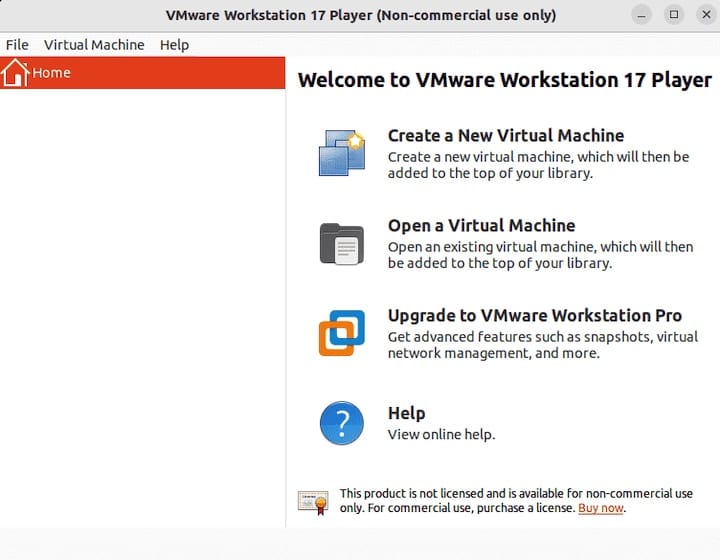
How To Install VMware Workstation on Ubuntu 24.04 LTS

In this tutorial, we will show you how to install VMware Workstation on Ubuntu 24.04 LTS. In the world of software development and IT infrastructure, virtualization plays a crucial role in creating efficient testing environments. VMware Workstation is a powerful tool that allows users to run multiple operating systems on a single physical machine. This guide will walk you through the process of installing VMware Workstation on Ubuntu 24.04 LTS, ensuring you have a smooth experience from start to finish.
Understanding VMware Workstation
What is VMware Workstation?
VMware Workstation is a desktop virtualization software that enables users to create and manage virtual machines (VMs). It provides a robust platform for developers and IT professionals to test applications across different operating systems without the need for multiple physical machines. The key features of VMware Workstation include:
- Support for a wide range of guest operating systems, including Windows, Linux, and macOS.
- Advanced networking capabilities, allowing users to simulate complex network environments.
- Snapshot functionality, enabling users to save the state of a VM and revert back if necessary.
- Integration with cloud services for enhanced scalability.
Why Use VMware Workstation on Ubuntu?
Using VMware Workstation on Ubuntu provides several advantages:
- Cost-Effective: Ubuntu is free and open-source, making it an economical choice for developers.
- User-Friendly: The graphical interface of VMware Workstation simplifies the management of virtual machines.
- Robust Community Support: Ubuntu has a large user base, ensuring ample resources and forums for troubleshooting.
Pre-installation Requirements
System Requirements
Before installing VMware Workstation, ensure your system meets the following minimum hardware specifications:
- Processor: 64-bit x86 processor with Intel VT-x or AMD-V virtualization support.
- RAM: At least 4 GB; 8 GB or more is recommended for optimal performance.
- Disk Space: Minimum 1 GB of free disk space for installation; additional space required for virtual machines.
Enabling Hardware Virtualization
To take full advantage of VMware Workstation’s capabilities, you need to enable hardware virtualization in your system’s BIOS or UEFI settings. Here’s how:
- Restart your computer and enter the BIOS/UEFI setup (usually by pressing F2, F10, DEL, or ESC immediately after powering on).
- Navigating through the BIOS/UEFI menus, look for options related to CPU configuration.
- Enable Intel VT-x or AMD-V (the exact terminology may vary).
- Save changes and exit the BIOS/UEFI setup.
You can verify whether virtualization is enabled by running the following command in your terminal:
lscpu | grep VirtualizationDownloading VMware Workstation
Where to Download VMware Workstation
The official VMware website is the best source for downloading the latest version of VMware Workstation. Navigate to the following link to access the download page:

Choosing the Right Version
You will find both free and paid versions available. The free version (VMware Workstation Player) is suitable for personal use, while the Pro version offers advanced features that cater to professional needs. Consider your requirements carefully before making a choice.
Installing Dependencies
Before proceeding with the installation of VMware Workstation, ensure that you have all necessary dependencies installed. Open your terminal and run the following commands:
sudo apt update
sudo apt install build-essential p7zip-full
This will install essential packages required for building kernel modules during the installation process.
Installing VMware Workstation
Step-by-Step Installation Process
The installation process involves several straightforward steps:
Download the Installer File:
You can download the latest version of VMware Workstation using `wget`. Replace `<version>` with the actual version number you wish to download:
wget https://softwareupdate.vmware.com/cds/vmw-desktop/ws//linux/core/VMware-Workstation--x86_64.bundleMake the Installer Executable:
chmod +x VMware-Workstation--x86_64.bundleRun the Installer:
sudo ./VMware-Workstation--x86_64.bundleThe installer will launch a graphical interface guiding you through the installation process. Follow the prompts to complete installation.
Compiling Kernel Modules
A critical step post-installation is compiling kernel modules required by VMware Workstation. This ensures that it integrates seamlessly with your system’s kernel. Run the following command in your terminal:
sudo vmware-modconfig --console --install-allThis command will compile and install all necessary kernel modules automatically. If you encounter any errors during this step, ensure that you have installed all required headers using:
sudo apt install linux-headers-$(uname -r)Troubleshooting Common Issues
Installation Errors
If you face issues during installation, consider these common problems and their solutions:
- Error: “Kernel headers are missing”: Ensure that you have installed Linux headers as shown above.
- Error: “VMware services are not running”: Use this command to start services manually:
sudo systemctl start vmware.service - Error: “Module compilation failed”: Check if your system has all necessary development tools installed (build-essential). Re-run the module compilation command after resolving any missing dependencies.
Kernels Module Issues
If you experience issues with vmmon or vmnet modules not loading correctly, follow these steps:
-
- If modules fail to load:
sudo vmware-modconfig --console --install-all-
- If you receive errors about missing kernel headers:
sudo apt install linux-headers-$(uname -r)-
- If issues persist after these steps:
– Check online forums or consult official documentation for specific error messages.
– Consider reinstalling VMware Workstation if problems continue.
First Launch and Configuration
Lauching VMware Workstation for First Time
Your installation should now be complete. To launch VMware Workstation, search for it in your applications menu or run this command in your terminal:
/usr/bin/vmware
Initial Configuration Settings
The first time you launch VMware Workstation, you’ll be prompted to enter your license key (if applicable) or choose between using it in evaluation mode. After this initial setup, consider configuring settings such as shared folders and network settings according to your preferences.
Congratulations! You have successfully installed VMware. Thanks for using this tutorial for installing VMware Workstation virtual machines on Ubuntu 24.04 LTS system. For additional help or useful information, we recommend you check the official VMware website.