In this tutorial, we will show you how to install Webmin on Ubuntu 20.04 LTS. For those of you who didn’t know, Webmin is a powerful web-based interface that simplifies the management of Unix-like systems, including Ubuntu. With its intuitive graphical user interface (GUI), Webmin allows you to perform various administrative tasks without the need for command-line expertise.
This article assumes you have at least basic knowledge of Linux, know how to use the shell, and most importantly, you host your site on your own VPS. The installation is quite simple and assumes you are running in the root account, if not you may need to add ‘sudo‘ to the commands to get root privileges. I will show you the step-by-step installation Webmin control panel on Ubuntu 20.04 Focal Fossa. You can follow the same instructions for Ubuntu 18.04, 16.04, and any other Debian-based distribution like Linux Mint.
Prerequisites
- A server running one of the following operating systems: Ubuntu 20.04, 18.04, 16.04, and any other Debian-based distribution like Linux Mint.
- It’s recommended that you use a fresh OS install to prevent any potential issues.
- SSH access to the server (or just open Terminal if you’re on a desktop).
- A
non-root sudo useror access to theroot user. We recommend acting as anon-root sudo user, however, as you can harm your system if you’re not careful when acting as the root.
Install Webmin on Ubuntu 20.04 LTS Focal Fossa
Step 1. Before installing any new software, it’s a best practice to update the package list to ensure you have access to the latest available packages and security updates. Open a terminal and run the following commands:
sudo apt update
sudo apt upgrade
This will update the package list and upgrade any existing packages to their latest versions.
Step 2. Installing Dependencies.
Webmin requires a few dependencies to be installed before proceeding with the main installation. Run the following command to install the necessary packages:
sudo apt install perl libnet-ssleay-perl openssl libauthen-pam-perl libpam-runtime libio-pty-perl apt-show-versions python
Step 3. Installing Webmin on Ubuntu 20.04.
We will install Webmin using the official repository on both Debian and non-Debian-based systems. We can install Webmin using the Webmin APT repository on Ubuntu as shown below:
sudo nano /etc/apt/sources.list
# Add these lines at last
deb http://download.webmin.com/download/repository sarge contrib
deb http://webmin.mirror.somersettechsolutions.co.uk/repository sarge contrib

# Save and exit the editor
Next, install the GPG key as shown below. We need the GPG key to trust the repository:
wget -q http://www.webmin.com/jcameron-key.asc -O- | sudo apt-key add -
Now we can install the most recent version of Webmin using the following commands:
sudo apt update
sudo apt install webmin
Step 3. Configure Firewall.
By default, Webmin listens for connections on port 10000 on all network interfaces. You need to open the port in your firewall so that the Webmin interface is accessible from the Internet:
sudo ufw allow 10000
sudo ufw reload
Step 3. Accessing Webmin Web Interface.
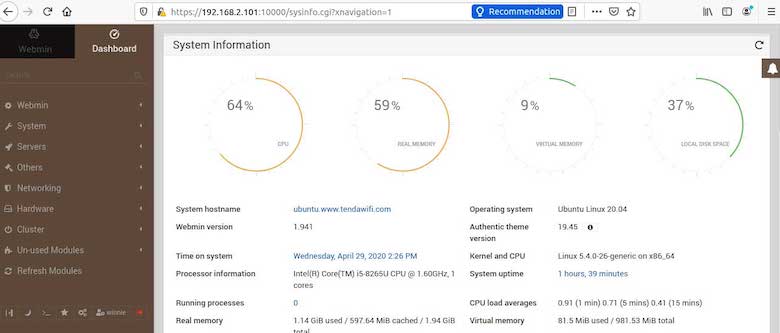
Once the installation is complete, you can access the Webmin interface by opening a web browser and navigating to:
https://your-server-ip-address:10000/
Replace your_server_ip with the actual IP address or domain name of your Ubuntu server.
You’ll be prompted to enter the login credentials. By default, Webmin uses the root user account with no password set. It’s highly recommended to change the root password immediately after logging in for security reasons.

Congratulations! You have successfully installed Webmin. Thanks for using this tutorial for installing the Webmin control panel in Ubuntu 20.04 LTS Focal Fossa system. For additional help or useful information, we recommend you to check the official Webmin website.