How To Install Webmin on Ubuntu 24.04 LTS

In this tutorial, we will show you how to install Webmin on Ubuntu 24.04 LTS. Webmin is a powerful, open-source web-based control panel that simplifies the management of Unix-like systems, including Linux. It provides a graphical interface for system administration tasks such as user account management, package management, and server configuration.
This article assumes you have at least basic knowledge of Linux, know how to use the shell, and most importantly, you host your site on your own VPS. The installation is quite simple and assumes you are running in the root account, if not you may need to add ‘sudo‘ to the commands to get root privileges. I will show you the step-by-step installation of the Webmin control panel on Ubuntu 24.04 (Noble Numbat). You can follow the same instructions for Ubuntu 22.04 and any other Debian-based distribution like Linux Mint, Elementary OS, Pop!_OS, and more as well.
Prerequisites
Before installing Webmin on Ubuntu 24.04 LTS, ensure your system meets the following requirements:
- A server running one of the following operating systems: Ubuntu and any other Debian-based distribution like Linux Mint.
- It’s recommended that you use a fresh OS install to prevent any potential issues.
- At least 4 GB of RAM and 20 GB of free disk space.
- SSH access to the server (or just open Terminal if you’re on a desktop).
- An active internet connection. You’ll need an internet connection to download the necessary packages and dependencies.
- An Ubuntu 24.04 system with root access or a user with sudo privileges.
Install Webmin on Ubuntu 24.04 LTS
Step 1. Updating the Package Repository.
First, update your system’s package list to ensure you have the latest information on available packages:
sudo apt update
sudo apt upgrade
The apt update command refreshes the package list, while apt upgrade installs the available updates. This step helps resolve any dependency issues and provides access to the latest security patches and bug fixes.
Step 2. Installing Required Dependencies.
Webmin requires certain dependencies to be installed. Use the following command to install them:
sudo apt install gnupg2
Step 3. Installing Webmin on Ubuntu 24.04.
- Method 1: Installing Webmin from the APT Repository
Next, add the Webmin repository to your system’s sources list:
echo "deb https://download.webmin.com/download/repository sarge contrib" | sudo tee /etc/apt/sources.list.d/webmin.list
Download and add the Webmin GPG key to your system to verify the packages:
wget -qO - https://download.webmin.com/jcameron-key.asc | sudo gpg --dearmor -o /usr/share/keyrings/webmin.gpg
Next, update your package list again to include the Webmin repository, then install Webmin:
sudo apt update
sudo apt install webmin
- Method 2: Installing Webmin Using the DEB Binary
First, download the Webmin DEB binary installer using curl:
curl -Ls https://www.webmin.com/download/deb/webmin-current.deb -o webmin.deb
Install Webmin using the downloaded DEB binary. This command will handle dependencies automatically:
sudo apt install ./webmin.deb
After installation, Webmin should start automatically. Verify its status with the following command:
sudo systemctl status webmin
Step 4. Configure Firewall.
Webmin listens on port 10000 by default. To allow external access, open this port on your firewall:
sudo ufw allow 10000/tcp
Ensure that the firewall is configured correctly and that port 10000 is open:
sudo ufw status
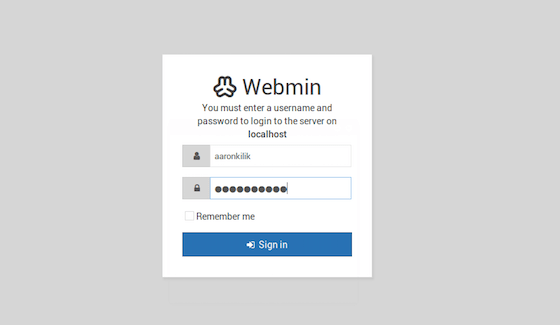
Step 5. Accessing Webmin Web Interface.
To access the Webmin interface, open a web browser and navigate to:
https://your_server_ip:10000
You will be prompted to log in. Use the root credentials or any user with sudo privileges.

Step 6. Securing Webmin.
Securing Webmin is crucial to protect your server from unauthorized access. One effective way to secure Webmin is by using SSL certificates from Let’s Encrypt.
Install Certbot, the tool for obtaining Let’s Encrypt certificates:
sudo apt install certbot
Run Certbot to obtain an SSL certificate for your domain:
sudo certbot certonly --standalone -d your_domain
Next, edit the Webmin configuration file to use the obtained SSL certificate:
sudo nano /etc/webmin/miniserv.conf
Find and update the following lines:
ssl=1
keyfile=/etc/letsencrypt/live/your_domain/privkey.pem
certfile=/etc/letsencrypt/live/your_domain/fullchain.pem
Restart Webmin to apply the changes:
sudo systemctl restart webmin
Step 7. Troubleshooting Common Issues.
If you encounter issues during the installation or use of Webmin, here are some common solutions:
-
- Webmin Not Accessible: Ensure that port 10000 is open on your firewall and that Webmin is running.
- SSL Certificate Issues: Verify that the paths to the SSL certificate and key in the Webmin configuration file are correct.
- Login Problems: Ensure that you are using the correct credentials and that the user has sudo privileges.
Congratulations! You have successfully installed Webmin. Thanks for using this tutorial for installing the Webmin control panel on the Ubuntu 24.04 LTS system. For additional help or useful information, we recommend you check the Webmin website.