How To Install WinSCP on Ubuntu 22.04 LTS

In this tutorial, we will show you how to install WinSCP on Ubuntu 22.04 LTS. WinSCP is a popular Windows-based SFTP, FTP, and SCP client that allows users to securely transfer files between local and remote systems. While WinSCP is designed for Windows, it can also be installed and used on Linux distributions like Ubuntu 22.04 LTS with the help of Wine, a compatibility layer that enables running Windows applications on Unix-like operating systems.
This article assumes you have at least basic knowledge of Linux, know how to use the shell, and most importantly, you host your site on your own VPS. The installation is quite simple and assumes you are running in the root account, if not you may need to add ‘sudo‘ to the commands to get root privileges. I will show you the step-by-step installation of the WinSCP on Ubuntu 22.04. You can follow the same instructions for Ubuntu 22.04 and any other Debian-based distribution like Linux Mint, Elementary OS, Pop!_OS, and more as well.
Prerequisites
- A server running one of the following operating systems: Ubuntu 22.04, 20.04, and any other Debian-based distribution like Linux Mint.
- It’s recommended that you use a fresh OS install to prevent any potential issues.
- Access the terminal on your Ubuntu system, where we’ll execute the commands for a seamless WinSCP installation.
- An active internet connection. You’ll need an internet connection to download the necessary packages and dependencies for WinSCP.
- A
non-root sudo useror access to theroot user. We recommend acting as anon-root sudo user, however, as you can harm your system if you’re not careful when acting as the root.
Install WinSCP on Ubuntu 22.04 LTS Jammy Jellyfish
Step 1. To ensure your Ubuntu system is up-to-date and has access to the latest package versions, start by updating the APT package cache and upgrading any installed packages. Open a terminal window and run the following commands:
sudo apt update
sudo apt upgrade
Step 2. Installing Wine.
Before installing WinSCP, you need to install and configure Wine on your Ubuntu system. Wine requires the 32-bit architecture to run Windows applications on a 64-bit Debian system. Enable the 32-bit architecture by executing the following command:
sudo dpkg --add-architecture i386
sudo apt update
Now that your system is prepared, let’s proceed with the Wine installation. To install Wine on Debian 12 Bookworm, we need to add the Wine repository. Execute the following command to add the repository key:
wget -O- https://dl.winehq.org/wine-builds/winehq.key | sudo gpg --dearmor -o /usr/share/keyrings/winehq-archive-keyring.gpg
Next, add the repository itself by executing the following command:
echo "deb [signed-by=/usr/share/keyrings/winehq-archive-keyring.gpg] https://dl.winehq.org/wine-builds/debian/ bookworm main" | sudo tee /etc/apt/sources.list.d/winehq.list
Now that the repository is added, update the package lists and install Wine by executing this command:
sudo apt install --install-recommends winehq-stable
During the installation process, you may be prompted to confirm additional packages. Review the prompts carefully and press ‘Y‘ when required.
To ensure that Wine is correctly installed, follow these steps to verify the installation:
wine --version
Step 3. Installing WinSCP on Ubuntu 22.04.
First, download the WinSCP installer from the official WinSCP download page and save the installer to an easily accessible location such as your Downloads folder.
Once the download is complete, open the terminal and navigate to the Downloads directory. You can verify the successful download of the WinSCP installer by listing the contents of the directory:
cd Downloads && ls
Now, use the Wine utility to install the downloaded WinSCP executable file. Run the following command in the terminal:
wine WinSCP-*-Setup.exe
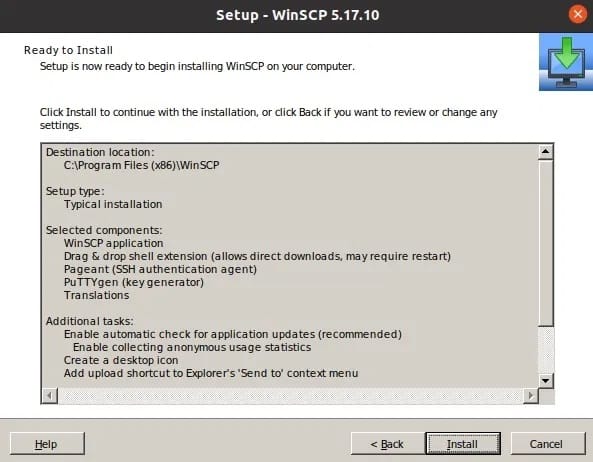
A screen will pop up. Choose the “Install for all users (recommended)” option. Agree with the terms and conditions by clicking on the “Accept” button. Choose the setup type by clicking on the “Typical installation (recommended)” option and click on the “Next” button. Then choose the “Initial User Interface” by clicking the “Commander” and click on the “Next” button to proceed.

Step 4. Access WinSCP on Ubuntu.
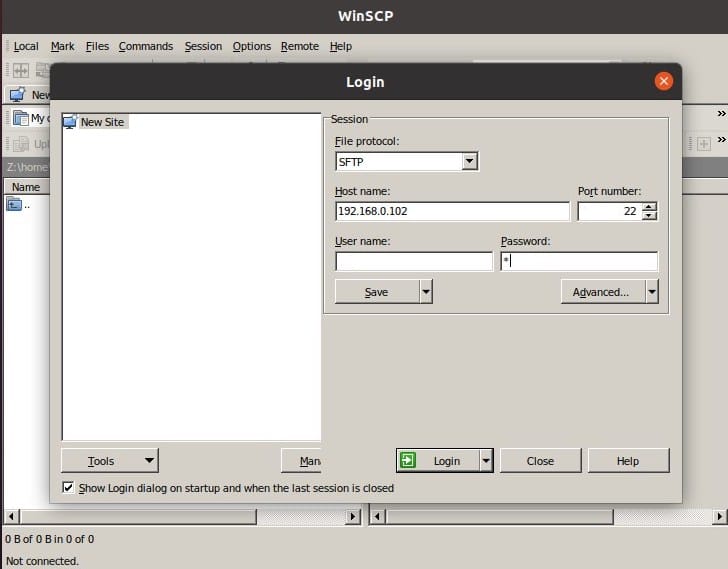
Once the installation is completed, go to All Applications and search for “WinSCP”. Double-click on it to run the program. A desktop shortcut will also be created automatically. To use it, right-click on the icon and select “Allow Launching.

Congratulations! You have successfully installed WinSCP. Thanks for using this tutorial for installing the WinSCP on the Ubuntu system. For additional help or useful information, we recommend you check the official WinSCP website.