How To Install Wireshark on Ubuntu 24.04 LTS

In this tutorial, we will show you how to install Wireshark on Ubuntu 24.04 LTS. Wireshark, formerly known as Ethereal, is a free and open-source packet analyzer that allows users to capture, inspect, and dissect network traffic in real time. Developed by Gerald Combs and released in 1998, Wireshark has evolved into a feature-rich tool trusted by network professionals worldwide. With its intuitive graphical user interface and command-line capabilities, Wireshark provides deep insights into network communication, making it an essential tool for network troubleshooting, security analysis, and protocol development.
This article assumes you have at least basic knowledge of Linux, know how to use the shell, and most importantly, you host your site on your own VPS. The installation is quite simple and assumes you are running in the root account, if not you may need to add ‘sudo‘ to the commands to get root privileges. I will show you the step-by-step installation of the Wireshark network analysis on Ubuntu 24.04 (Noble Numbat). You can follow the same instructions for Ubuntu 22.04 and any other Debian-based distribution like Linux Mint, Elementary OS, Pop!_OS, and more as well.
Prerequisites
- A server running one of the following operating systems: Ubuntu and any other Debian-based distribution like Linux Mint.
- It’s recommended that you use a fresh OS install to prevent any potential issues.
- Basic familiarity with the command line interface.
- SSH access to the server (or just open Terminal if you’re on a desktop).
- An active internet connection. You’ll need an internet connection to download the necessary packages and dependencies.
- An Ubuntu 24.04 system with root access or a user with sudo privileges.
Install Wireshark on Ubuntu 24.04
Step 1. Updating the Package Repository.
Before installing Wireshark, it is recommended to update your system packages to ensure that you have the latest versions of dependencies and security patches. Open a terminal window and run the following commands to update and upgrade your system packages:
sudo apt update
sudo apt upgrade
The apt update command refreshes the package list from the Ubuntu repositories, while apt upgrade installs the available updates for your installed packages. This process may take a few minutes, depending on the number of updates available.
Step 2. Installing Wireshark.
- Method 1: Using APT (Advanced Package Tool).
The simplest and most straightforward method to install Wireshark on Ubuntu 24.04 LTS is using the APT package manager. APT is the default package management system in Ubuntu, allowing you to easily install, update, and remove software packages. To install Wireshark using APT, follow these steps:
sudo apt install wireshark
Wait for the installation to complete. APT will download and install Wireshark along with its dependencies.
- Method 2: Using Personal Package Archive (PPA)
If you require a more recent version of Wireshark than the one available in the default Ubuntu repositories, you can use a Personal Package Archive (PPA). PPAs are third-party repositories that provide updated or additional software packages for Ubuntu. To install Wireshark using a PPA, follow these steps:
sudo add-apt-repository ppa:wireshark-dev/stable -y
Install Wireshark using the following command:
sudo apt update
sudo apt install wireshark
Using a PPA ensures that you have access to the latest stable version of Wireshark, which may include bug fixes, performance improvements, and new features.
After successfully installing Wireshark on Ubuntu 24.04 LTS, it is important to verify that the installation was completed correctly. You can check the installed version of Wireshark by running the following command in the terminal:
wireshark --version
This command will display the version number of Wireshark installed on your system, confirming that the installation was successful.
Step 3. Launching Wireshark.
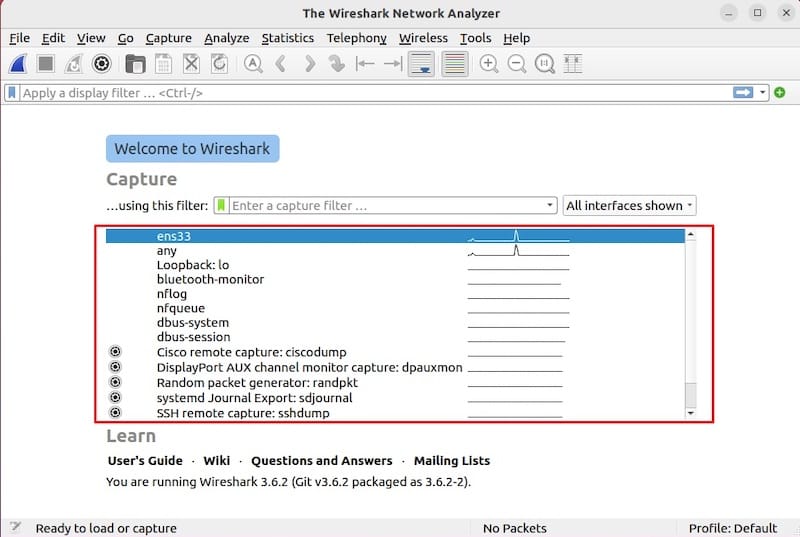
Wireshark can be launched either from the terminal or through the graphical user interface (GUI). To open Wireshark from the terminal, simply type wireshark and press Enter. This will start the Wireshark GUI, allowing you to begin capturing and analyzing network traffic.
Alternatively, you can launch Wireshark from the Ubuntu application menu. Click on the Ubuntu icon in the top-left corner of your screen, search for “Wireshark” in the search bar, and click on the Wireshark icon to launch the application.

Step 4. Troubleshooting Common Issues.
While installing Wireshark on Ubuntu 24.04 LTS is generally a straightforward process, you may encounter some common issues. Here are a few troubleshooting tips:
- Permission Errors: If you encounter permission errors while running Wireshark, make sure that your user account has been added to the
wiresharkgroup as described in the previous section. If the issue persists, try running Wireshark withsudoprivileges. - Missing Dependencies: If Wireshark fails to start due to missing dependencies, run
sudo apt install -fto automatically resolve and install any missing dependencies. - Outdated Version: If you are experiencing issues with an outdated version of Wireshark, consider updating to the latest stable version using the PPA method described earlier.
Congratulations! You have successfully installed Wireshark. Thanks for using this tutorial for installing the Wireshark network analysis on the Ubuntu 24.04 LTS system. For additional help or useful information, we recommend you check the official Wireshark website.