How To Install WordPress on CentOS Stream 10

In this tutorial, we will show you how to install WordPress on CentOS Stream 10. WordPress, the world’s most popular content management system, powers over 40% of all websites on the internet. For those looking to harness its power on a robust and reliable platform, installing WordPress with a LAMP stack (Linux, Apache, MySQL, PHP) on CentOS Stream 10 is an excellent choice. This comprehensive guide will walk you through the process of setting up WordPress with the latest PHP 8.4 on CentOS Stream 10, ensuring you have a cutting-edge, high-performance website.
CentOS Stream 10, the latest version of the community-driven enterprise operating system, provides a stable and secure environment for hosting WordPress. Coupled with PHP 8.4, which offers significant performance improvements and new features, your WordPress installation will be primed for optimal performance and security.
This guide is designed for system administrators, web developers, and enthusiasts who want to set up a professional-grade WordPress environment. We’ll cover everything from preparing your server to the final steps of WordPress configuration, ensuring you have a fully functional and optimized website.
Prerequisites
Before we dive into the installation process, let’s ensure you have everything needed to proceed smoothly:
- A server running CentOS Stream 10 with root access
- A domain name pointed to your server’s IP address
- Basic familiarity with Linux command line operations
- At least 2GB of RAM and 20GB of storage space
- A stable internet connection
Step 1: Update Your System
Always start with a fully updated system to ensure you have the latest security patches and software versions.
sudo dnf update -y
sudo dnf upgrade -y
After updating, it’s a good practice to reboot your system:
sudo reboot
Step 2: Install Apache Web Server
Apache is the ‘A’ in LAMP and will serve your WordPress pages to visitors.
sudo dnf install httpd -y
sudo systemctl start httpd
sudo systemctl enable httpd
Verify that Apache is running:
sudo systemctl status httpd
You should see “active (running)” in the output.
Step 3: Install MariaDB (MySQL)
MariaDB, a fork of MySQL, will store your WordPress database.
sudo dnf install mariadb-server mariadb -y
sudo systemctl start mariadb
sudo systemctl enable mariadb
Secure your MariaDB installation:
sudo mysql_secure_installation
Follow the prompts to set a root password and remove insecure default settings.
Step 4: Install PHP 8.4
PHP 8.4 is not available in the default repositories, so we’ll need to use a third-party repository.
First, install the EPEL and Remi repositories:
sudo dnf install epel-release -y
sudo dnf install https://rpms.remirepo.net/enterprise/remi-release-10.rpm -y
Now, enable the PHP 8.4 module:
sudo dnf module enable php:remi-8.4 -y
Install PHP and necessary extensions:
sudo dnf install php php-mysqlnd php-fpm php-json php-gd php-curl php-mbstring php-xml php-intl php-zip -y
Verify the PHP version:
php -v
You should see PHP 8.4.x in the output.
Step 5: Configure PHP-FPM
PHP-FPM (FastCGI Process Manager) improves performance for high-traffic websites.
Edit the PHP-FPM configuration:
sudo nano /etc/php-fpm.d/www.conf
Find and modify these lines:
user = apache
group = apache
listen = /var/run/php-fpm/php-fpm.sock
listen.owner = apache
listen.group = apache
listen.mode = 0660
Save and exit the file. Then start and enable PHP-FPM:
sudo systemctl start php-fpm
sudo systemctl enable php-fpm
Step 6: Create a WordPress Database
Log into MariaDB:
sudo mysql -u root -p
Create a database and user for WordPress:
CREATE DATABASE wordpress_db;
CREATE USER 'wordpress_user'@'localhost' IDENTIFIED BY 'strong_password';
GRANT ALL PRIVILEGES ON wordpress_db.* TO 'wordpress_user'@'localhost';
FLUSH PRIVILEGES;
EXIT;
Replace ‘strong_password‘ with a secure password of your choice.
Step 7: Download and Configure WordPress
Navigate to Apache’s document root:
cd /var/www/html
Download and extract WordPress:
sudo wget https://wordpress.org/latest.tar.gz
sudo tar -xzvf latest.tar.gz
sudo mv wordpress/* .
sudo rm -rf wordpress latest.tar.gz
Set proper permissions:
sudo chown -R apache:apache /var/www/html
sudo chmod -R 755 /var/www/html
Create the WordPress configuration file:
sudo cp wp-config-sample.php wp-config.php
Edit the configuration file:
sudo nano wp-config.php
Update the database information:
define('DB_NAME', 'wordpress_db');
define('DB_USER', 'wordpress_user');
define('DB_PASSWORD', 'strong_password');
define('DB_HOST', 'localhost');
Also, add these lines to improve security:
define('WP_MEMORY_LIMIT', '256M');
define('FS_METHOD', 'direct');
Step 8: Configure Apache for WordPress
Create a new Apache configuration file for WordPress:
sudo nano /etc/httpd/conf.d/wordpress.conf
Add the following content:
<VirtualHost *:80>
    ServerAdmin webmaster@your_domain.com
    DocumentRoot /var/www/html
    ServerName your_domain.com
    ServerAlias www.your_domain.com

<Directory /var/www/html>
        Options Indexes FollowSymLinks MultiViews
        AllowOverride All
        Require all granted
</Directory>

    ErrorLog /var/log/httpd/wordpress_error.log
    CustomLog /var/log/httpd/wordpress_access.log combined
</VirtualHost>
Replace ‘your_domain.com‘ with your actual domain name.
Step 9: Enable SSL with Let’s Encrypt
For enhanced security, let’s set up SSL using Let’s Encrypt:
sudo dnf install certbot python3-certbot-apache -y
sudo certbot --apache -d your_domain.com -d www.your_domain.com
Follow the prompts to complete the SSL setup.
Step 10: Optimize Apache and PHP for Performance
Edit Apache’s configuration:
sudo nano /etc/httpd/conf/httpd.conf
Add or modify these lines:
KeepAlive On
MaxKeepAliveRequests 50
KeepAliveTimeout 5
Now, optimize PHP:
sudo nano /etc/php.ini
Modify these values:
max_execution_time = 300
max_input_time = 300
memory_limit = 256M
post_max_size = 64M
upload_max_filesize = 64M
Step 11: Set Up WordPress through Web Interface
Restart Apache to apply all changes:
sudo systemctl restart httpd
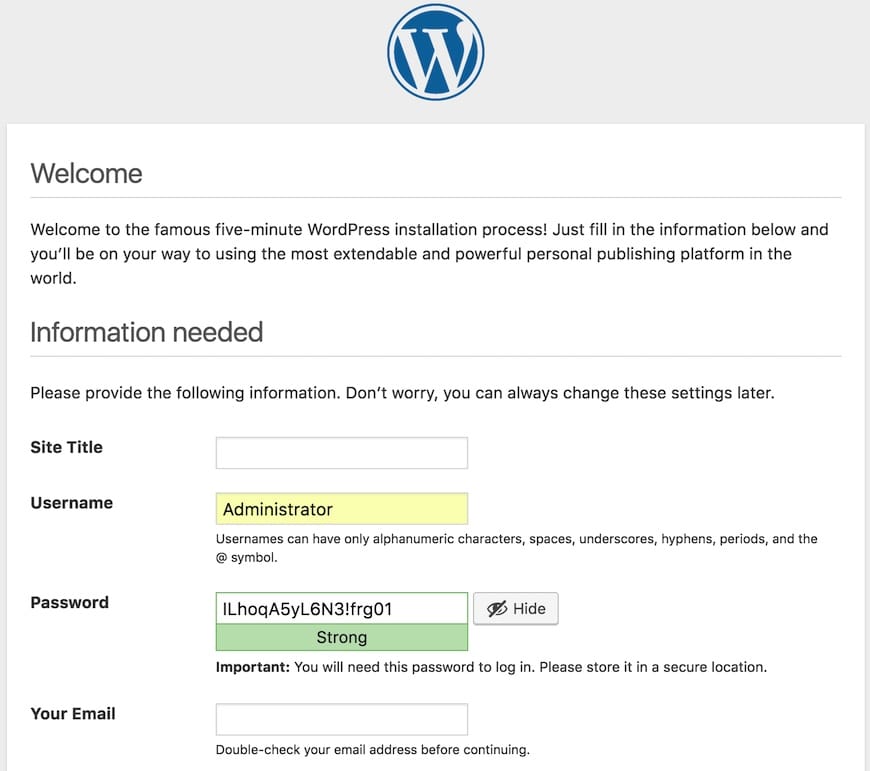
Now, open your web browser and navigate to your domain. You should see the WordPress installation page. Follow the on-screen instructions to complete the setup.

Congratulations! You have successfully installed WordPress. Thanks for using this tutorial to install the latest version of WordPress with LAMP stack on CentOS Stream 10. For additional help or useful information, we recommend you check the official WordPress website.