How To Install WordPress on Fedora 40

In this tutorial, we will show you how to install WordPress on Fedora 40. WordPress stands as the most popular content management system (CMS), powering over 40% of websites worldwide. For Linux enthusiasts and developers using Fedora 40, installing WordPress locally can be an excellent way to experiment with web design, test new ideas, or create a personal website.
This article assumes you have at least basic knowledge of Linux, know how to use the shell, and most importantly, you host your site on your own VPS. The installation is quite simple and assumes you are running in the root account, if not you may need to add ‘sudo‘ to the commands to get root privileges. I will show you the step-by-step installation of WordPress on Fedora 40.
Prerequisites
Before we dive into the installation process, ensure that you have the following prerequisites in place:
- A server running one of the following operating systems: Fedora 40.
- It’s recommended that you use a fresh OS install to prevent any potential issues.
- You will need access to the terminal to execute commands. Fedora provides the Terminal application for this purpose. It can be found in your Applications menu.
- A stable internet connection to download the necessary packages.
- At least 2GB of RAM and 20GB of free disk space.
- A non-root sudo user or access to the root user. We recommend acting as a non-root sudo user, however, as you can harm your system if you’re not careful when acting as the root.
Install WordPress on Fedora 40
Step 1. Update Your System.
Begin by updating your Fedora 40 system to ensure you have the latest packages and security updates. Open a terminal and run:
sudo dnf clean all
sudo dnf update
This command refreshes the package lists and upgrades all installed packages to their latest versions. It’s crucial to start with an up-to-date system to avoid potential compatibility issues during the WordPress installation process.
Step 2. Installing Apache Web Server.
WordPress requires a web server to function. Apache is a popular and reliable choice for hosting WordPress sites. Install Apache by running:
sudo dnf install httpd
Once installed, start the Apache service and enable it to run at boot:
sudo systemctl start httpd
sudo systemctl enable httpd
To verify that Apache is running correctly, open a web browser and navigate to http://localhost. You should see the default Apache test page.
Step 3. Installing MariaDB Database Server.
WordPress uses a database to store content and settings. MariaDB, a fork of MySQL, is the recommended database server for Fedora. Install MariaDB with the following command:
sudo dnf install mariadb-server
After installation, start the MariaDB service and enable it to run at boot:
sudo systemctl start mariadb
sudo systemctl enable mariadb
Secure your MariaDB installation by running the security script:
sudo mysql_secure_installation
Follow the prompts to set a root password, remove anonymous users, disallow root login remotely, and remove the test database.
Step 4. Installing PHP and Required Extensions.
PHP is the scripting language used by WordPress. Install PHP and the necessary extensions by running:
sudo dnf install php php-mysqlnd php-fpm php-gd php-xml php-mbstring php-json php-pecl-zip
After installation, restart Apache to load the PHP module:
sudo systemctl restart httpd
Step 5. Create a WordPress Database.
Log in to MariaDB as the root user:
sudo mysql -u root -p
Create a new database and user for WordPress:
CREATE DATABASE wordpress;
CREATE USER 'wordpressuser'@'localhost' IDENTIFIED BY 'your_password';
GRANT ALL PRIVILEGES ON wordpress.* TO 'wordpressuser'@'localhost';
FLUSH PRIVILEGES;
EXIT;
Replace ‘your_password‘ with a strong, unique password for your WordPress database user.
Step 6. Download and Configure WordPress.
Download the latest version of WordPress:
cd /var/www/html
sudo wget https://wordpress.org/latest.tar.gz
sudo tar -xzvf latest.tar.gz
sudo mv wordpress/* .
sudo rm -rf wordpress latest.tar.gz
Set the correct permissions:
sudo chown -R apache:apache /var/www/html
sudo chmod -R 755 /var/www/html
Create the WordPress configuration file:
sudo cp wp-config-sample.php wp-config.php
sudo nano wp-config.php
Update the database settings in wp-config.php:
define('DB_NAME', 'wordpress');
define('DB_USER', 'wordpressuser');
define('DB_PASSWORD', 'your_password');
define('DB_HOST', 'localhost');
Step 7. Configure Apache for WordPress.
Create a new Apache configuration file for WordPress:
sudo nano /etc/httpd/conf.d/wordpress.conf
Add the following content:
<VirtualHost *:80>
ServerAdmin webmaster@localhost
DocumentRoot /var/www/html
ServerName your_domain.com
ServerAlias www.your_domain.com

<Directory /var/www/html>
Options FollowSymLinks
AllowOverride All
Require all granted
</Directory>

ErrorLog /var/log/httpd/wordpress_error.log
CustomLog /var/log/httpd/wordpress_access.log combined
</VirtualHost>
Replace your_domain.com with your actual domain name or use localhost for local development.
Restart Apache to apply the changes:
sudo systemctl restart httpd
Step 8. Complete WordPress Installation.
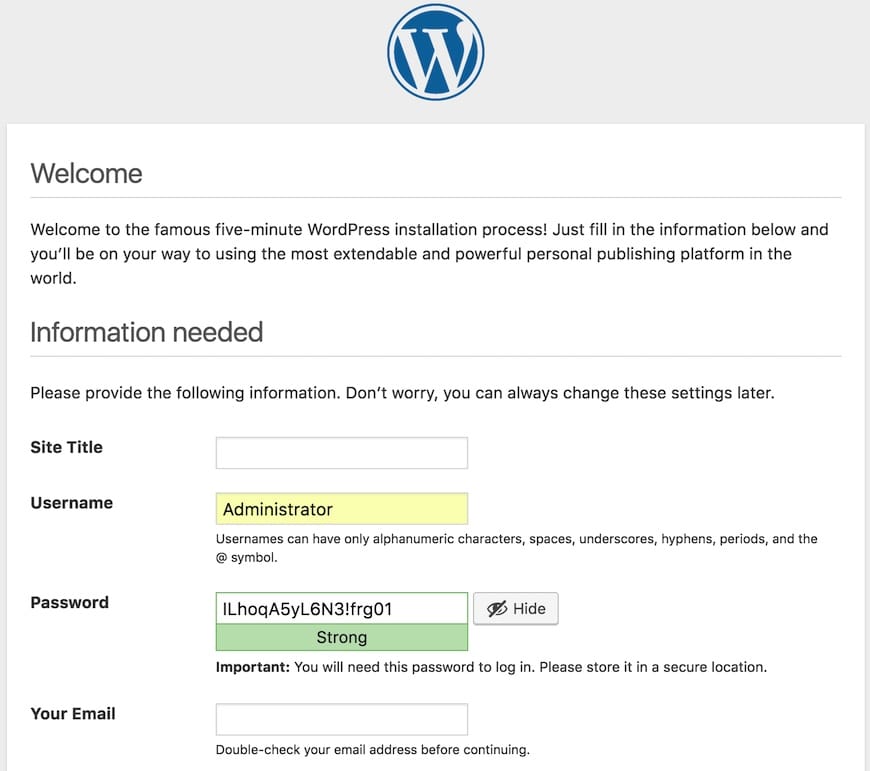
Open a web browser and navigate to http://your_domain.com or http://localhost. You should see the WordPress installation page. Follow the on-screen instructions to complete the setup, including creating an admin account and setting your site title.

Step 9. Security Considerations
After installing WordPress, consider implementing these security measures:
- Enable SELinux for enhanced system security:
sudo setsebool -P httpd_can_network_connect_db 1
sudo setsebool -P httpd_unified 1
- Configure the Fedora firewall to allow HTTP and HTTPS traffic:
sudo firewall-cmd --permanent --add-service=http
sudo firewall-cmd --permanent --add-service=https
sudo firewall-cmd --reload
- Install and configure a WordPress security plugin like Wordfence or Sucuri Security.
- Regularly update WordPress core, themes, and plugins.
- Use strong, unique passwords for all user accounts.
- Implement SSL/TLS encryption by installing an SSL certificate.
Congratulations! You have successfully installed WordPress. Thanks for using this tutorial for installing WordPress on your Fedora 40 system. For additional or useful information, we recommend you check the official WordPress website.