How To Install WordPress with Docker Compose

In this tutorial, we will show you how to install WordPress with Docker Compose on Ubuntu. For those of you who didn’t know, WordPress is a popular open-source content management system (CMS) that is used to create and manage websites. One of the ways to install WordPress is by using Docker Compose, which is a tool for defining and running multi-container Docker applications.
This article assumes you have at least basic knowledge of Linux, know how to use the shell, and most importantly, you host your site on your own VPS. The installation is quite simple and assumes you are running in the root account, if not you may need to add ‘sudo‘ to the commands to get root privileges. I will show you the step-by-step installation of WordPress with Docker Compose. You can follow the same instructions for Ubuntu 22.04 and any other Debian-based distribution like Linux Mint, Elementary OS, Pop!_OS, and more as well.
Prerequisites
- A server running one of the following operating systems: Ubuntu 22.04, 20.04, and any other Debian-based distribution like Linux Mint.
- It’s recommended that you use a fresh OS install to prevent any potential issues.
- SSH access to the server (or just open Terminal if you’re on a desktop).
- An active internet connection. You’ll need an internet connection to download the necessary packages and dependencies for Docker.
- A
non-root sudo useror access to theroot user. We recommend acting as anon-root sudo user, however, as you can harm your system if you’re not careful when acting as the root.
Install WordPress with Docker Compose
Step 1. First, make sure that all your system packages are up-to-date by running the following apt commands in the terminal.
sudo apt update
sudo apt upgrade
Step 2. Installing Docker.
By default, Docker is not available on Ubuntu 22.04 base repository. Now run the following command below to add the Docker repository to the system:
echo "deb [arch=$(dpkg --print-architecture) signed-by=/usr/share/keyrings/docker-archive-keyring.gpg] https://download.docker.com/linux/ubuntu $(lsb_release -cs) stable" | sudo tee /etc/apt/sources.list.d/docker.list
Next, import the GPG key to your system:
curl -fsSL https://download.docker.com/linux/ubuntu/gpg | sudo gpg --dearmor -o /usr/share/keyrings/docker-archive-keyring.gpg
After the repository is enabled, now install the latest version of the Docker package using the below command:
sudo apt update
sudo apt install docker-ce docker-ce-cli containerd.io docker-compose-plugin
You can verify that Docker is installed and about the current version:
docker -v
After successfully installed, enable Docker (to start automatically upon system boot), start, and verify the status using the commands below:
sudo systemctl enable docker
sudo systemctl start docker
sudo systemctl status docker
By default, Docker requires root privileges. If you want to avoid using sudo every time you run the docker command, add your username to the docker group:
sudo usermod -aG docker $(whoami)
su - ${USER}
Confirm that your user is added to the Docker group:
groups
For additional resources on installing and managing Docker, read the post below:
Step 3. Create Docker Compose File for WordPress.
First, create a directory for WordPress configuration:
mkdir wordpress
cd wordpress
Next, create and open the Docker compose file using your favorite text editor:
nano docker-compose.yml
Add the following file:
version: '3.9'

services:
  wp:
    image: wordpress:latest
    container_name: wordpress-app
    restart: unless-stopped
    expose:
      - 8080
    volumes:
      - ./config/php.conf.ini:/usr/local/etc/php/conf.d/conf.ini
      - ./wp-app:/var/www/html
      #- ./plugin-name/trunk/:/var/www/html/wp-content/plugins/plugin-name # Plugin development
      #- ./theme-name/trunk/:/var/www/html/wp-content/themes/theme-name # Theme development
    environment:
      WORDPRESS_DB_HOST: db
      WORDPRESS_DB_NAME: "${DB_NAME}"
      WORDPRESS_DB_USER: "${DB_USER_NAME}"
      WORDPRESS_DB_PASSWORD: "${DB_USER_PASSWORD}"
      VIRTUAL_HOST: your-domain.com
      LETSENCRYPT_HOST: your-domain.com
    depends_on:
      - db
    links:
      - db

  wpcli:
    image: wordpress:cli
    container_name: wpcli_app
    volumes:
      - ./config/php.conf.ini:/usr/local/etc/php/conf.d/conf.ini
      - ./wp-app:/var/www/html
    environment:
      WORDPRESS_DB_HOST: db
      WORDPRESS_DB_NAME: "${DB_NAME}"
      WORDPRESS_DB_USER: "${DB_USER_NAME}"
      WORDPRESS_DB_PASSWORD: "${DB_USER_PASSWORD}"
    depends_on:
      - db
      - wp

  pma:
    image: phpmyadmin/phpmyadmin
    container_name: pma
    restart: unless-stopped
    environment:
      # https://docs.phpmyadmin.net/en/latest/setup.html#docker-environment-variables
      PMA_HOST: db
      PMA_PORT: 3306
      MYSQL_ROOT_PASSWORD: "${DB_ROOT_PASSWORD}"
      UPLOAD_LIMIT: 50M
      VIRTUAL_HOST: phpmyadmin.your-domain.com
      LETSENCRYPT_HOST: phpmyadmin.your-domain.com
    expose:
      - 8081
    links:
      - db:db

  db:
    image: mysql:latest
    container_name: wordpressdb
    restart: unless-stopped
    command: [
        '--default_authentication_plugin=mysql_native_password',
        '--character-set-server=utf8mb4',
        '--collation-server=utf8mb4_unicode_ci'
    ]
    volumes:
      - ./wp-data:/docker-entrypoint-initdb.d
      - db_data:/var/lib/mysql
    environment:
      MYSQL_DATABASE: "${DB_NAME}"
      MYSQL_ROOT_PASSWORD: "${DB_ROOT_PASSWORD}"
      MYSQL_USER: "${DB_USER_NAME}"
      MYSQL_PASSWORD: "${DB_USER_PASSWORD}"

volumes:
  db_data:
Save and close the file, then make the environment file for the variables used in the compose file:
sudo nano .env
Add the following file:
DB_NAME=wordpress
DB_USER_NAME=username
DB_USER_PASSWORD=userpassword
DB_ROOT_PASSWORD=your-strong-password
Save and close the file, then create a folder for PHP configuration:
mkdir config
Now we create and open the php.conf.ini file for editing:
nano config/php.conf.ini
Add the following file:
file_uploads = On
memory_limit = 512M
upload_max_filesize = 30M
post_max_size = 30M
max_execution_time = 400
Step 4. Configure Docker Compose for Nginx.
First, we create the directory for the Nginx configuration:
mkdir nginx
Next, create a directory for Virtual hosts inside that directory:
mkdir nginx/vhost
After that, create and open them nginx/vhost/wordpress.your-domain.com for editing.
nano nginx/vhost/wordpress.your-domain.com
Paste the following file:
server_tokens off;
client_max_body_size 30m;
Save and close the file.
Do the same for nginx/vhost/phpmyadmin.example.com file.
nano nginx/vhost/phpmyadmin.your-domain.com
Add the following code:
server_tokens off;
client_max_body_size 50m;
Save and close the file, then open the docker-compose file again:
nano docker-compose.yml
Paste the following code before the volumes: db_data: line.
nginx:
    container_name: nginx
    image: nginxproxy/nginx-proxy
    restart: unless-stopped
    ports:
        - 80:80
        - 443:443
    volumes:
        - /var/run/docker.sock:/tmp/docker.sock:ro
        - ./nginx/html:/usr/share/nginx/html
        - ./nginx/certs:/etc/nginx/certs
        - ./nginx/vhost:/etc/nginx/vhost.d
    logging:
        options:
            max-size: "10m"
            max-file: "3"
Step 5. Configure Docker Compose for SSL.
Now we open a docker-compose file using the following command:
nano docker-compose.yml
Add the following code before the volumes: db_data: line:
acme-companion:
    container_name: acme-companion
    image: nginxproxy/acme-companion
    restart: unless-stopped
    volumes_from:
        - nginx
    volumes:
        - /var/run/docker.sock:/var/run/docker.sock
        - ./nginx/acme:/etc/acme.sh
    environment:
        DEFAULT_EMAIL: admin@your-domain.com
Step 7. Configure Firewall.
Now we set up an Uncomplicated Firewall (UFW) with WordPress to allow public access on default web ports 80:
sudo ufw allow OpenSSH
sudo ufw allow 'Nginx Full'
sudo ufw enable
Step 8. Installing WordPress.
After all our configuration files are complete, it is time to start and launch the containers:
docker compose up -d
Output:
$ docker ps
CONTAINER ID   IMAGE                       COMMAND                  CREATED          STATUS          PORTS                                                                      NAMES
r1e8agdt169d   nginxproxy/acme-companion   "/bin/bash /app/entr…"   12 seconds ago   Up 8 seconds                                                                               acme-companion
9m3ilk8ff790   wordpress:latest            "docker-entrypoint.s…"   12 seconds ago   Up 8 seconds    80/tcp, 8080/tcp                                                           wordpress-app
1f9c777g9dta   phpmyadmin/phpmyadmin       "/docker-entrypoint.…"   12 seconds ago   Up 8 seconds    80/tcp, 8081/tcp                                                           pma
1bmwil07an42   nginxproxy/nginx-proxy      "/app/docker-entrypo…"   12 seconds ago   Up 10 seconds   0.0.0.0:80->80/tcp, :::80->80/tcp, 0.0.0.0:443->443/tcp, :::443->443/tcp   nginx
t0dh64a2f4a3   mysql:latest                "docker-entrypoint.s…"   12 seconds ago   Up 10 seconds   3306/tcp, 33060/tcp                                                        wordpressdb
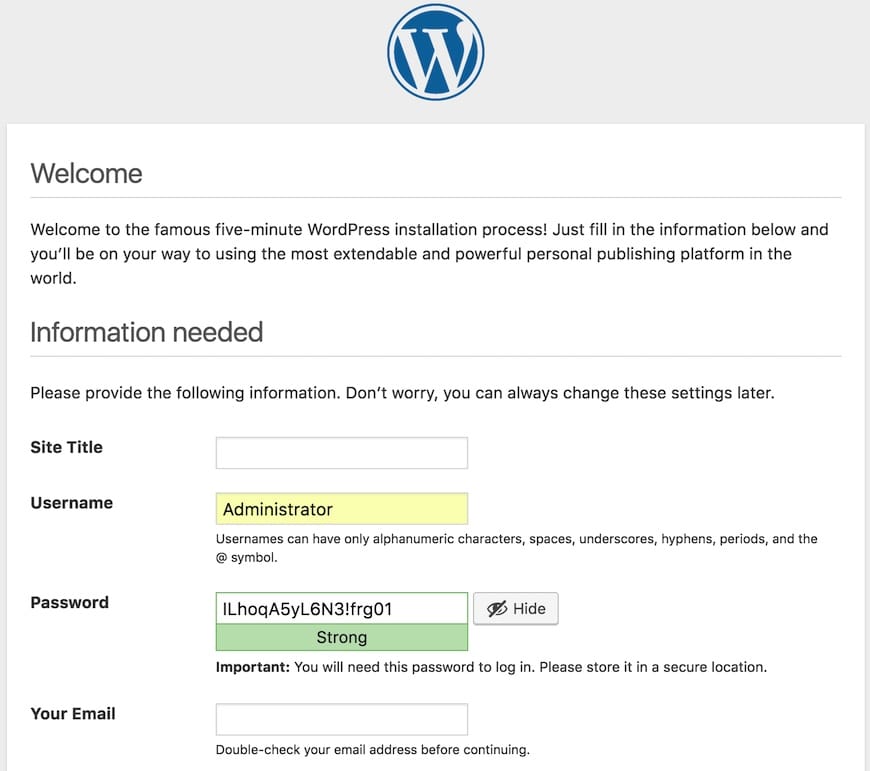
Now open your web browser and access the WordPress Web UI using the URL https://your-domain.com. You will be redirected to the following page:

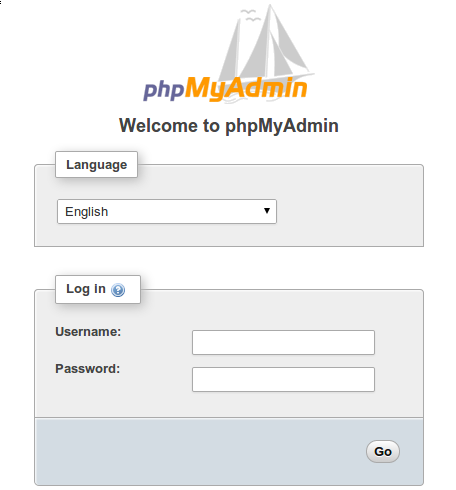
In addition, you can access phpMyAdmin via the URL https://phpmyadmin.your-domain.com.

Congratulations! You have successfully installed WordPress. Thanks for using this tutorial for installing WordPress with Docker Compose on the Ubuntu system. For additional help or useful information, we recommend you check the official Docker website.